Adding images to a page
Overview
(For adding product images, please see the following documentation: StoreFront Image Size Guide)
There are two (2) main steps for adding images to a page in your storefront. In this document, we'll be adding the image "bunny" to the Storefront's Contact page. remember it's just an example. The two steps are:
1) Upload the desired image from your platform to the StoreFront File Manager, and
2) Place the image on the desired page
STEP 1: Upload the image.
Access your Storefront and navigate to the file manager tab. From there click on the "contact" folder as shown below.
In the next screen, mouse over and click the "File Upload" icon as shown below.
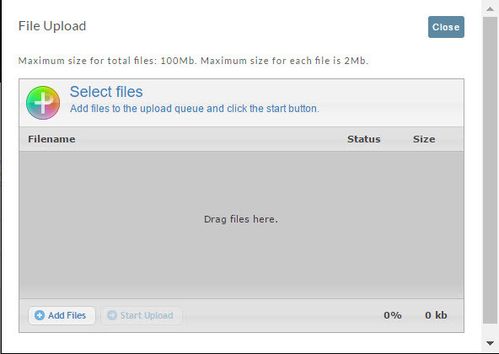
The File Upload screen will appear.
Using either of two following methods, locate your image file:
- Browse your system to locate the file; then drag and drop onto the grey, "Drag files here" area, or
- Click the "Add Files" button to navigate your system and locate the file.
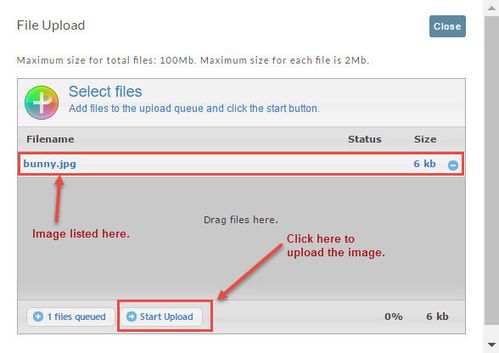
The File upload screen will now show your file below.
Click the Start Upload button once you have your image is listed.
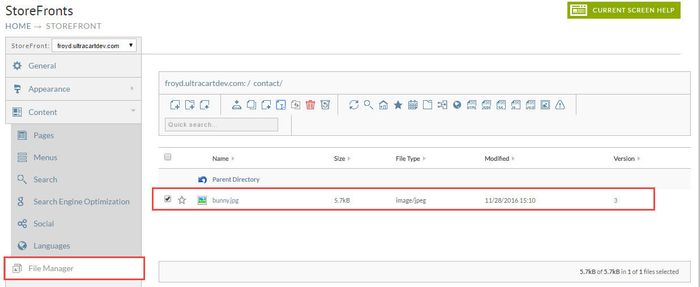
After uploading the file it appears in the file manager like this:
STEP 2: Placing the image onto the desired page - recall we are uploading a cute, little Bunny to our "Contacts" page.
Now that the image is uploaded into the File Manager > Contacts page we'll now add the image to the Storefront page.
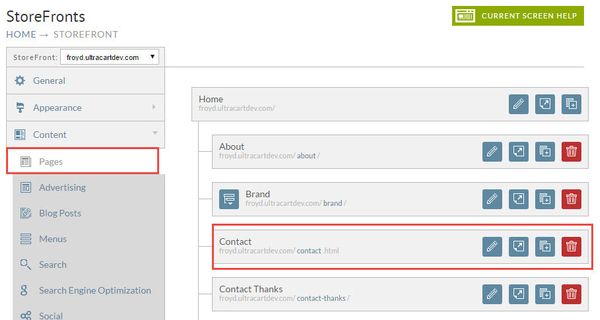
Navigate to StoreFronts > Pages (tab) and locate the "Contact" page.
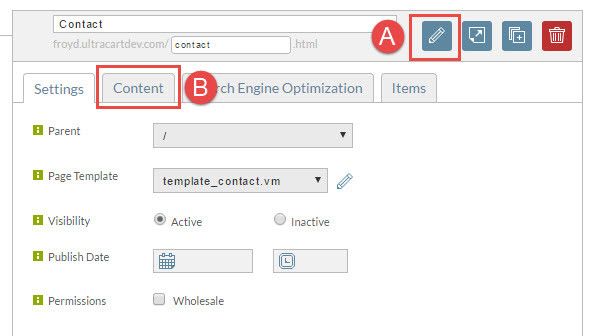
A. Click the 'pencil" icon to the right of the page.
B. Click the "Content" tab.
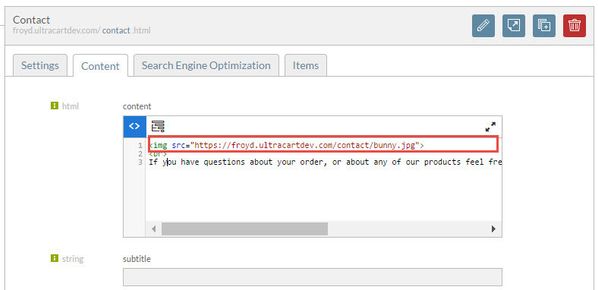
Insert the image onto this page by inserting the appropriate "img" tag as shown below.
Note: The URL is case sensitive. Make certain that the name of the image in the code matches the image file name.
After updating the content to include the image tag for the image, click the save and preview button to view the changes.
The following is an example of how our bunny image appears at the StoreFront Contact page.
Hop to it!
