A brief tour of the StoreFront File Manager
- Perry Tew
- John Anderson (Unlicensed)
- Jonathan Tew
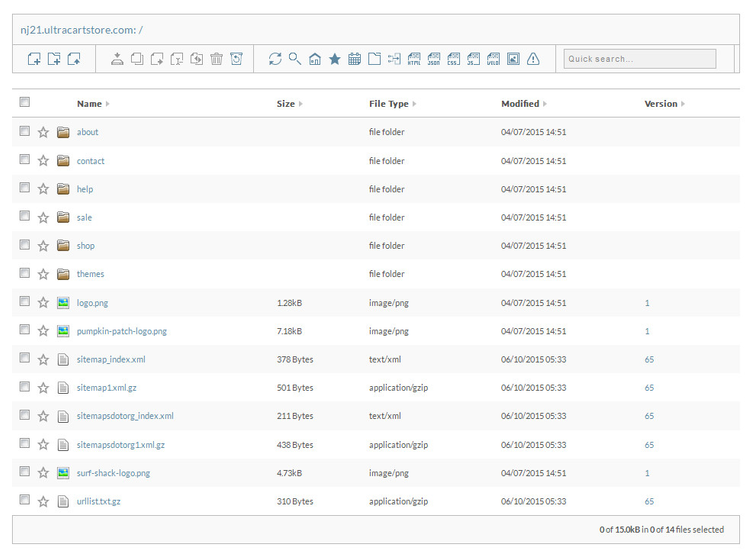
This document is a brief tour of the StoreFront file manager. Below is a screen shot of the entire file manager that we're going to break down into the various sections.
The first major section is the toolbar across the top. The toolbar is divided into 5 parts:
- Current location
- New file/directory operations
- Selected file operations
- Search/Filters
- Quick Search
The Current location tells you the current StoreFront and folder that you are looking at. In this example that is:

The first group of icons are: new file, new directory and upload file.

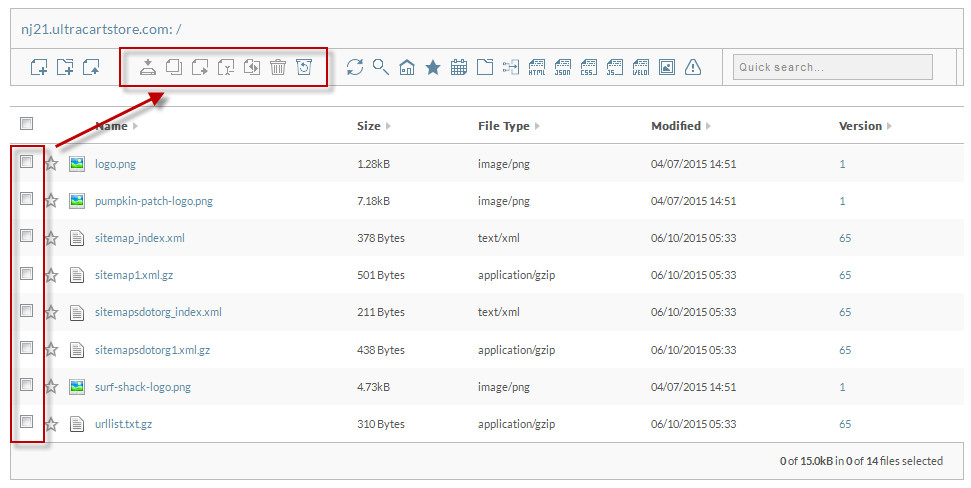
Moving along the toolbar to the right are icons for; clone, move, rename, diff delete, and a recycle bin. All of the icons will be greyed out until you select (checkbox) one or more files as shown below.
The next group of icons provide control for the type of files that you are viewing. These are basically quick searches that make it faster to find certain file types. If you hover over each icon a tooltip will tell you more about it's function before selecting.

The final section of the toolbar is the quick search text box. This allows you to enter a file name to quickly locate regardless of which directory it is in.

Immediately below the toolbar is the file list (shown below).

Clicking on the star will mark a file as a favorite. You can find your favorite files with the favorites search located in the toolbar.
Clicking on the name of a file will; bring up the editor (for text files), preview images in a lightbox, or download binary files. By clicking the version number, a version history dialog will appear providing a comprehensive record of how the file has changed over time.
For more information on the Version column and version history check out the tutorial See changes made to file using file manager version history