Adding custom content to the checkout such as trust logos or testimonials
Overview
This document will summarize the process of adding custom content to your checkout screens. There are templates for the various checkout screens which define the layout of the pages.
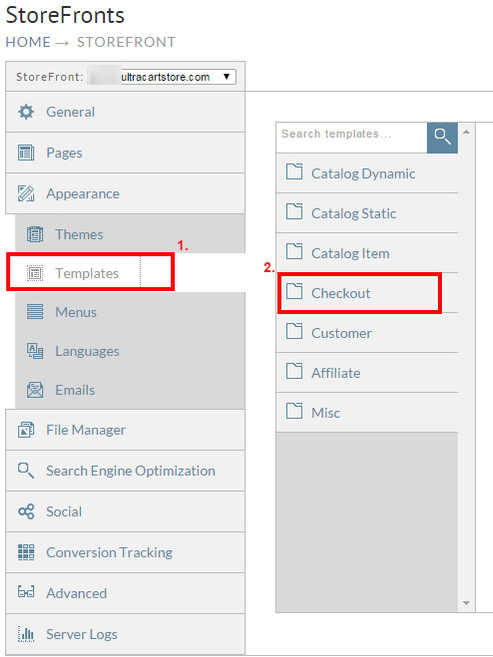
Step 1 - Accessing the storefront checkout templates
Step 2 - Edit Template
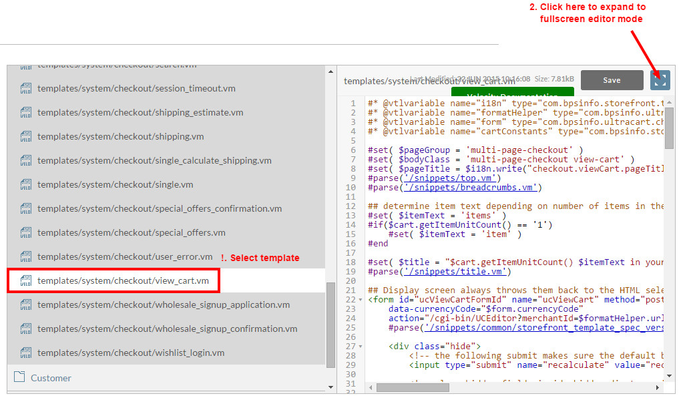
Next select the template to which you wish to add the custom content (then click on the blue button in top right side above the template editor to change to fullscreen mode, for easier editing.
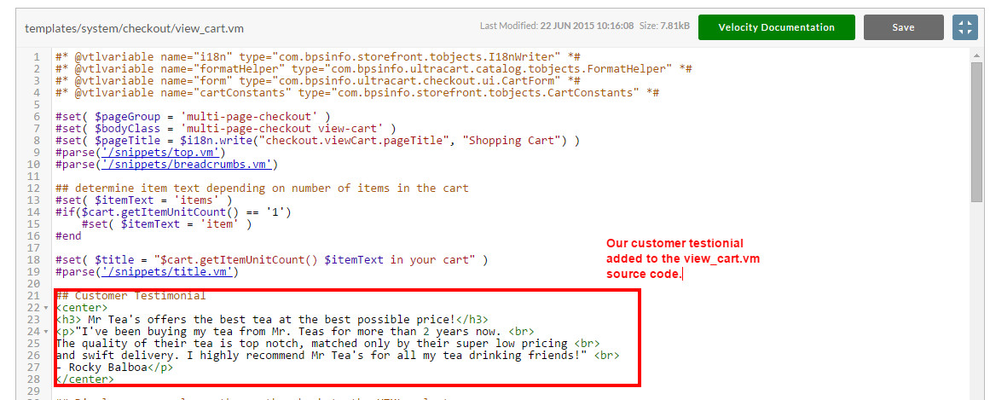
Step 3 - Add the custom source code to the template
When editing the template you will edit the template using velocity and/or HTML code. In our example we are adding basic HTML tags to display the customer testimonial:
## Customer Testimonial
<center>
<h3> Mr Tea's offers the best tea at the best possible price!</h3>
<p>"I've been buying my tea from Mr. Teas for more than 2 years now. <br>
The quality of their tea is top notch, matched only by their super low pricing <br>
and swift delivery. I highly recommend Mr Tea's for all my tea drinking friends!" <br>
- Rocky Balboa</p>
</center>
View in the template editor:
Upon saving you will see a dialog window stating:

You'll want to select okay to save the changes.
Template update Merge Conflicts
Step 4 - Viewing the changes to the template
After saving the changes, navigate to the storefront and add an item to the cart to view the updated view_cart.vm:
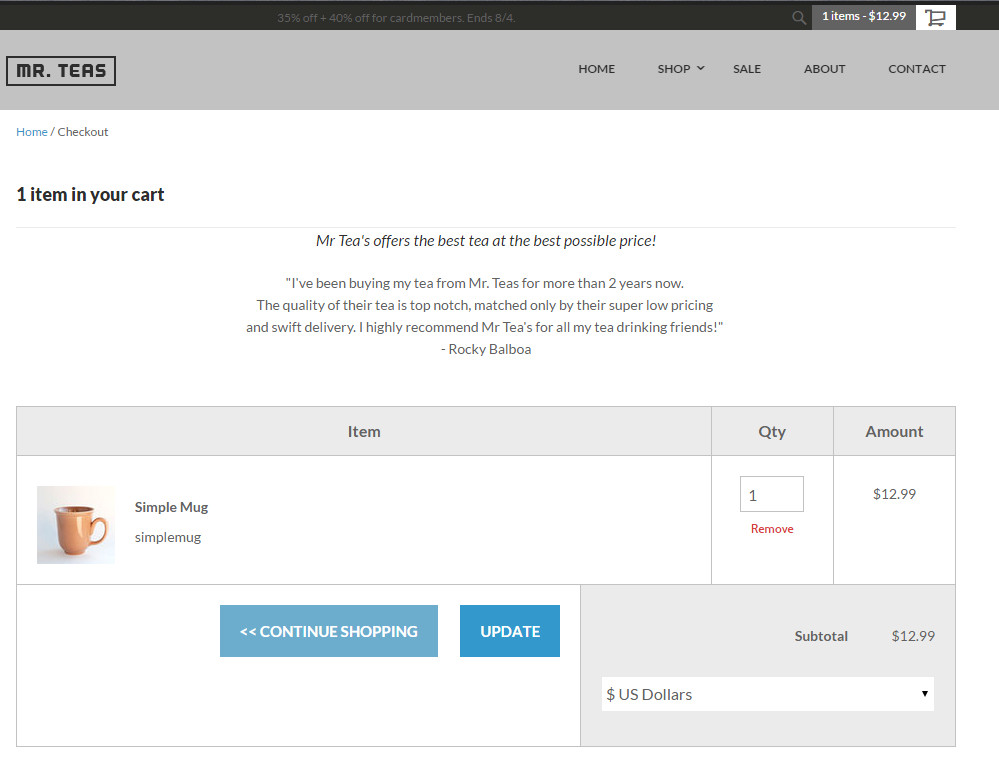
Congratulations, you've successfully added custom content to the checkout templates!