Configuring an Import Map
- Perry Tew
The UPS WorldShip software is very selective about the settings used to perform an import. A lot of screen shots are used in this section of the manual to make sure that the setup of an import map goes as smooth as possible. First, start the UPS WorldShip software and select the Connection Assistant from the UPS OnLine Connect menu.
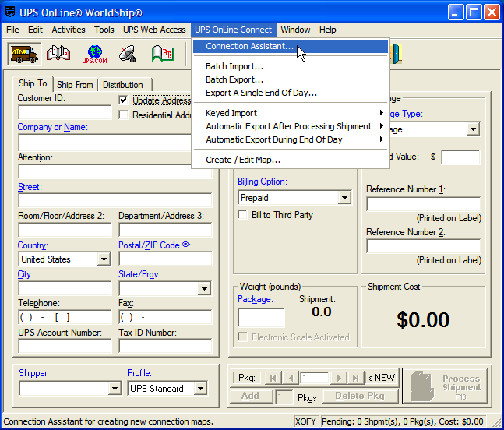
Figure 340 - Opening the Connection Assistant
Select "Create a new map for Import" and then click the Next button.
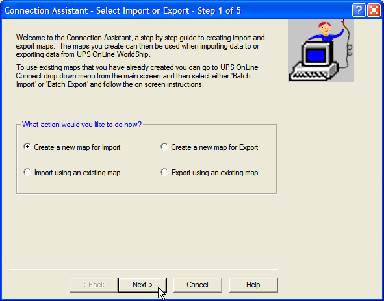
Figure 341 - Creating a new map
Select the "Shipment" import data type from the list of available and click Next.
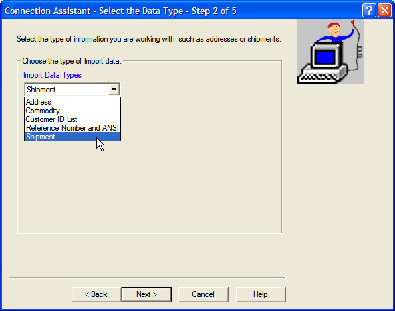
Figure 342 - Selecting the Import Type
On the next screen, select the "By File" Data Source and then click the "Browse" button shown in the figure below.
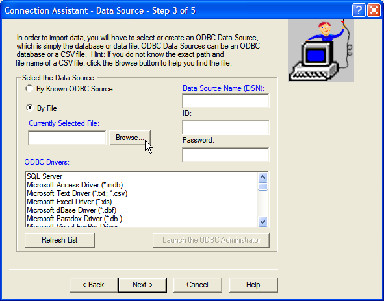
Figure 343 - Selecting Data Source Type
Browse to the directory that the import files will be saved in. For this example, the directory is c:\upsimport. Change the "Files of type" option to "Text Files (*.txt; *.csv)". Click on the import.csv (saved from an UltraCart UPS WorldShip Export) and then click the "Open" button.
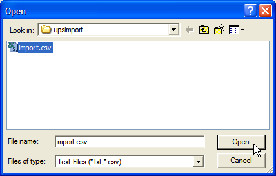
Figure 344 - Browsing for import file
Enter "UltraCartImport" in the Data Source Name (DSN) field. Select "Microsoft Text Driver (*.txt; *.csv)" from the list of ODBC drivers and click Next as shown in the figure below.
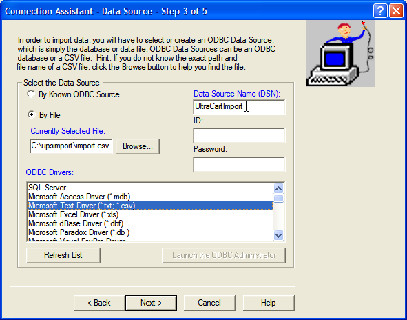
Figure 345 - Naming the Data Source and Selecting ODBC Driver
Next, select "New Map", name your map "UltraCartImport", and click the Next button as shown below.
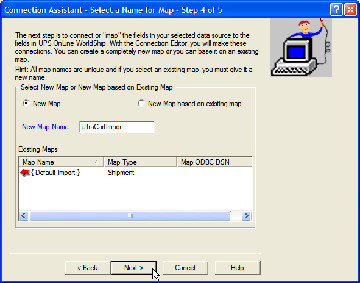
Figure 346 - Naming the Import Map
The next screen provides instructions for the remainder of the mapping configuration. Click the "Finish" button to procedure to the next part of the configuration.
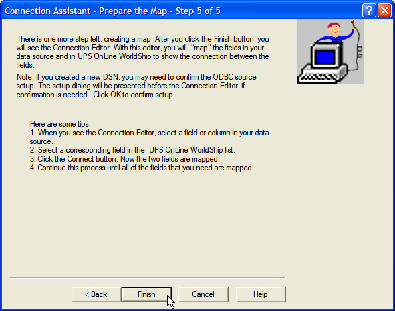
Figure 347 - Instructions on preparing the Import Map
The next window that will appear on your screen is the ODBC Text Setup dialog. Just click the "OK" button.
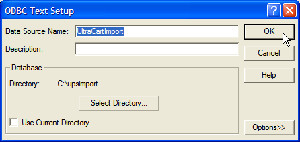
Figure 348 - ODBC Text Setup
The next screen is where all the mapping between the text file and the UPS import format occurs. The first step is to designate "import.csv" as the "Primary Table". Simply click the "Primary Table" button as shown below.

Figure 349 - Specifying the Primary Table
Next, select "Ship To" from the drop down box under WorldShip Fields as shown in the figure below.
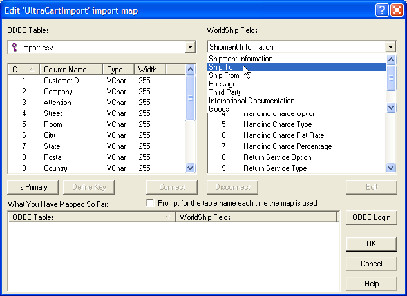
Figure 350 - Selecting Ship To from the WorldShip Fields
The next step is to connect fields on the left handle column to fields on the right hand column. Click on the field name on the left hand side and matching entry on the right hand side then click the "Connect" button. A little red chain link will appear beside each column name and an entry will be added to the "What You Have Mapped So Far". After mapping most of the Ship To fields the screen should look like the figure below.
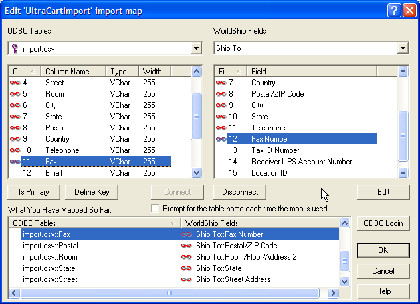
Figure 351 - Mapping Ship To Fields
There are two other sections that must be mapped between the import file and UPS. Click on the "Package" from the WorldShip Fields drop down as shown in the figure below.
Figure 352 - Selecting Package Mapping
Map the "PackageType" and "Weight" columns as shown in the figure below.
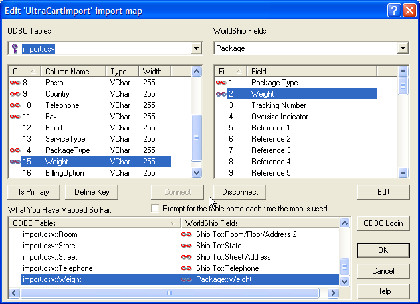
Figure 353 - Mapping Package Fields
Finally, select "Shipping Information" from the drop down list and map "ServiceType" and "BillingOption" as shown in the figure below.
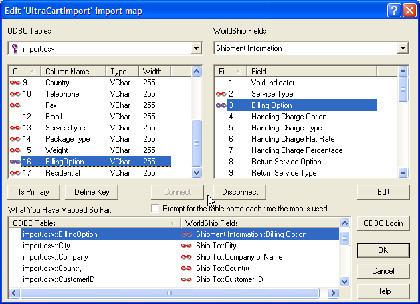
Figure 354 - Mapping Shipment Information
The final step in completely the map is defining the key for the import table. Since each Order's ID is unique in UltraCart, this serves as the CustomerID field and the key for the table. To define the key, select "CustomerID" from the left hand list and click the "Define Key" button shown in the figure below. After defining the key, click the OK button to finalize the map.
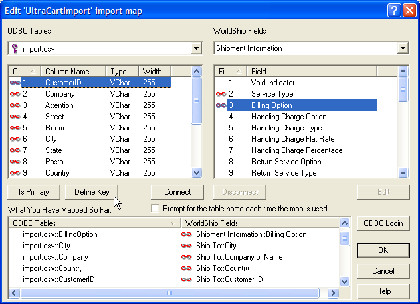
Figure 355 - Defining Key