Item Options
- Chris Torigian
- Hunter Schaeffer
Introduction
Options / Variations - There is a good explanation on the differences between Options and Variations here.
Navigation
Home → Item Management → Items → Click on the Item ID you would like to edit
Item Options allow customers to select criteria for an item when that item has several choices (options). For instance, a merchant might offer a t-shirt that comes in three different sizes. "T-Shirt Size" would be the item option in this example. You are theoretically defining different store items (by size, color, etc.) under one Item ID (SKU).
Although the Item Options feature is easy to set up and reduces the number of actual store items, merchants with many items should give some serious thought before considering this feature. Having the same SKU (Item ID) may cause difficulty in the following areas:
- The inventory system will not track the Item Options.
- Fulfillment centers have a difficult time with "pick and pack" without separate SKUs.
- Importing orders into accounting systems can also be difficult
- Options will not work with Kits
The following illustrates where the Item (drop down value) Option will appear on the checkout screen. 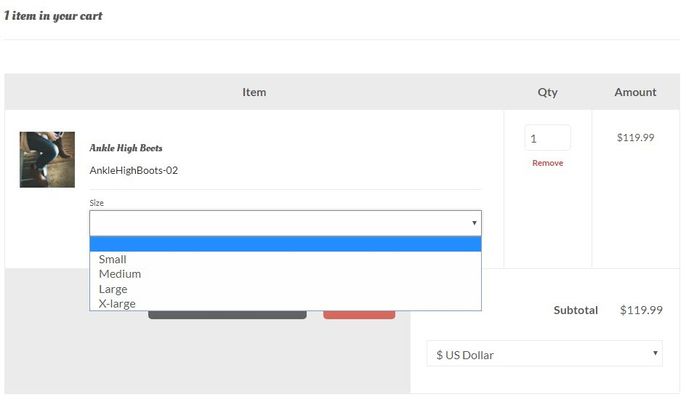
Add Option
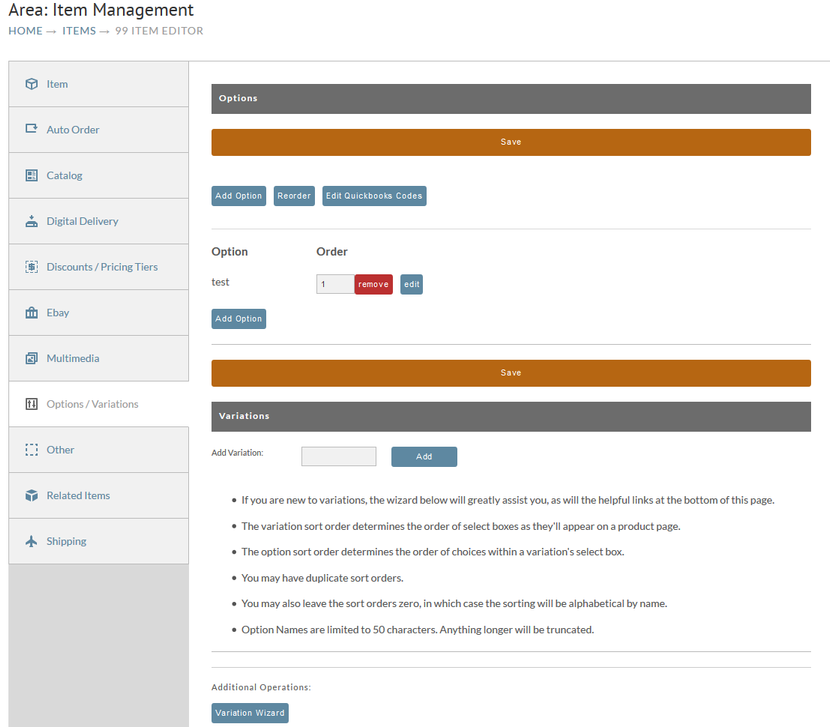
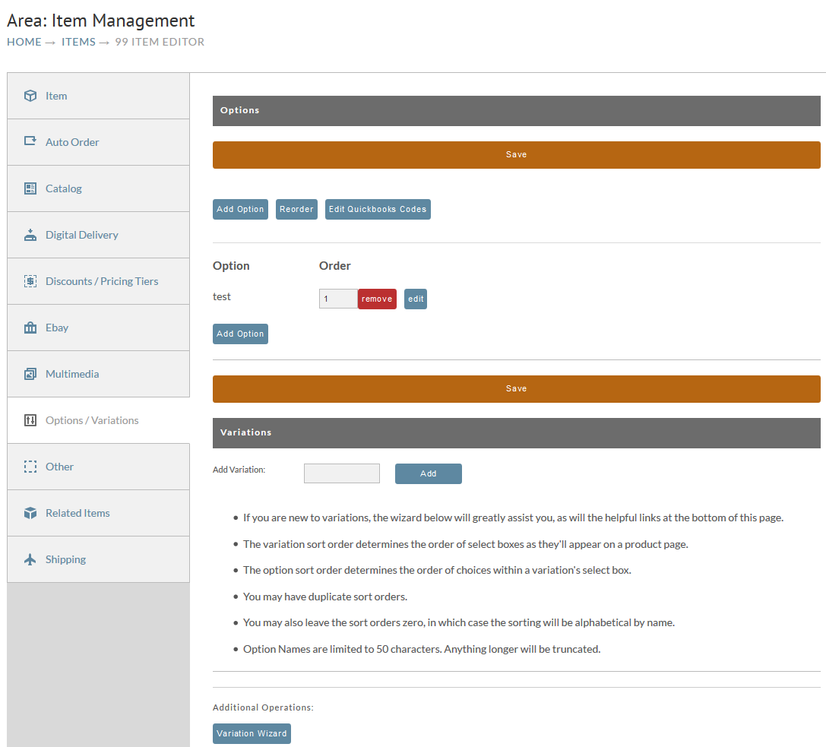
Navigate to the Item Editor screen, click on the "Options/Variations" tab. The following screen will display a "No options are defined…" message until options are added. To add your first option, click on the "Add Option" button.
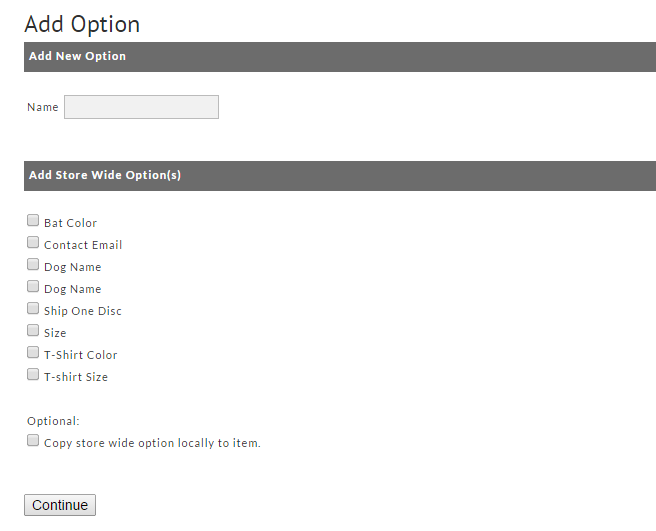
At the Add Option screen you set a name for the option. In our example the merchant would specify "T-Shirt Size" in the "Create a New Option for just this item" field. Then click on the "Continue" button. The field "Add Store Wide Option(s)" will be discussed later in this chapter.
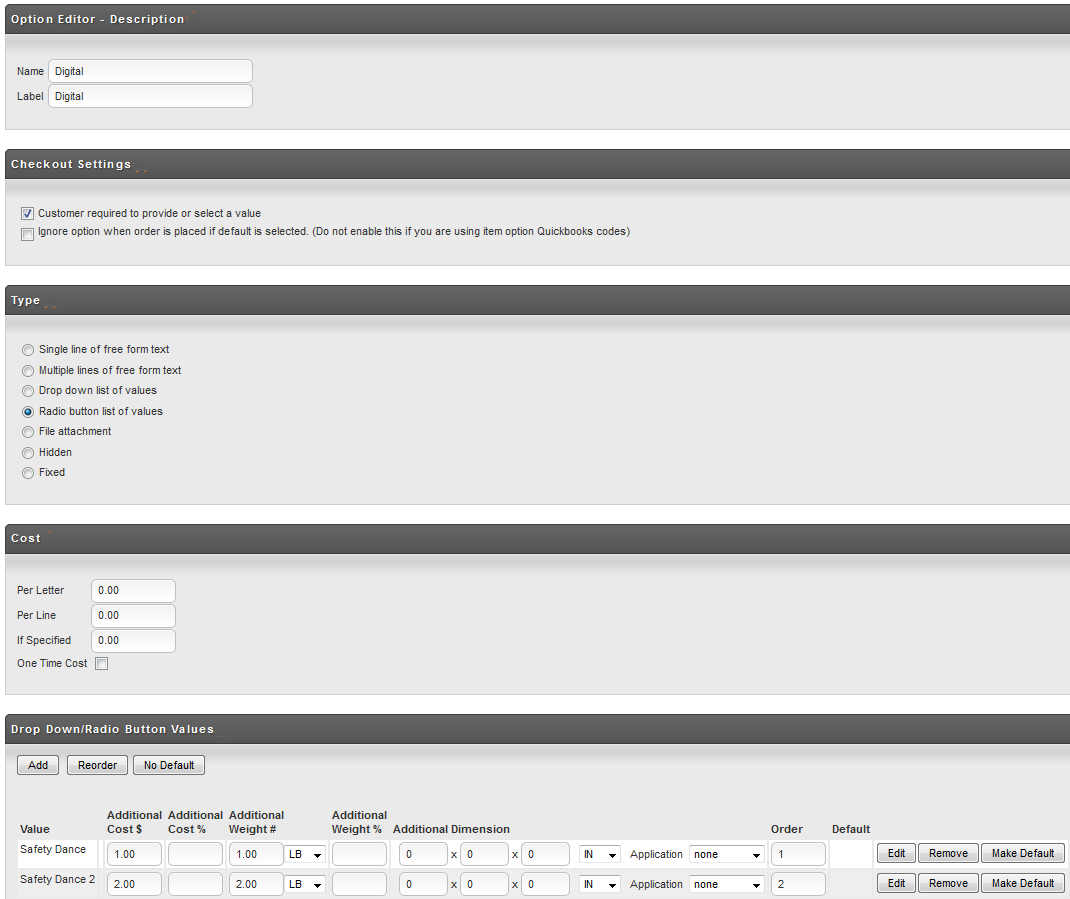
After clicking the "continue" button, the Option Editor Screen will appear. This screen is divided into five sections; Description, Check-Out Settings, Type, Cost and Drop Down/Radio Button Values. The last section, Drop down/Radio button list of values (shown in example below), will only appear if Drop Down or Radio Button list TYPE is selected.
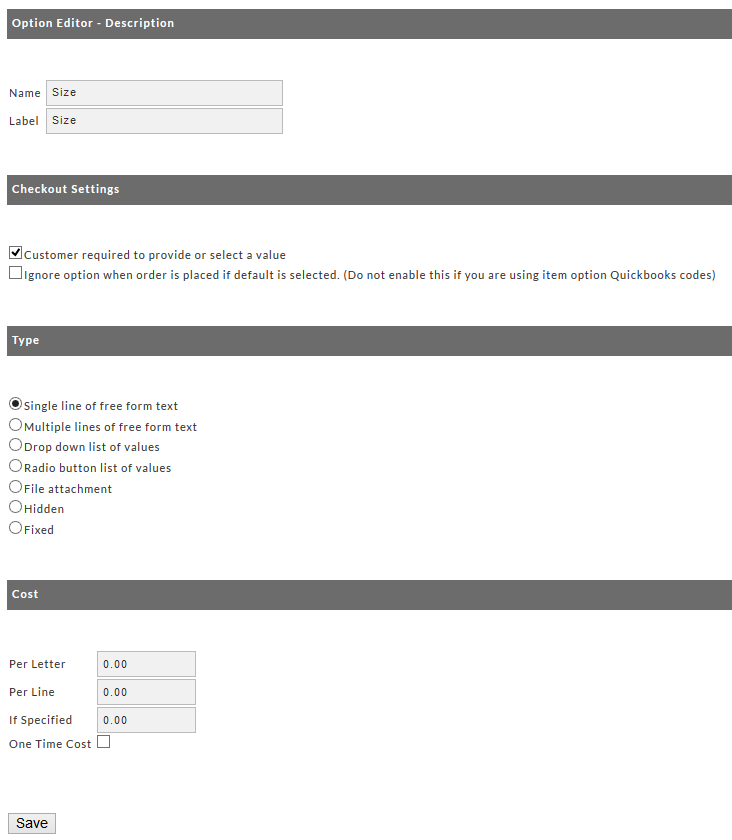
Description
| Field Name | Description |
|---|---|
Name | the name of the option. For instance "T-shirt size". This will be automatically entered from your entry in the previous Add Option Screen. It can be changed at this screen if desired. |
Label | The label is what appears in the customer's shopping cart, on the order invoice, and on the packing slip. This is often a shorter version of the Name such as "Size" |
Checkout Settings
| Option Name | Description |
|---|---|
| Customer required to provide or select a value | If you check this box, an "error" message will appear during checkout if and when the customer fails to provide or select a value. Customers cannot proceed with the checkout until they have selected or provided a value for the option. |
| Ignore Option when order is placed if default is selected | Some merchants define numerous values for many of their options. This can cause considerable clutter on the printed documentation (i.e., order, packing slip, etc.). Selecting this option will prevent printing of the option value if the "default" option is selected at checkout. |
Option Type
There are seven possible types of item options. Click on the radio button to the left of the choice desired to see the configuration options related to that option type.
| Option Name | Description |
|---|---|
| Single line of free-form text | If this setting is specified the option will appear at checkout as a single line input field where the customer can specify free form text. |
| Multiple lines of free-form text |
|
| Drop Down List of Values | If this setting is specified the option will appear at checkout as a drop down list. Merchants will specify values for the list immediate below this section (only appears when option is selected). |
| Radio Button List of Values | If this setting is specified the option will appear at checkout as a user selectable list. Customer will be able to select only one (1) of the values in the list. Merchants will specify values for the list immediate below this section (only appears when option is selected). |
| File attachment |
|
| Hidden | Use this setting when you want to have a special option that is NOT shown on the checkout. This is most often used when a merchant builds a special form on their web site that passes information to UltraCart. A merchant can create an Option (hidden) to pass a unique ID (for example) to help identify the order. Given that scenario, the merchant does not want to have the option visible in the cart. |
| Fixed | The value passed to the cart is displayed in the checkout but is read-only, so its not editable by the customer. |
Drop Down Value List
Once you have selected the Drop Down list of Values TYPE the Drop Down/Radio Button Values section will appear at the bottom of the Option Editor screen.
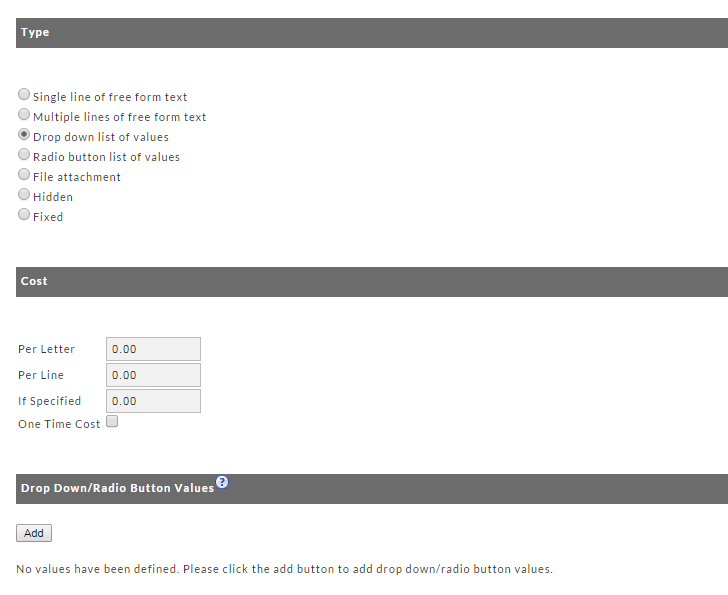
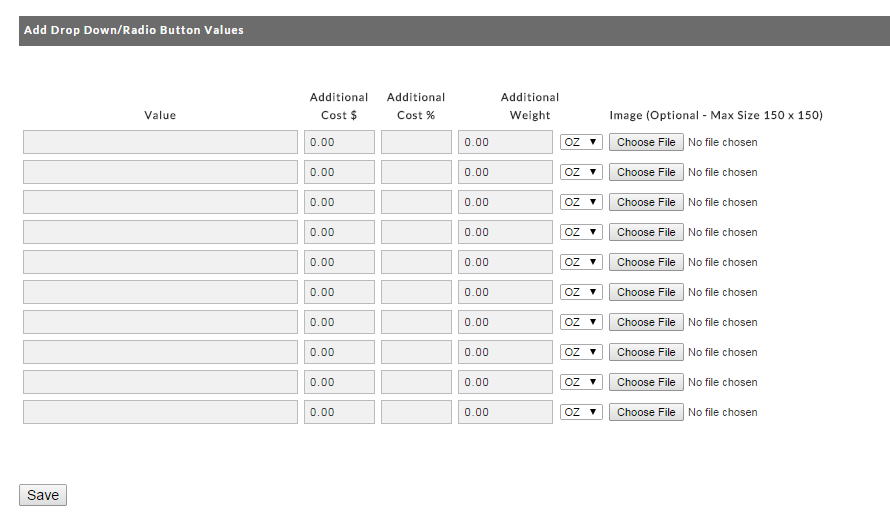
To add your values, click on the "ADD" button which will take you to the Add Drop Down Values screen.
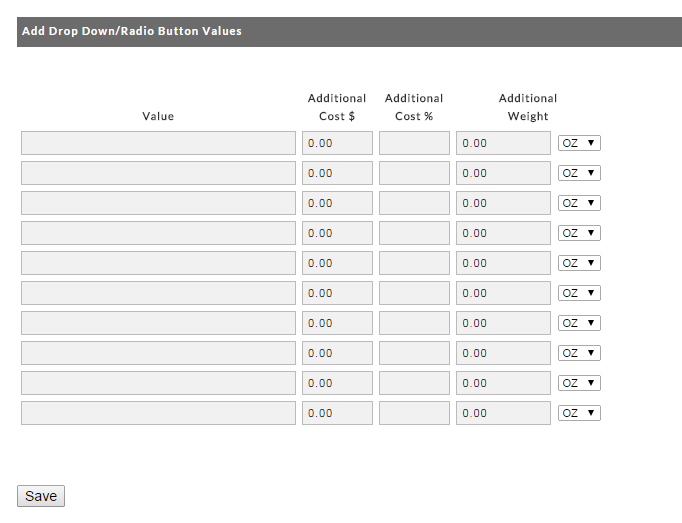
Here the merchant should specify all the different values for the option and the effect they have on the cost and weight of the item. For instance, an x-large shirt might cost $1.00 more or weigh slightly more. You would also indicate if the weight was in pounds (LB), ounces (OZ) or Kilogram (KG).
Once you've entered your values (up to 10), click on the "Save" button and you will be returned to the Order Editor screen. If you have more than ten values to enter, click on the "ADD" button. Values that you've added will appear on the Option Editor Screen and the look of this section will have changed.
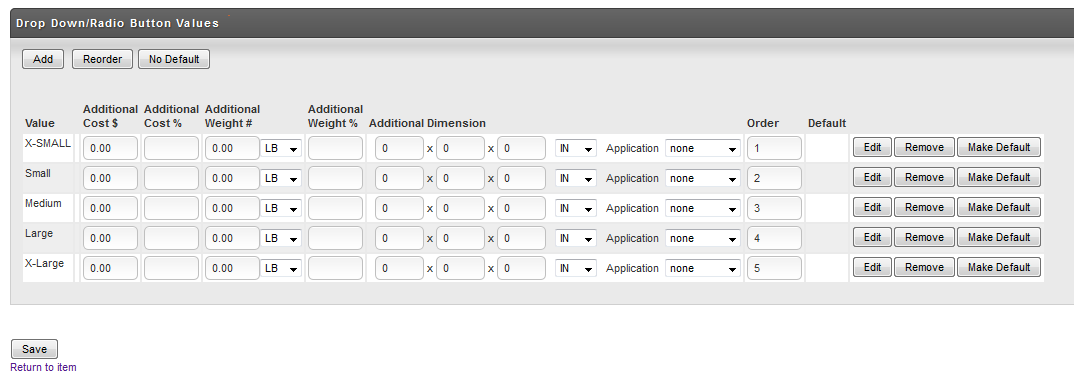
The new columns and buttons that now appear are explained below.
| Column Name | Description |
|---|---|
| Additional Cost and Additional Weight | the amounts that you set (if any) when creating the values will appear in these columns. |
| Additional Dimension | this field will show "none". Click the Edit button to be taken to the editor screen where you can enter the additional dimension values. |
| Order | This column will show the present order of this list. You can re-arrange the order of your list by changing the numbers in this column. Once you have change the order numbers, click on the "Reorder" button in the Section Header. Your values will then shift to the order you configured. |
| Application | add item = another kit component is added to the order set item to = changes the weight and dimensions of the item for shipping calculation purposes none = does neither of the above two behaviors. |
| Default |
|
| Edit Button | Clicking on a "Edit" button will take you to the Value Editor where you can change attributes for that particular value. |
| Remove Button | Clicking on the "Remove" button will remove that Value from the list. This is a permanent action without a warning dialog. |
| Make Default Button |
|
Radio Button Value List
Once you have selected the Radio Button List of Values the Drop Down/Radio Button Values section will appear at the bottom of the Option Editor screen.
To add your values, click on the "ADD" button which will take you to the Add Radio Button Values screen. This procedure will be somewhat different than the drop down list.
Here the merchant should specify all the different values for the option and the effect they have on the cost and weight of the item. For instance, an x-large shirt might cost $1.00 more or weigh slightly more.
Radio Button Value list also allows you to upload images assigned to each value. These images will be displayed in the cart along with each value. Click on the Browse button and navigate within your system to the location of your image. Repeat this process for each image you want to attach to each value.
Once you've entered your values (up to 10), click on the "Save" button and you will be returned to the Option Editor screen where your newly created Value list will be shown.
Associating Digital Content
You can also associate digital content with the Radio Button Value List (only). For instance you might offer an option for digital delivery for an picture to go along with the item. This would give the customer the option of purchasing the picture (which requires shipping costs) or digital delivery download (no shipping). Two Radio Button Values would be set as Safety Office and Safety Office 2. If the customer selects the Safety value for the option then it would associate a picture with the item and reduce the weight to zero (so UltraCart will not calculate shipping costs).
After creating the Item, we create the Item Option called Delivery Method with two values; Safety Office and Safety Office 2. They would appear as follows in the Option Editor.
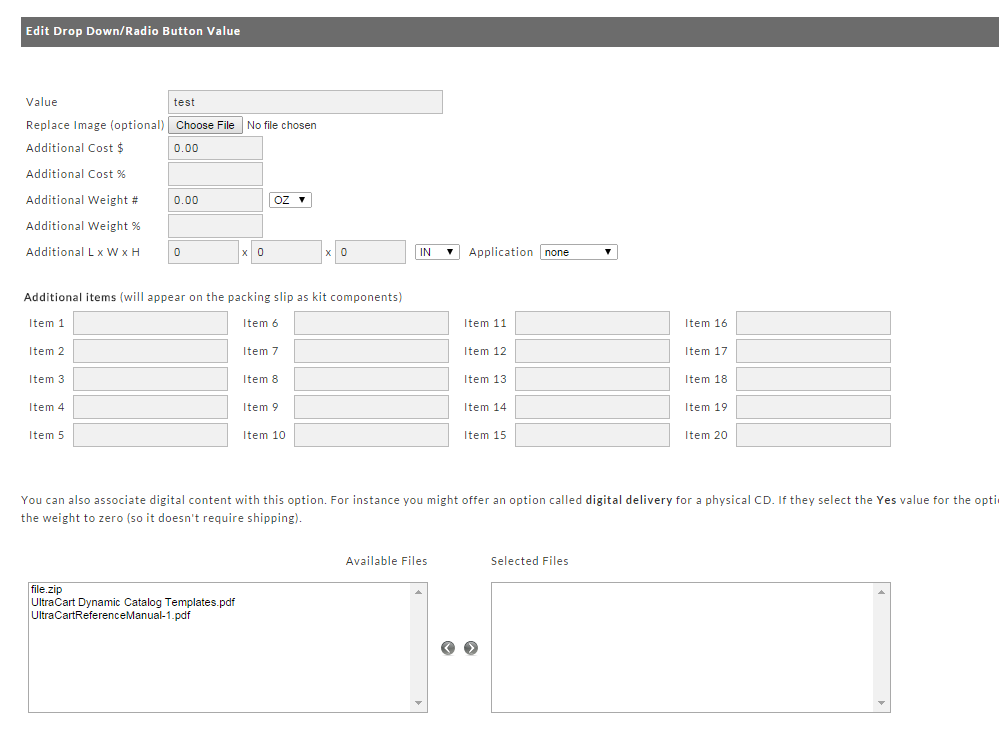
To associate Digital Content click on the "Edit" button for the Radio Button Value desired. In this case it would be the Digital Download Value.
Radio Button Value Edit screen
This editor automatically shows all files that have been uploaded in the Digital Library. We associated them to this option by selecting and moving them to the right side (click on the arrow pointing to the right).
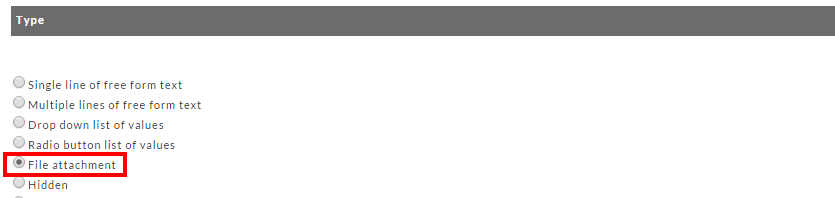
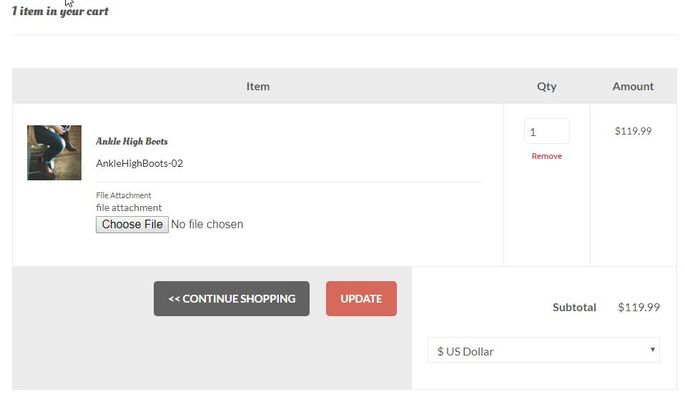
File Attachment
The file attachment option adds a upload button to the checkout that allows the customer to browse their computer and upload a file as an attachment to their order.
Configuration View of File Attachment Option
How it appears in the shopping cart
Options Listing
Once you have successfully created options, they will be listed under the options tab.
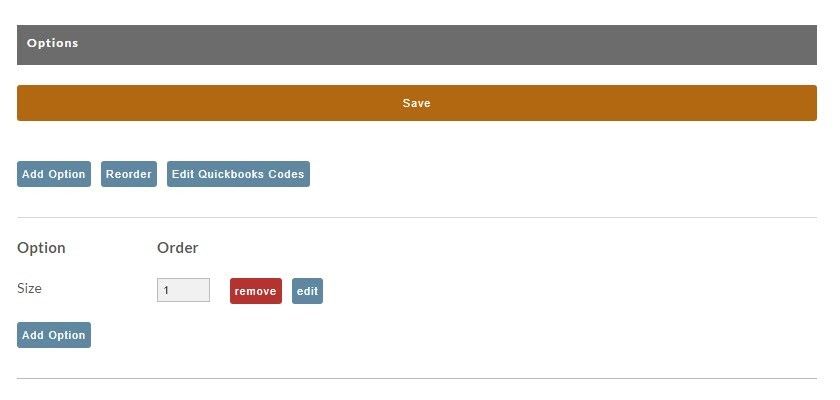
There are three buttons above the listings; Add Option, Reorder and Edit QuickBooks™ Codes.
| Button Name | Description |
|---|---|
| Add Options | Click the "Add Option" button to add a new option for this Item. |
| Reorder | this simply rearranges the order the options are listed during checkout. Change the numbers to the order you want them to appear in the "Order" column. Click the "reorder" button when finished. The list will be rearranged into the order you have specified. |
| Edit QuickBooks™ Codes | Using options can make it convenient for a customer to select variations for an item but causes some issues when it comes to accounting since each item has its own accounting code. For instance, you might offer a Blue T-shirt that comes in small, medium, large, and x-large. The QuickBooks™ code for the Item might be BLUESHIRT. However, the codes might have been configured in QuickBooks™ for all the variations as; BLUESHIRT-S, BLUESHIRT-M, BLUESHIRT-L, and BLUESHIRT-XL. This screen allows you to assign the QuickBooks™ code to each unique item option. Enter the code desired and click the "Save" button. Repeat these steps for each Option. |
Remove Item Option
Click the "Remove" button to delete an option. Warning! There will be no confirmation dialog presented.
Edit Item Option
Click the "Edit" button to be returned to the Option Editor screen. There you can make changes. Click the "Save" button when finished.