Configuring Salesforce.com Outbound Messages
- Perry Tew
- Hunter Schaeffer
- Former user (Deleted)
Introduction
Salesforce.com utilizes a pair of features to integrate with external systems such as UltraCart, Outbound Messages and Workflow Rules. For complete integration with UltraCart, you will need to configure several Outbound Messages, and then create Workflow Rules to notify UltraCart when you make changes. This process is fairly detailed, but only needs to be done once.
Getting Started
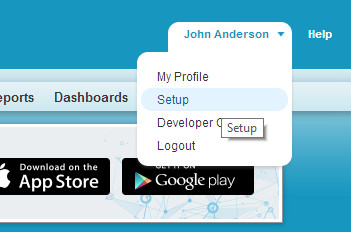
- Login to Salesforce.com, and click on your user name at the top right of your screen. From the drop down menu, select Setup.
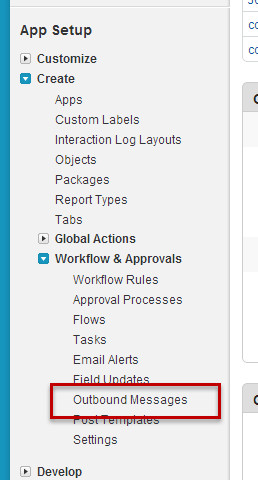
- Click to expand the Create in the App Setup section. Once it has expanded, click on Workflow & Approvals to expand that section. You will now be able to click on Outbound Messages.
Creating an Outbound Message
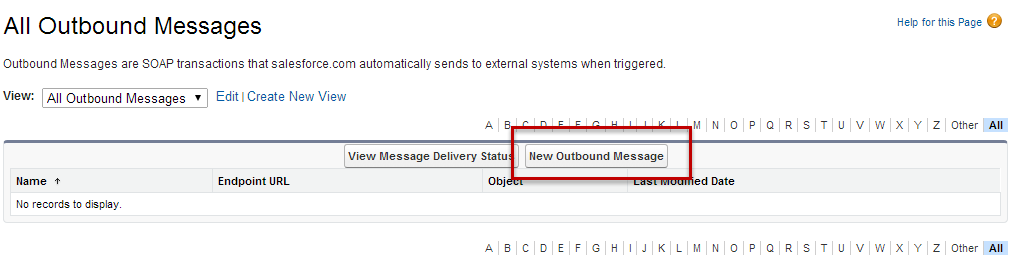
When you click the Outbound Messages link, you will be taken to a screen listing your existing Outbound Messages (if any).
Click on the New Outbound Message button to begin creating the first Outbound Message.
The first step is to select the object that will be the subject of this message. Let's begin with the Product object. Select Product from the drop down, and click on Next. 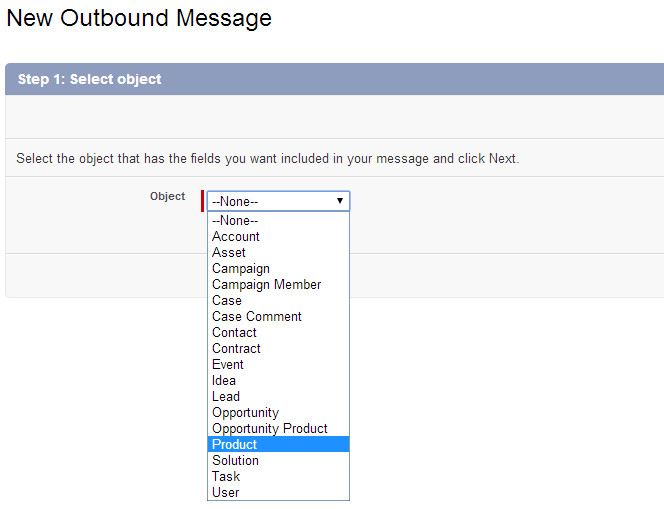
Now we come to the message configuration screen, shown below.
Outbound Message Configuration

- In the Name field, input "UltraCart Product Message."
- In the Endpoint URL, enter https://salesforce-soap.ultracart.com/axis/services/SFPartnerProductNotification
- If you have a dedicated API user, select that user name in the User to send as field. If you don't have a dedicated user, use an account that has access to all of the default objects and fields.
- Check the box next to Send Session ID. This feature will allow UltraCart to verify that a message received is a valid Salesforce.com message related to your account.
- Under Product fields to send, the only value that should be in the Selected Fields section. If you do not see the field "Id" under the Selected Fields header, select the "Id" entry underneath the Available Fields header, and click on Add.
That's it! Click the Save button. You will need to repeat the process for the Account and Contact objects as well. The process is exactly the same as described above, except that you will choose the appropriate object, and use a different URL for each object, as shown below.
Account Object | https://salesforce-soap.ultracart.com/axis/services/SFPartnerAccountNotification |
Contact Object | https://salesforce-soap.ultracart.com/axis/services/SFPartnerContactNotification |