Processing credit card payments
- Hunter Schaeffer
Overview
Options for processing credit card payments.
Processing credit card payments in the Accounts Receivables Department
Processing credit card orders from the Accounts Receivables department will be the primary method of processing placed credit card orders that were either captured for review due to declined attempts during checkout, orders that are flagged for fraud review, and orders that were flagged for "No Real-time" processing.
Navigation
You can process the credit card payments either individually or in batches.
Orders may appear color coded, there is a legend that shows the color code for:
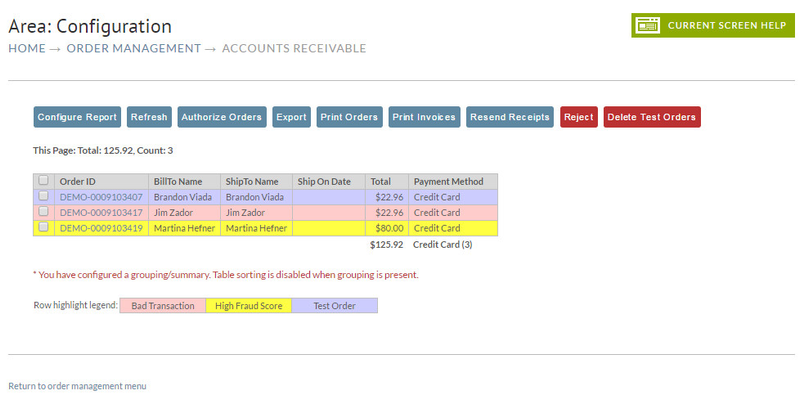
- (Color code = Pink) Indicates "Bad Transaction" - This color code indicates that the order was captured during the checkout process with declined authorizations.
- (Color code = Yellow) Indicates "High Fraud Score" - This color code indicates that the order was captured without attempting any authorization transactions. The order should be reviewed before processing for payment.
- (Color code = Purple) Indicates a "Test Order" - This color code indicates that the order was placed with a configured "test credit card number".
Processing orders individually
When an order arrives in the Accounts Receivables department, each user that has the "Process Credit Card payments" email notification configured for their user will receive a email alerting them to a new order in the A/R needing their review for payment processing.
An order can be processed in the A/R department two ways:
- Clicking on the hyperlinked orderID then scrolling down to the payment section and clicking the "Process payment" button.
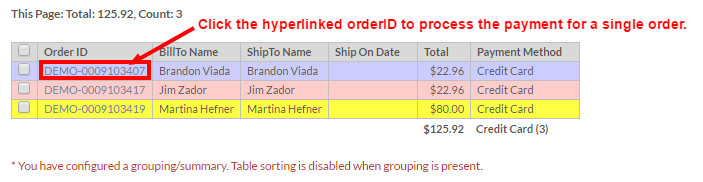
- Clicking on the checkbox along the left side and then clicking the process payment button in the pop-up window that appears. This approach works best for processing multiple orders, but can be used for a single order.
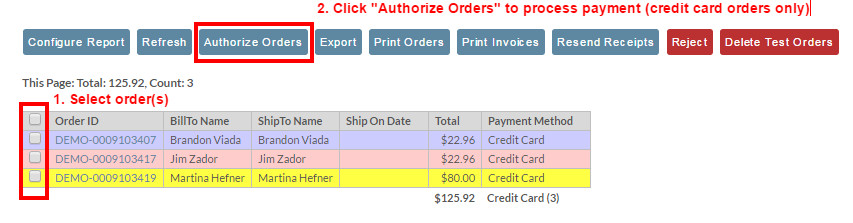
Processing payments for multiple orders at once
When you have situations where you have multiple order to process, you'll want to use the batch processing method, which can process hundreds of orders at once (although its probably best to process them in batches of up to, say, 100 at a time, so that the review process is more easily managed.
View of the Batch payment pop-up window:
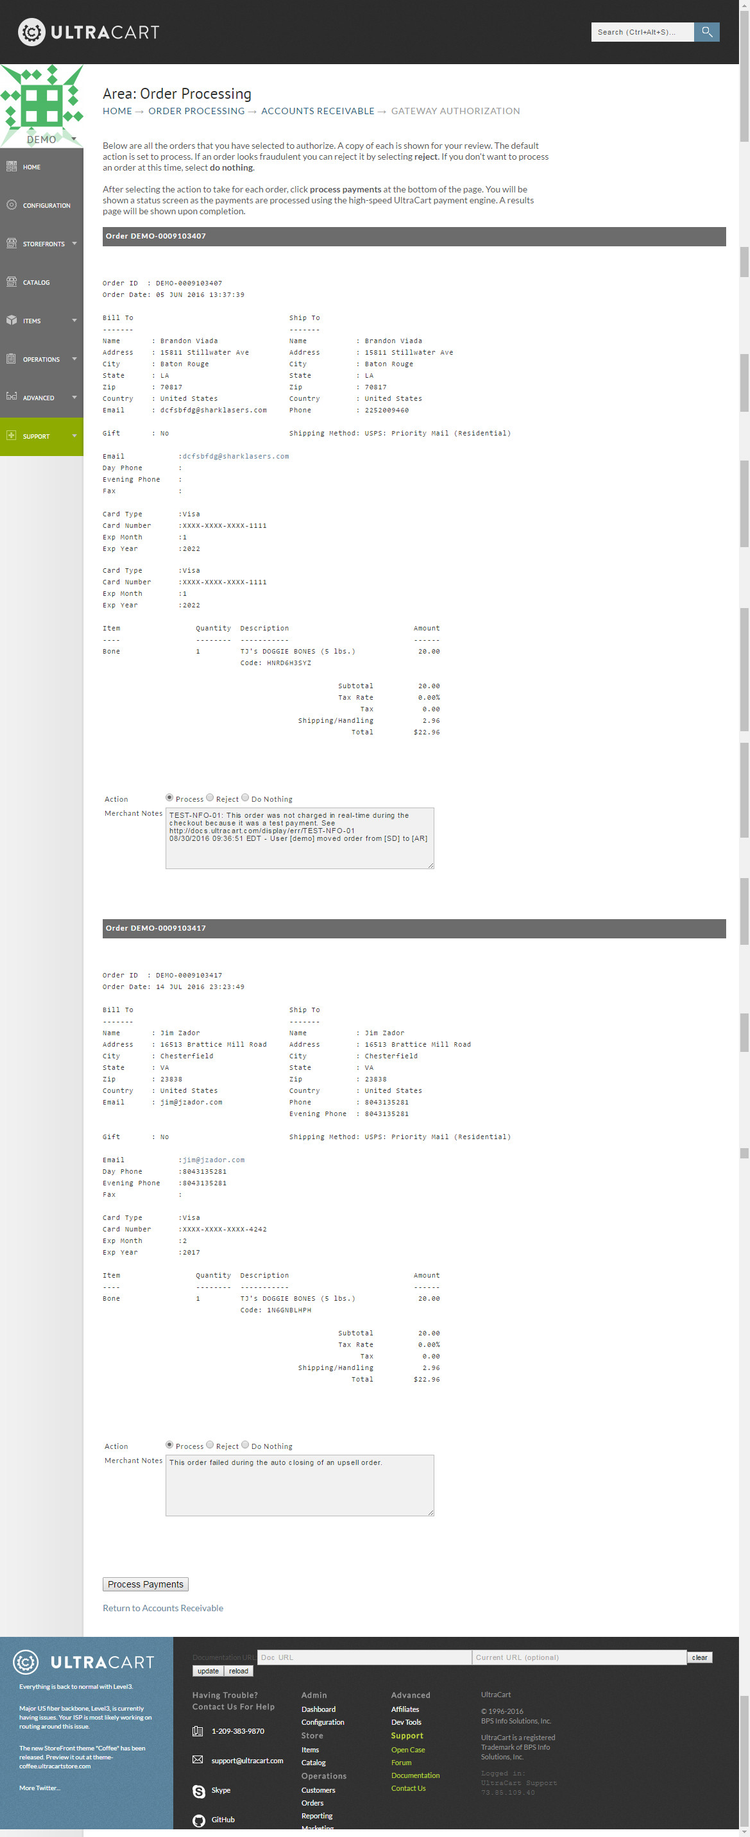
When processing multiple orders, there will be a review step in which each order shows these actions that can be taken:
- Process (process payment)
- Reject (Send order to rejected orders)
- Do Nothing (Leave the order in A/R)
View after processing the payments
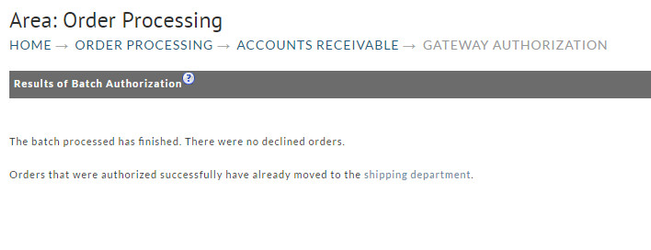
If there had been any declined transactions, the declined orders will be presented to you and you'll be prompted to either "Reject" the order or "Do Nothing" (which means leave in A/R for later follow up.
Other Ways of Processing Credit Card Payments
There may be times when you'll need top process a credit card payment after the order has been processed for payment. For example, you may need to apply a "rush order" processing fee because the customer called after placing their order to request the the order be rushed because the customer is going out of town.
To process this type of additional payment, you can use the "Virtual Terminal" button located in the billing tab of the order editor.
Virtual Terminal Payment Processing
The virtual terminal allows merchants to process charges against an order after it's already been placed.
The virtual terminal provides a way to process payments on placed orders that do not require viewing the full credit card details (this is part of PCI-Compliance). This feature eliminates the requirement to move orders to the Accounts Receivables department in order to facilitate payment processing .
Where is the Virtual Terminal feature?
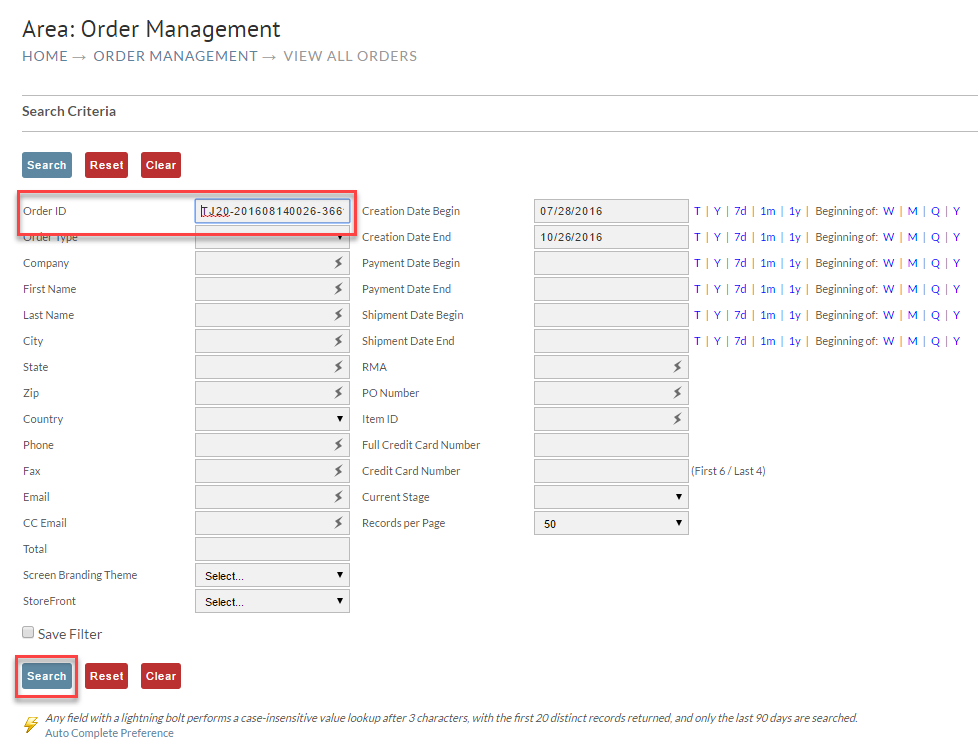
The Virtual Terminal button is located along the right side of the Billing tab of the order editor. You'll first need to locate the order. Navigate to:
Locate the order desired via the search (filter) method. Enter the Order ID or other search criteria. Take note of the pre-configured Date Range on the right. Make certain the existing date range covers the date range of the order. Then click the Search button.
Once you have your order in view, click the Customer Information button:
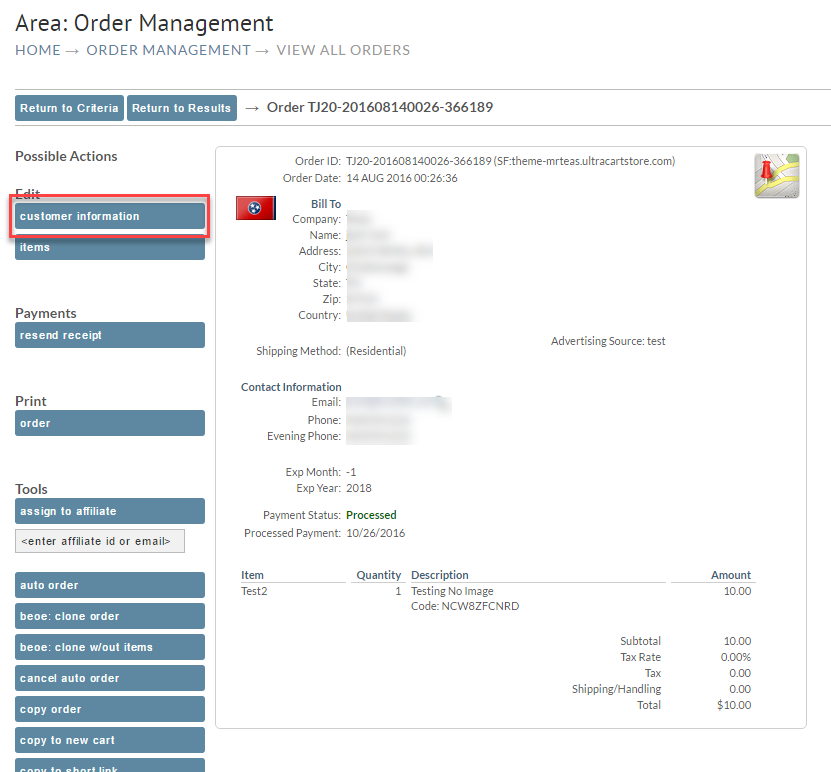
The next screen will display the Billing information in the Order Editor. You will find the Virtual Terminal button on the right side of the screen:

Clicking on the virtual terminal button will take you to the screen to enter the details of the transaction:
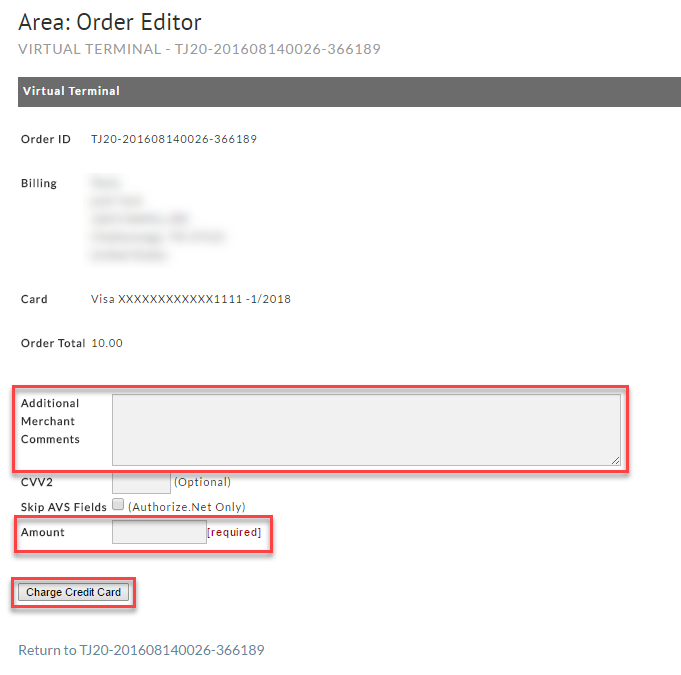
Enter the Amount to be charged. You may want to include a comment describing the charge and why it was processed using the virtual terminal.
Finally, click the Charge Credit Card button.
Via the Back End Order Entry tool
Please see the help doc for the BEOE tool here.