Customer Profiles Import Tutorial
- Hunter Schaeffer
- Loyd James (Unlicensed)
- Chris Torigian
Main Menu → Operations → Customer Profiles → Import
About
Customer Profile Import uses a "wizard" process to walk you through the steps of importing customer profile records.
Customer Profile Data Fields
The following is a listing of current fields contained in the Customer Profile database along with a brief explanation of each. Most are self explanatory. The only Required field is the customers Email Address which is used as their Login to their account.
| Field Name | Description |
|---|---|
| Customer's Email - used as Login | |
Address 1 | Customer's address |
| Address 2 | Customer's 2nd address |
| Allow 3rd Party Billing | Allows the customer to use their own shipping account for the billing of shipping costs. |
| City | City |
| Company | Company Name |
| Country | Country |
| Customer Profile ID | ID assigned by our system |
| Day Phone | Daytime phone of Customer |
| Evening Phone | Evening phone of Customer |
| First Name | First Name |
| Last Name | Last Name |
| No Free Shipping | Disallows Free Shipping |
| Postal Code | Postal Code |
| State | State |
There may be additional fields depending on certain configurations you may have on your account. One such example is "Pricing Tiers".
Step 1
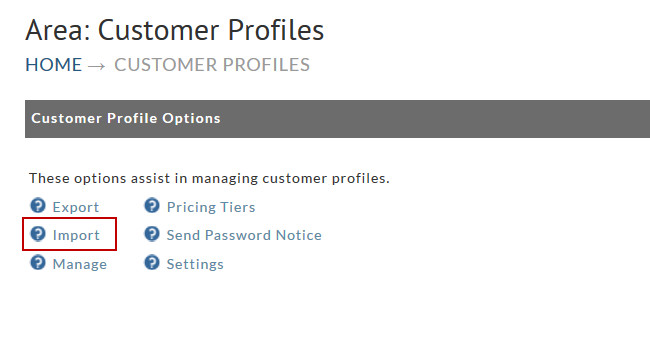
The Customer Profile Import wizard is located on the Customer Profiles page. Upon clicking the Import link you are presented with the first step of the import wizard process:
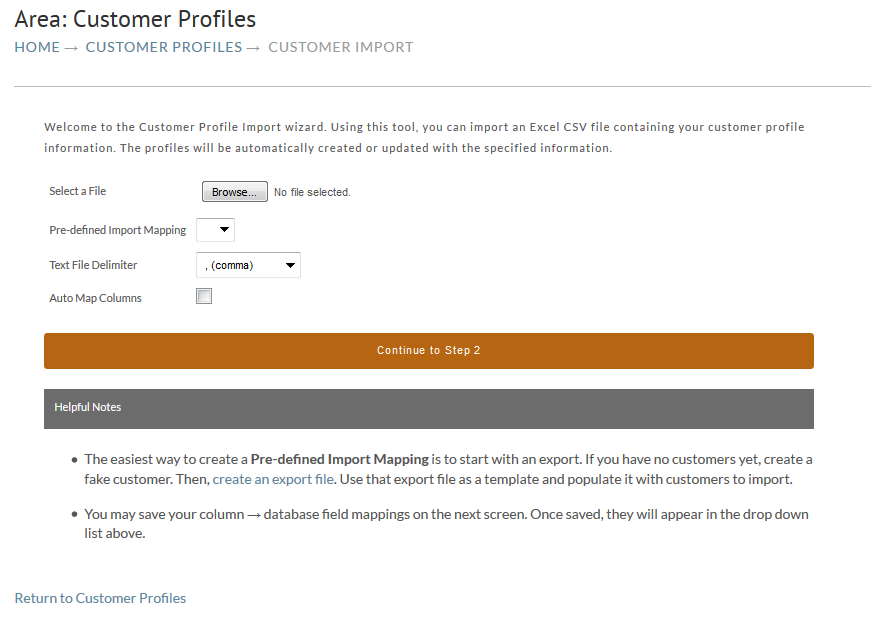
Using this tool, you can import your customer profile information by choosing the file then selecting the appropriate text file delimiter (most commonly a comma (,)) and the profiles will be automatically created or updated with the specified information from your import file.
The Pre-defined Importing Mapping is only used if you have imported and saved the mapping file in the past . After selecting the file and Text file delimiter click "Continue to Step 2".
Step 2
Email is currently the only required column. We can not import your data without the Email address.
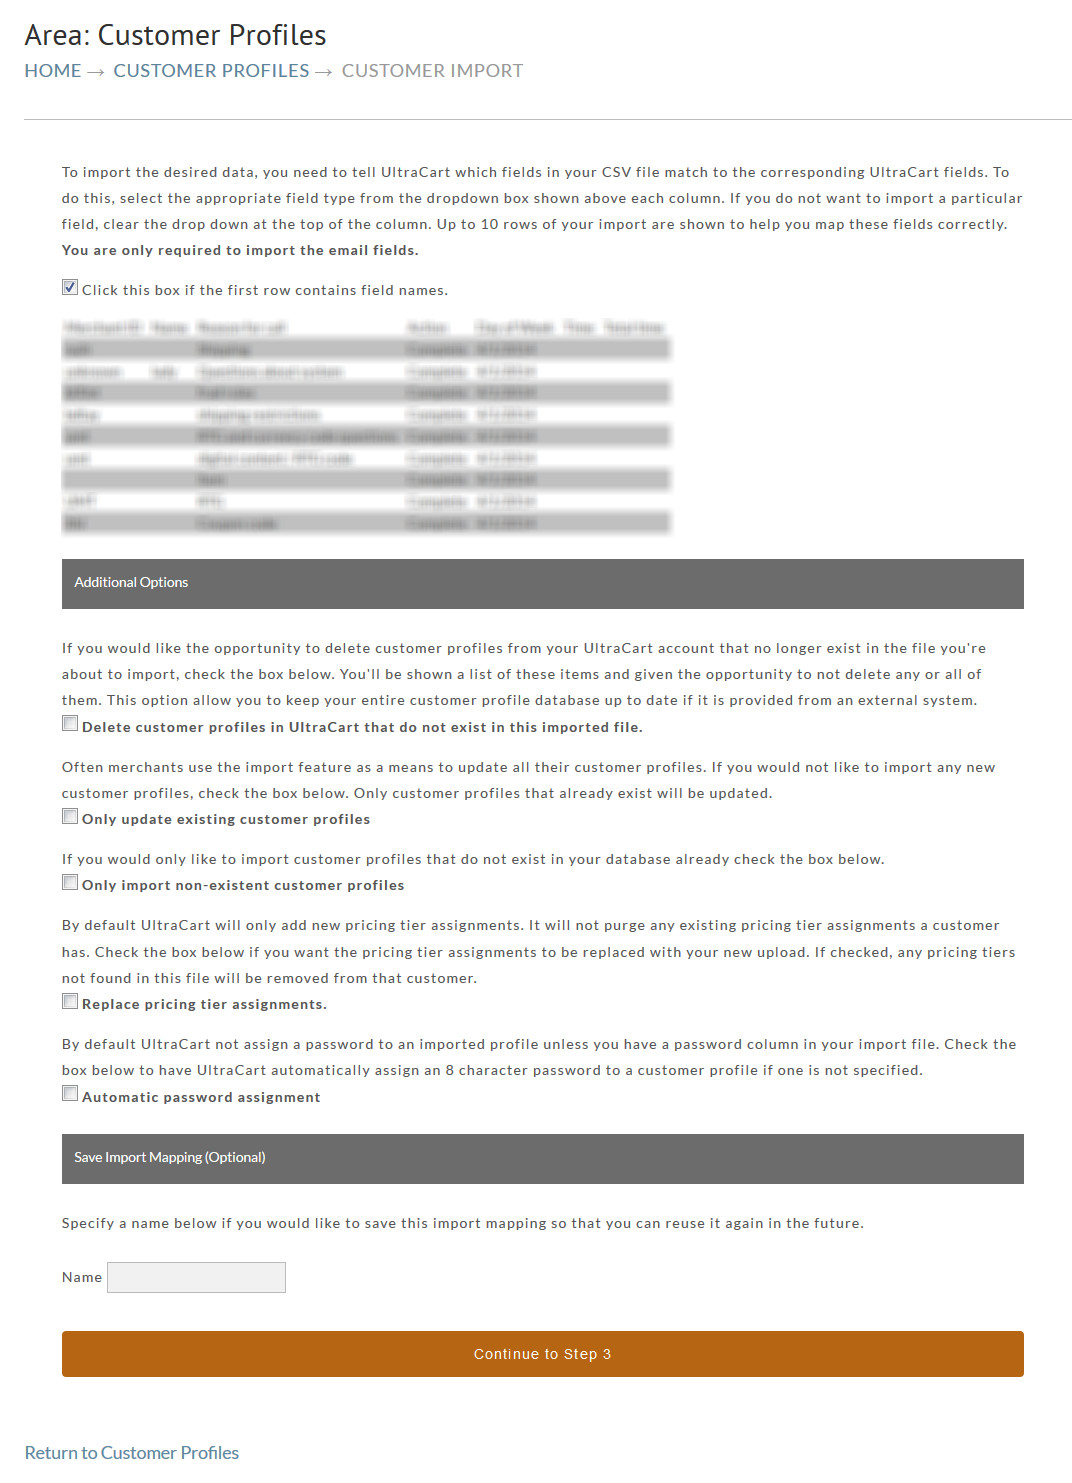
At the top of the page you will see an example of a few records on your file along with the option "Click this box if the first row contains field names." This is almost always checked.
Step 3
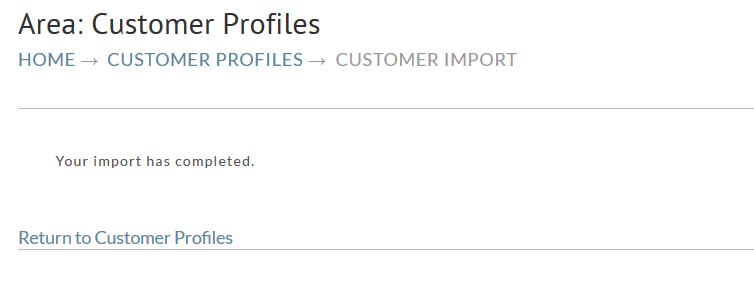
The import should now be complete and the profiles should be view-able from within the Customer Profile Manage section.
Sending a Password Notice to Customer Profiles that were assigned a automatic password
If you are creating customer profiles for customers, you'll need to configure an email notification to be sent to each customer profile email in which their password was automatically assigned.
Navigation
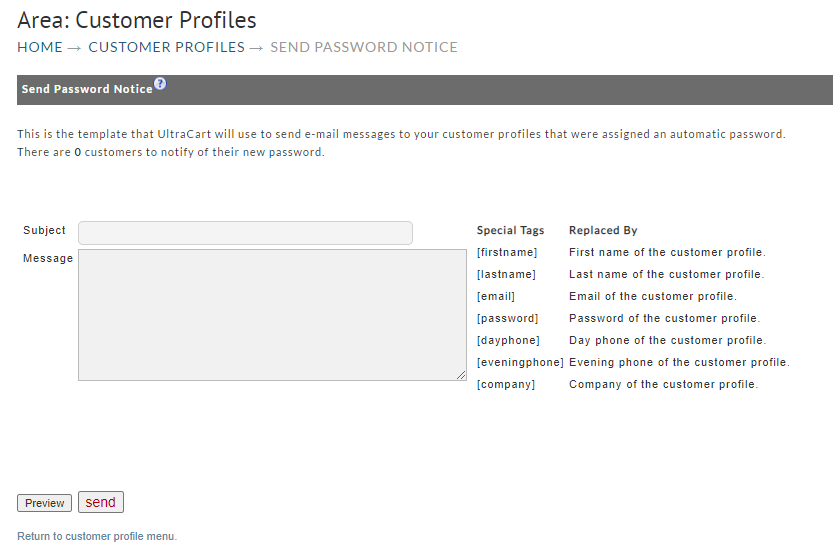
You'll configure the message template using the special tags:
| Special Tag | Description |
|---|---|
| [firstname] | Replaced by first name of the customer profile. |
| [lastname] | Replaced by last name of the customer profile. |
| [email] | Replaced by email of the customer profile. |
| [password] | Replaced by password of the customer profile. |
| [dayphone] | Replaced by day phone of the customer profile. |
| [eveningphone] | Replaced by evening phone of the customer profile. |
| [company] | Replaced by company of the customer profile. |
After configuring the email template with your custom content, click the "Preview" button to preview the rendered email, then once you have proofread and verified the rendered message , you'll click the "Send" button to send the message.