Replacing legacy screen branding with StoreFronts Checkout
Installing Storefronts
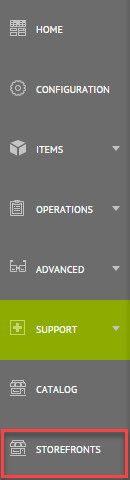
- From the Main Menu select the StoreFronts option
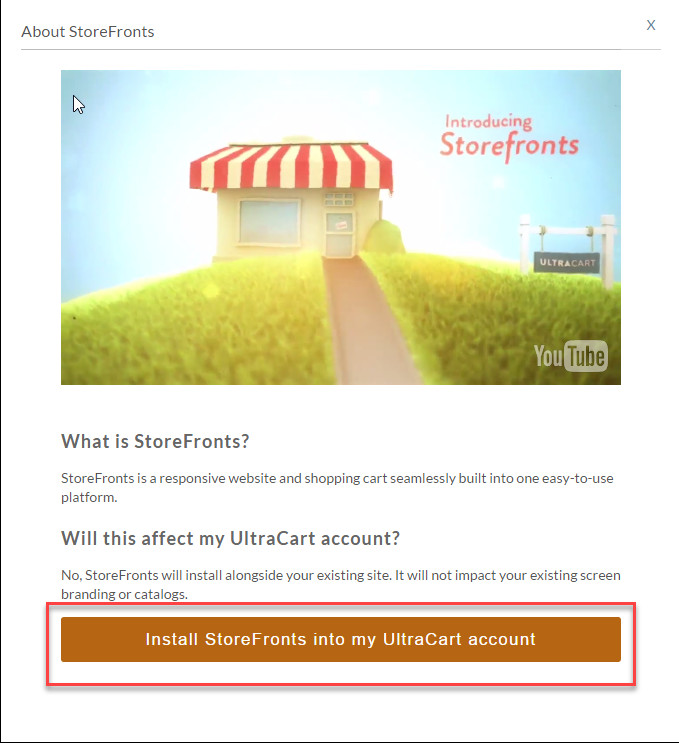
2. A lightbox will display a short video, simply click on the "Install StoreFronts into my UltraCart account" button to begin the install process.
Configure StoreFront to checkout only
Here are the steps for using a StoreFront as a Checkout Only theme. Placing a theme into Checkout Only mode causes the theme to generate a slimmed down version of header/footer navigation and redirect any other traffic to the StoreFront to your main website. Using a StoreFront in a Checkout Only mode is the fastest way to add a responsive checkout experience to an existing website.
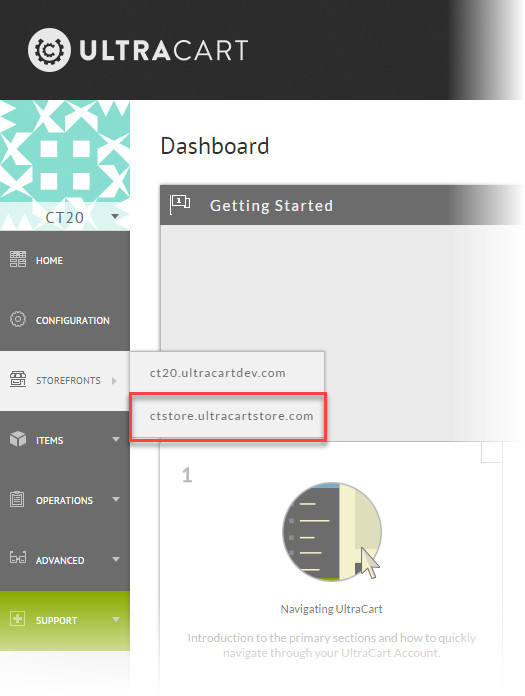
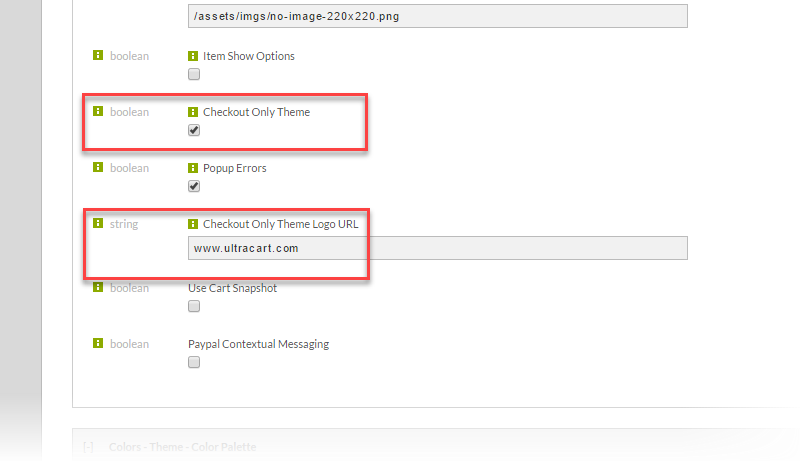
- On the left hand menu hover over StoreFronts and select one as shown below.
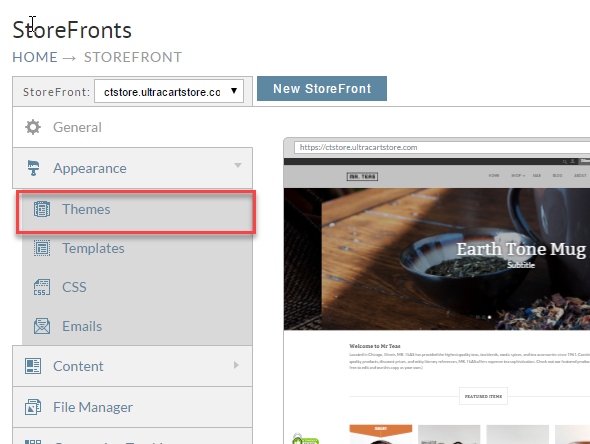
- Click on the Themes tab as shown below.
- Check the "Checkout Only Theme" attribute. Fill out the "Checkout Only Theme Logo URL" with the URL to home page of your website. Finally click save.
Adding a logo
You can customize your StoreFront with your company's logo. This is used in a variety of locations throughout the StoreFronts system. You can upload your logo in GIF, JPG, or PNG formats.
Logo File Format
It is HIGHLY recommended that you upload your logo in the .PNG format. The .PNG format offers better image quality for limited color images such as a logo. Additionally, you can save a PNG file with transparency, which can be used to match the logo's background with the StoreFront's colors perfectly.
The steps for uploading your own logo in place of the sample logo will differ base upon whether or not the storefront theme has the Visual Builder tool or not:
Steps for a Visual Builder Enabled Theme
Upload your logo using the Visual Builder editor. From the storefront menu, click the "Browse your Store" button:
![]()
Next, click the "Edit" button that appears at the top left corner of the web page:
(This menu only appear when you are actively logged into the UltraCart back-end, it doers not appear to your customers)
![]()
Next, mouse over the sample logo so that the logo is outlined in blue then click the gear icon (or use the keyboard shortcut "s" key to open the settings panel in the Visual Builder editor:
Steps for a Non-Visual Builder Enabled Storefront Theme
Here are the steps for changing the sample storefront logo to your actual logo for storefront themes that do not have the Visual Builder tool.
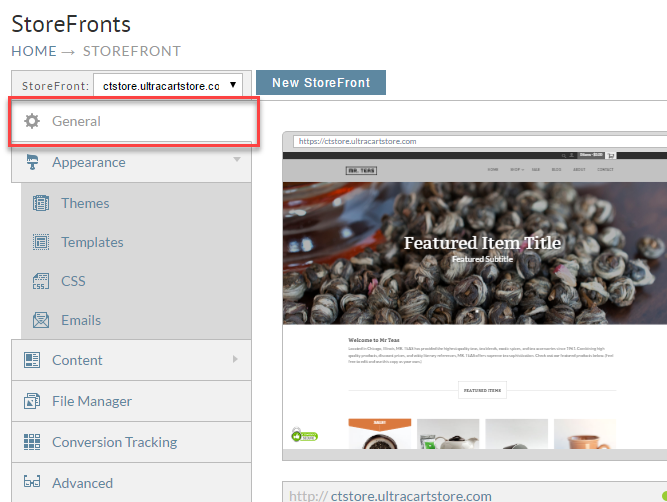
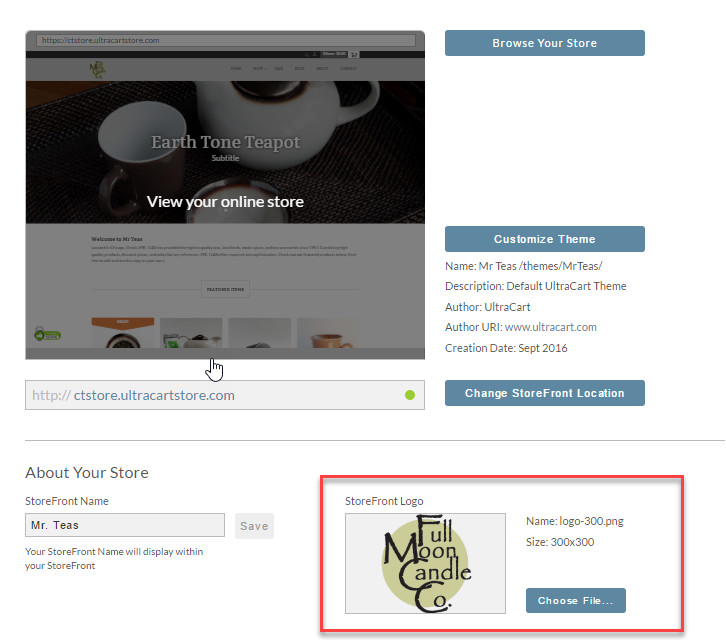
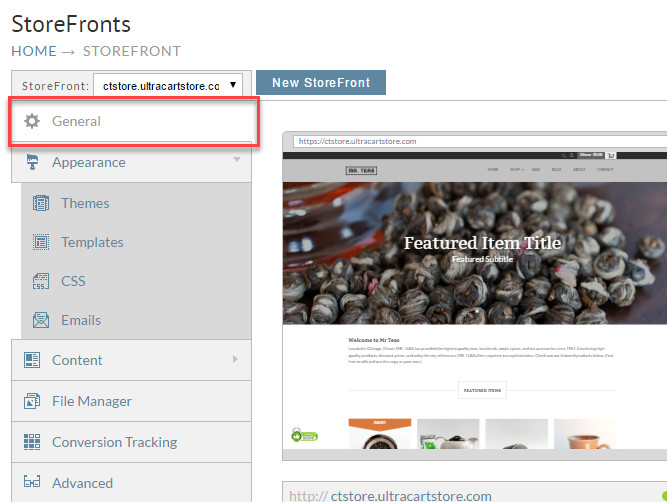
- From the StoreFronts page, click on the General tab.
- Under the heading "About Your Store", you will see the label StoreFront Logo. If you currently have a logo uploaded into your StoreFront, it will be shown below the label. If you do not have a logo uploaded, it will be indicated by "No Logo"
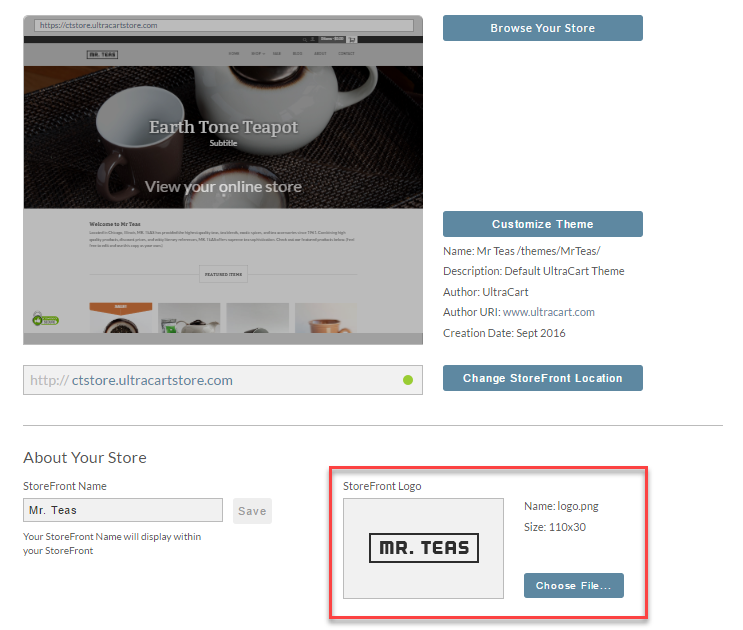
- Click the Choose File... button to bring up the file upload dialog. This screen will allow you to upload a new logo image file, or replace the current logo image with one you have previously uploaded. To upload a new graphic, click the Add Files button, or drag the graphic file to the upload dialog.
- After you have added your new logo file, click the Begin Upload button.
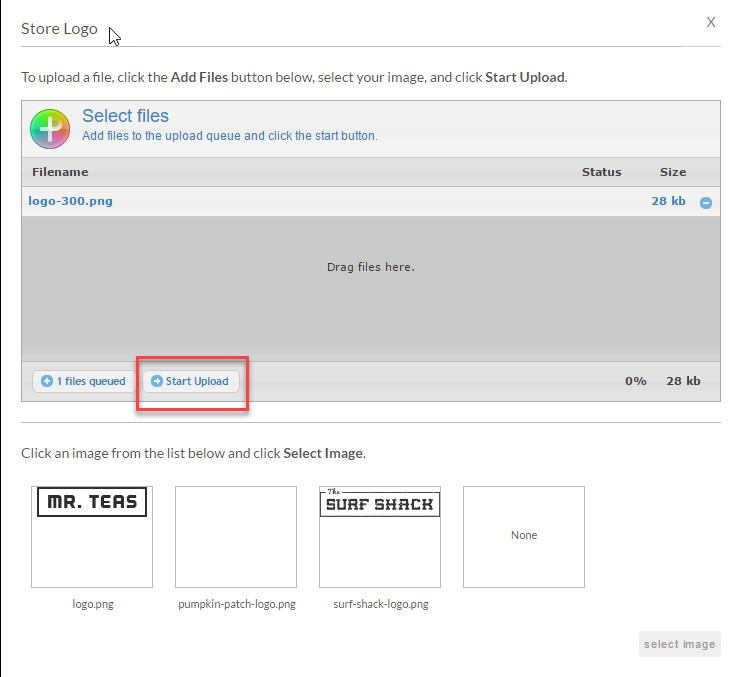
- The file will then be uploaded, and you will see it at the bottom of the dialog. Select the logo you wish to use, and press the Select Image button.
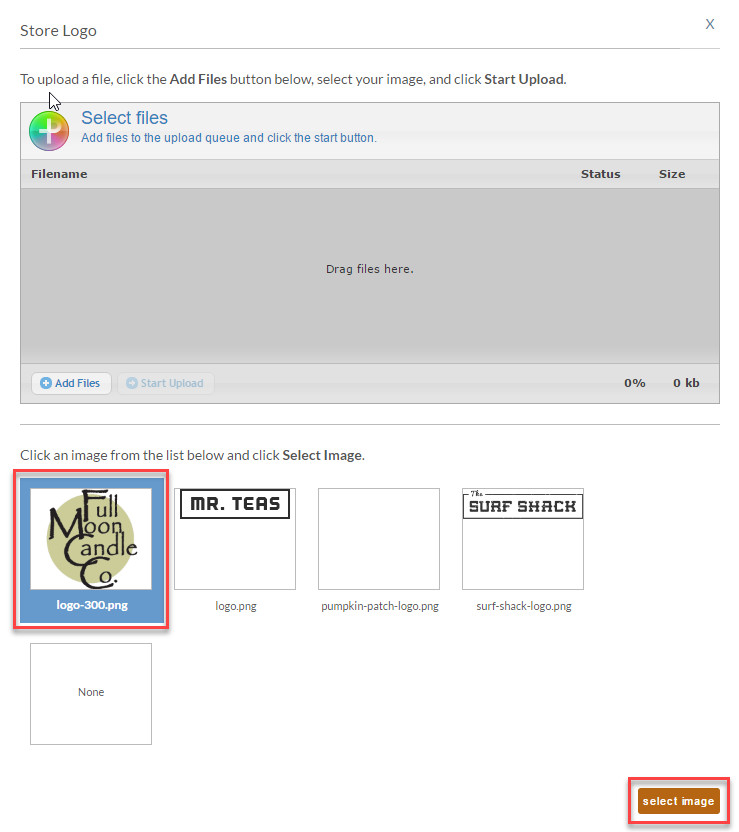
- Your new logo will be shown, along with its file name and its dimensions.
Fine tuning your checkout colors
This document will help you to fine tune the theme so that it's personalized for your business. First there are three topics that you want to make sure that you've covered.
Assuming those changes are complete, the next thing you will want to do is customize colors on the theme. To do this navigate to Themes as shown below.

The first theme is always your active theme so just scroll down a bit on the page and you'll see all of the theme attributes. Typically theme attributes control everything related to the look and feel of the theme as shown below.
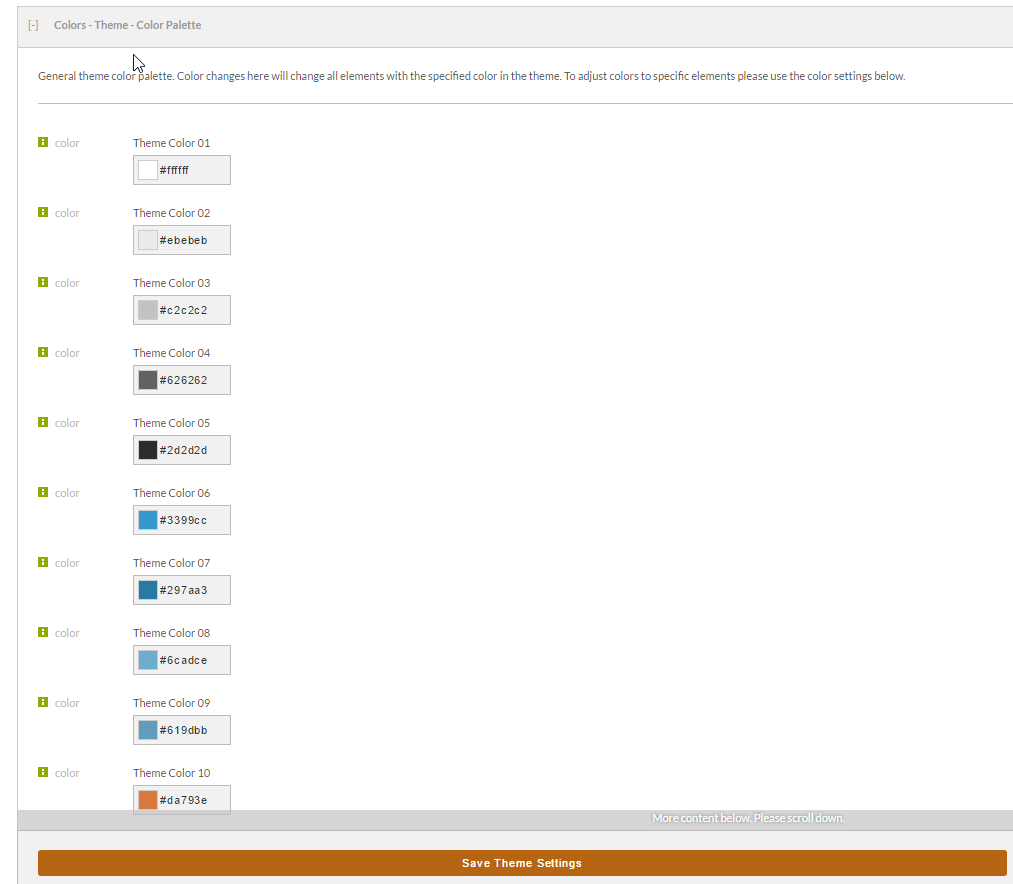
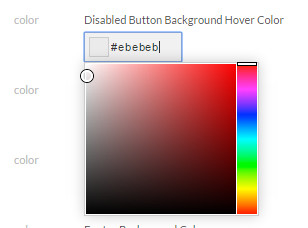
To customize a color click in the field. You can either input an HTML color in the format #RRGGBB or use the color picker as shown below.
When you are done, make sure to click the Save Theme Settings button to apply your changes. If there are other aspects of the theme color scheme that you want to change that are not present in the theme attributes, see overriding theme CSS for details on how to properly override the CSS of a theme.
Related Document:
Storefront Themes Tutorial - Activating or Suppressing Google Auto Complete
Updating Contact Us information
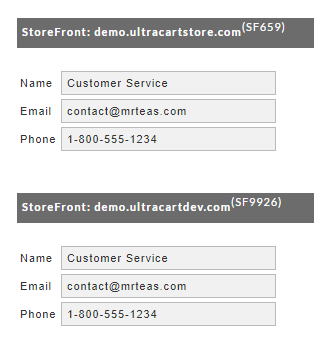
The Storefront contains two "Contact Us" sections:
- Contact us details in the footer section of all of the storefront pages.
- A "Contact Us" page with an email form to submit a message.
Contact Us details within the footer section of the storefront pages.
The Contact Us information is found in the footer section of the StoreFronts pages and checkout. It is important to keep this information up to date as there is information here (by default) that might be confusing to your customer(s).
- Navigate into StoreFronts General tab.
- Scroll down to the "Contact Us Information" section.
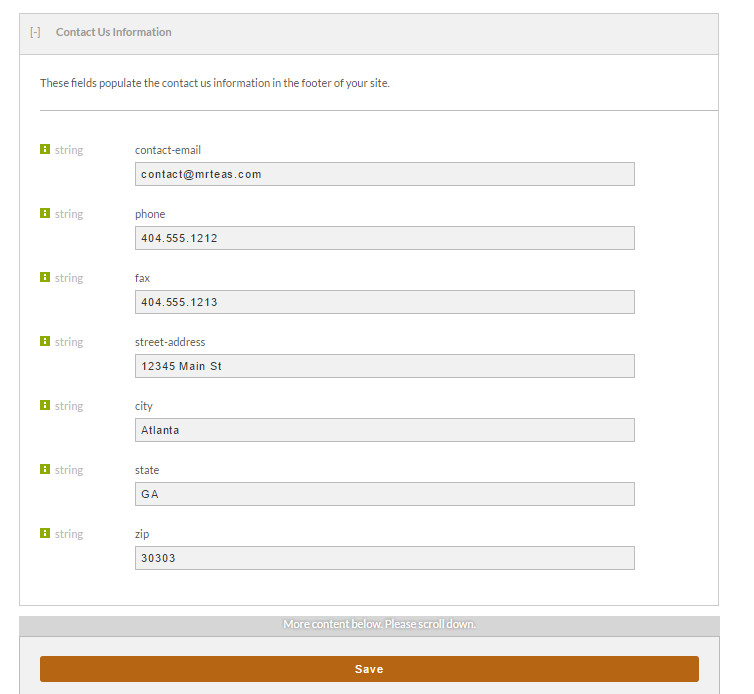
- Make sure all information is current. Click on "Save" at the bottom when finished.
Contact Us page form
By default, there is a Contact Us form page in the storefront catalog. This is in addition to the Footer details mentioned above.
This "Contact Us" form page requires two configuration steps:
- Configuring the customer service section for the storefront host:
(See our help document for the Customer Service Configuration page) - Configure an UltraCart User that contains the contact us/ customer service email address configured above AND has the "Customer Feedback" email notification enabled.
Permissions
If you configure this as a separate user specifically for receiving the contact us emails, the user does not need to have any permissions configured.
To configure a new user, see: Users.
Q: Can we configure multiple email addresses to receive the "contact us" form submissions?
A: Not within UltraCart. However, you can accomplish the same by configuring email forwarding or CC to additional addresses from your email server.
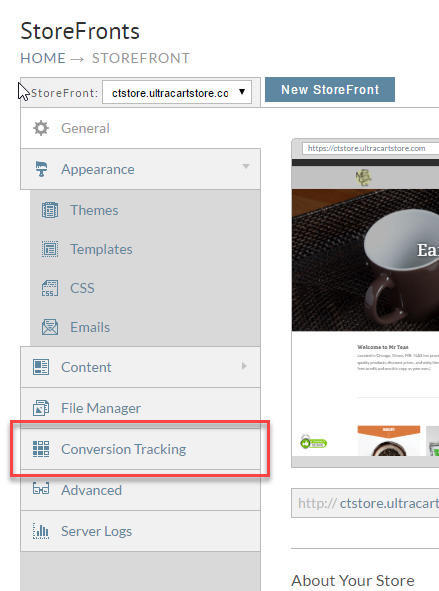
Copy Conversion Tracking
If you are using the Legacy Screen Branding you may have some Conversion and Tracking configured, It is important to move this content over to your new StoreFronts checkout so that you maintain these settings.
Navigate to Main Menu → Configuration → Checkout → Screen Branding Themes → Edit → Conversion and Tracking

- Next we want to copy any information we have entered here for the different providers. Now that we have the information we need to take that over to our new StoreFronts checkout.
- From here you will have options to configure Google, Other, Custom and more.

- Once you have copied over all of the details simply click "Save".
New Buy links
To find your Buy Links navigate to:
Main Menu → Items → Item ManagementNext to each Item that is created you will see a set of action icons, by clicking on the Links icon you will be taken to the Buy Links page for that product.

- Clicking on the icon for a given product will then take you to the Item Links or Buy Links page show below.
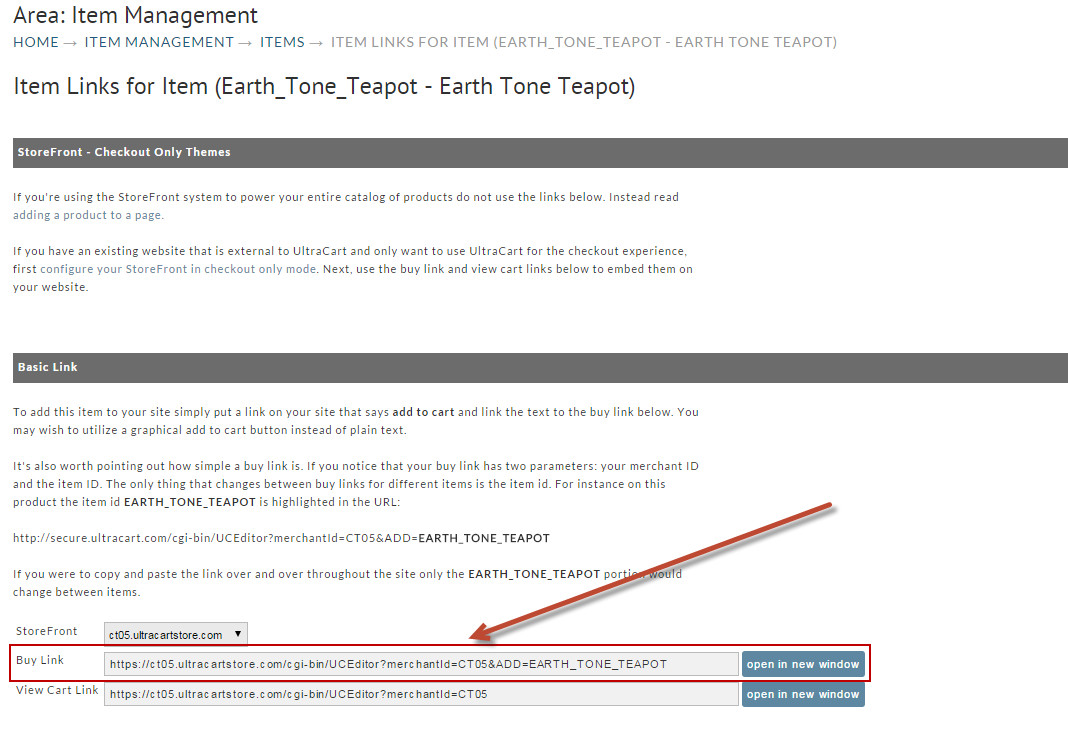
Because you can have multiple StoreFronts we do provide a drop down list just above the buy link that allows you to select which storefront the link should be assigned to, this allows you to have the same item pointed to different storefronts based on the link the customer user.
From here you would simply need to take the link and add it into your website, that code may look something like this:
<a href="https://ct05.ultracartstore.com/cgi-bin/UCEditor?merchantId=CT05&ADD=EARTH_TONE_TEAPOT"><img src="http://buttonImageUrl"alt=""/></a>