Creating an Installment Plan Product
- Jonathan Tew
- Hunter Schaeffer
This tutorial will cover the process of configuring a product that is sold on a 3 payment installment plan.
The first step is to navigate to:
Home → Items → Item Management
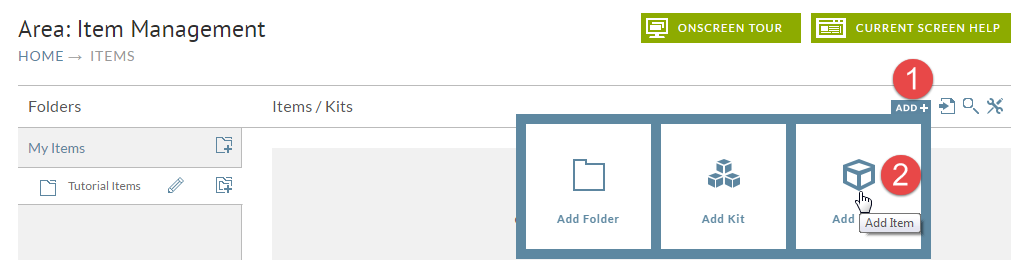
Hover over the "ADD+" button and click "Add Item" as shown below.
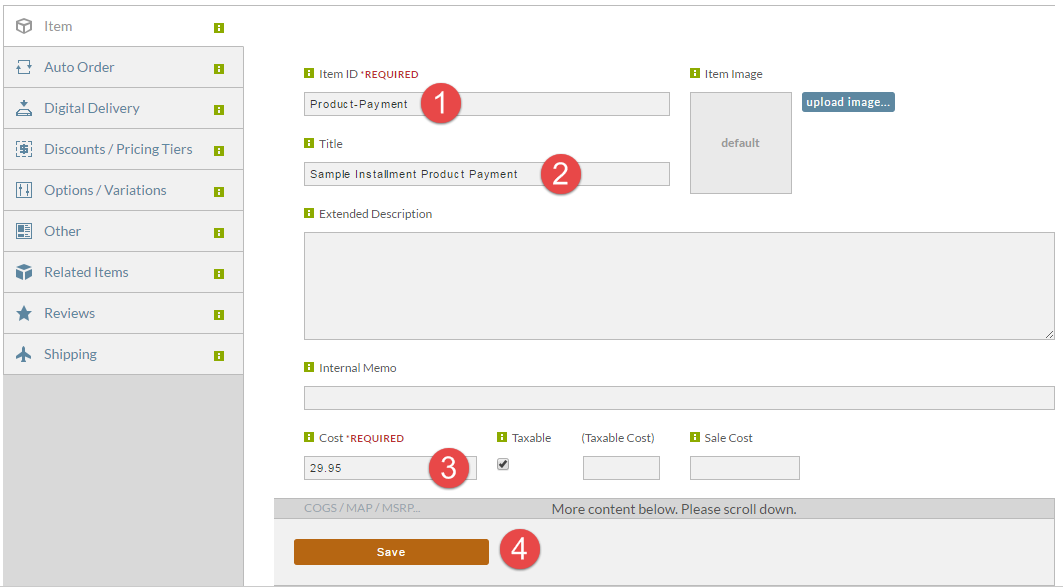
We're actually going to configure the item that represents the installment payment first. Follow the basic steps below by specifying the item id, title, cost, and then saving.
Configure Installment Payment Items with a weight of zero
Please note: Make sure to configure the installment payment item with a weight of zero, so that it's treated as a billing only item and does not trigger shipping charges or shipments.
We can see the item that we just created listed.
Now let's perform the same step of clicking the "ADD+" button and then "Add Item".

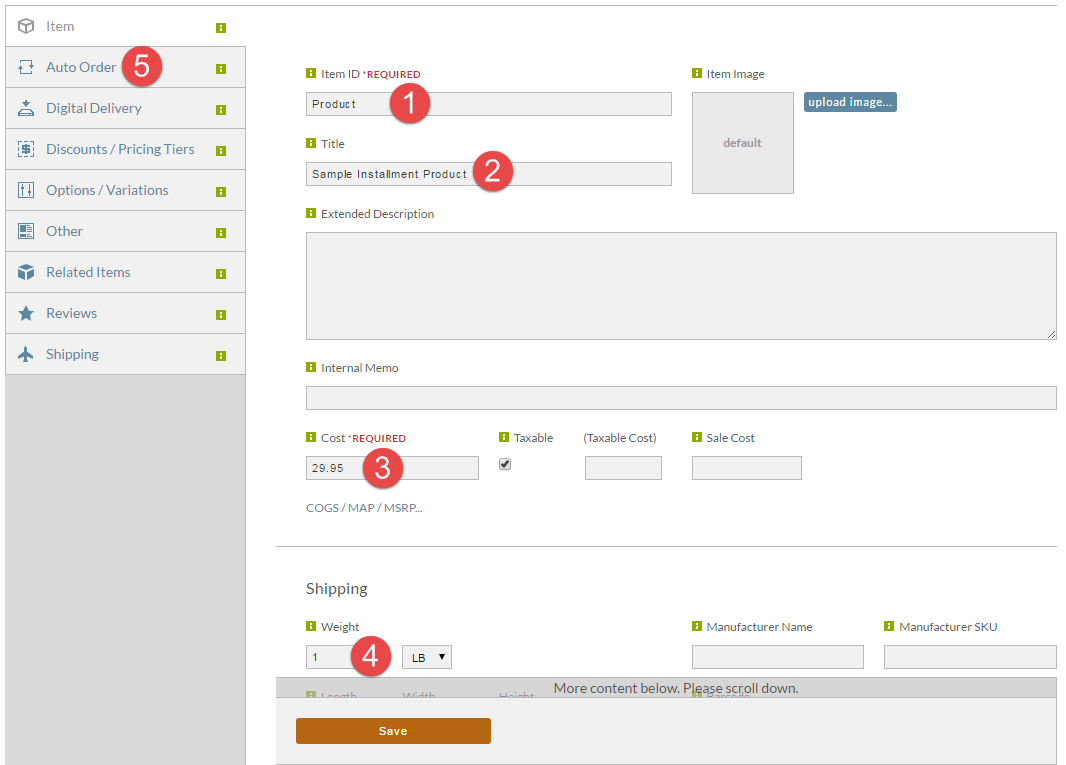
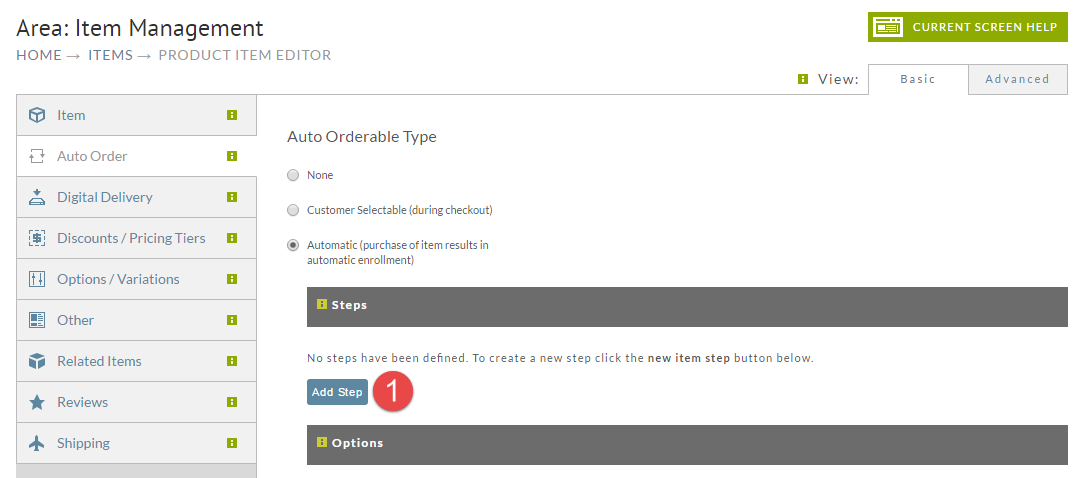
Now we're going to configure the main product that the customer buys. Configure the item id, title, cost, weight (important because this is what causes a product to ship) and then click on the "Auto Order" tab as shown below.
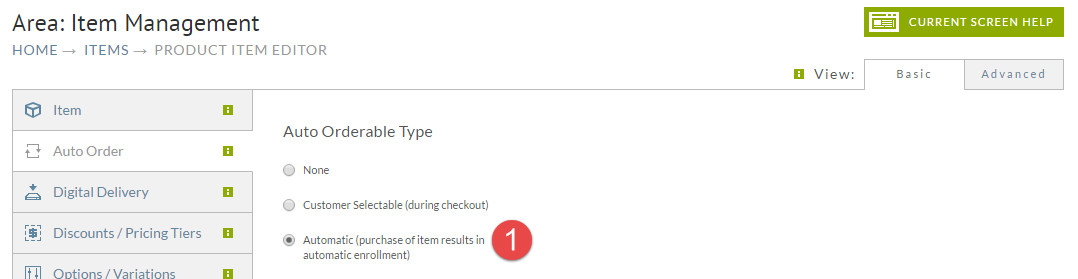
The first change we need to make on the Auto Order tab is to change the type to Automatic as shown below.
Now let's create the new schedule for the rebill. Click on the "Add Step" button.
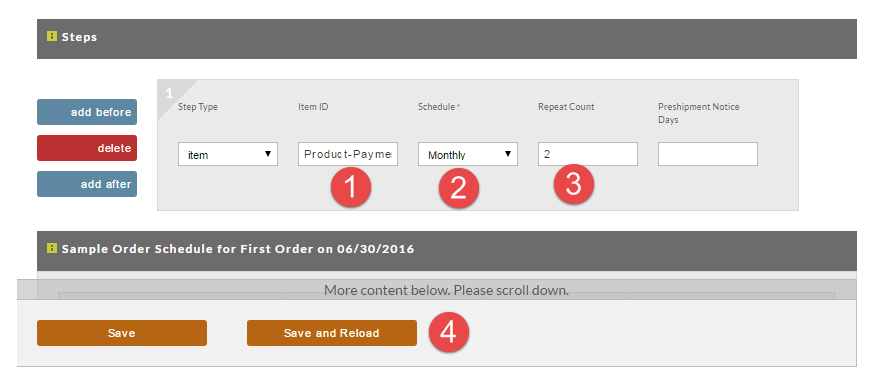
In the step, go ahead and enter the item ID that we configured earlier in the tutorial. For the schedule we are going to school monthly. For repeat count choose 2. Finally click the Save and Reload button.
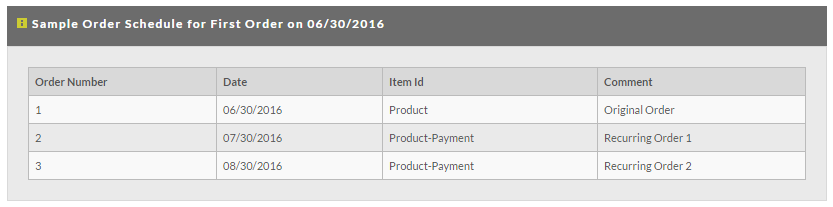
We can see the exact sample schedule for how this rebill scenario will take place. If the customer ordered today the physical "Product" would ship out to them. Then in a month they will pay the 2nd installment payment. Finally a month later they would pay the second installment.
In your item list you will see the items that are were created as part of this tutorial.

If you have any questions regarding implementing this tutorial on your UltraCart account, please contact UltraCart Support.