Multimedia Gallery Tutorial
- Perry Tew
- Chris Torigian
This feature is now considered Legacy and is not used within the Storefronts system.
This tutorial explains how to use the Multimedia Gallery Tool.
Setting up your items
Before you can use the gallery, you must have images. Navigate to each item you wish to have a gallery, and click on the Multimedia tab. Upload or Import the images for each item.
In the screen below, you can see 4 images attached to the item Baseball, which for our sample store is simply a ball for sale.
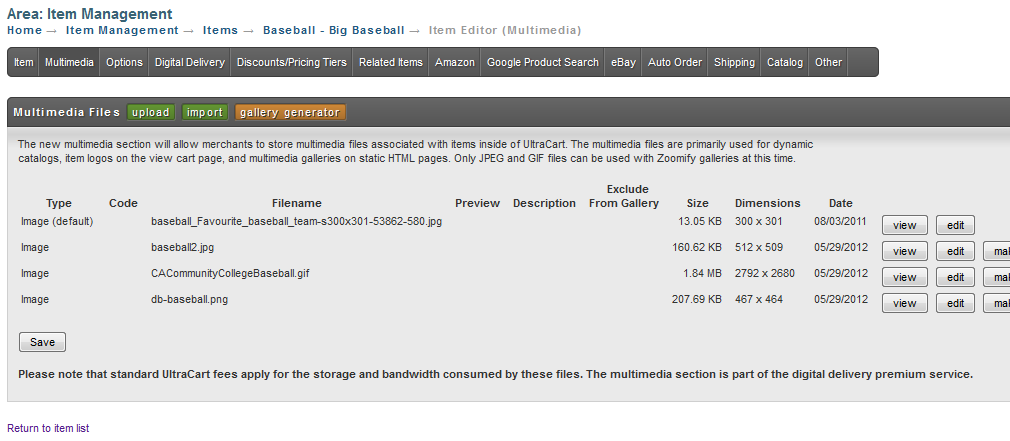
Once done, click on the gallery generator button.
If this is your first time, it might help to change the defaults for each field so you can see how the url is constructed.
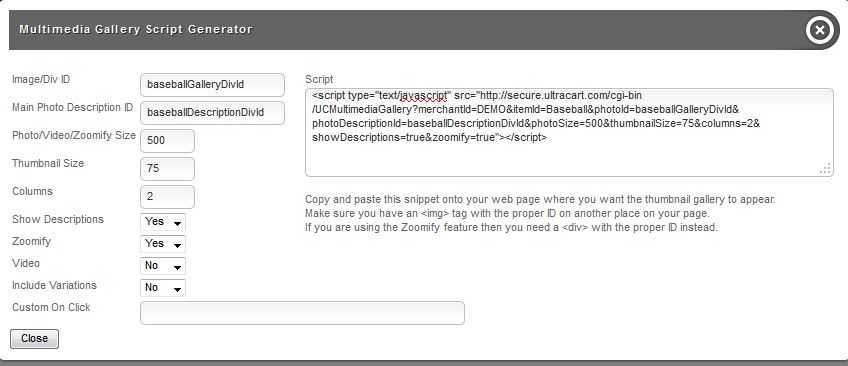
To use the url created in the screen above, I'll need to do the following:
- Include the script - add this at the end of the script since it requires the html div tags to exist
- Create a div to hold the gallery
- Create a div to hold the description
You cannot use a custom javascript function and zoomify at the same time.
Here's my sample page that will use the above gallery:
<html>
<head>
</head>
<body>
	<h4>A Baseball Gallery</h4>
	<!-- the gallery will display as a table wherever you place the script reference -->
        <script type="text/javascript" src="http://secure.ultracart.com/cgi-bin/UCMultimediaGallery?merchantId=DEMO&itemId=Baseball&photoId=baseballGalleryDivId&photoDescriptionId=baseballDescriptionDivId&photoSize=500&thumbnailSize=75&columns=2&showDescriptions=true&zoomify=true">
	<div id='baseballGalleryDivId'></div>
	<br />
	<!-- the description for each image will display in the div tag on the next line -->
	<div id='baseballDescriptionDivId'></div>


</script>
</body>
</html>
Try it out!