Authorize.net integration
- Hunter Schaeffer
- Former user (Deleted)
- Loyd James (Unlicensed)
Integrating Authorize.net into your UltraCart account
Very Important Integration Note
Turn Off Authorize.net Fraud Prevention Suite
UltraCart does not support the Authorize.net Fraud Prevention Suite. You must turn that feature off when integrating Authorize.net with your UltraCart account. You can make sure this is disabled under Authorize.Net here:
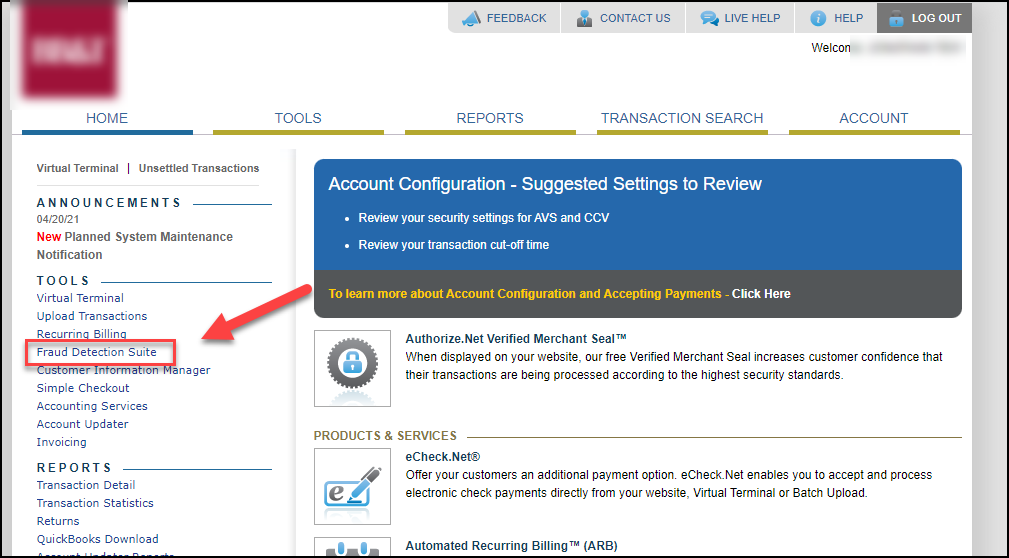
For additional fraud prevention protection, please see the UltraCart Fraud Prevention tool.
The first set of steps are listed at Authorize.Net's web site.
- Log in to your Authorize.Net account
- Navigate: Home Page → Account → Settings:
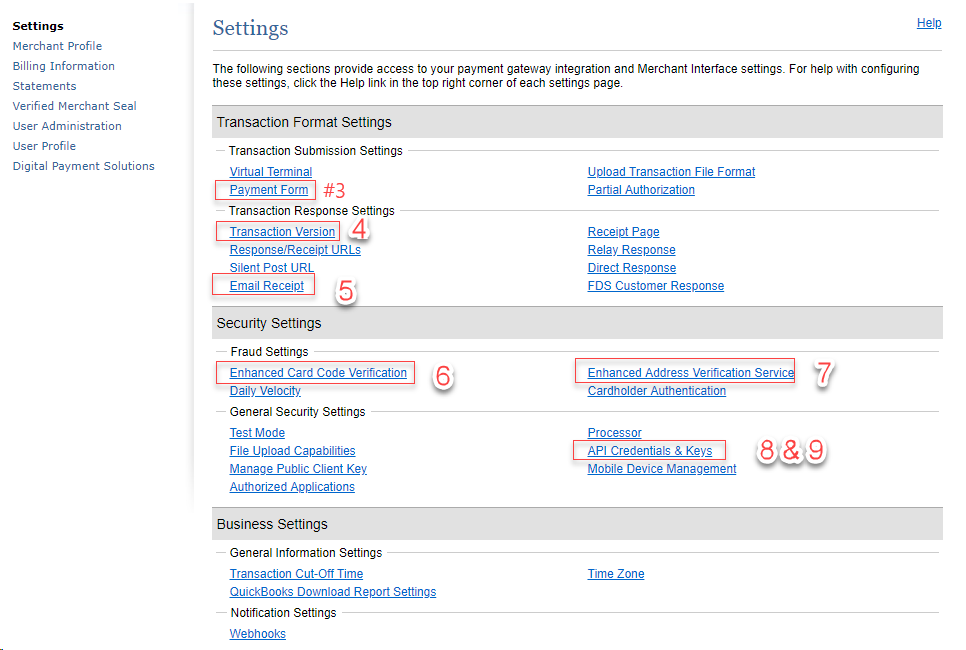
- In the first section of links click on "Payment Form". Then click on "Form Fields". Make sure none of the boxes have "Required" checked and then save. Click "Settings and Profile" on the left hand side of the screen.
- Click on "Transaction Version" and set it to "JSON" then Save.
- Click on "Email Receipts" and make sure "Email transaction receipt to customer" is not checked. Save.
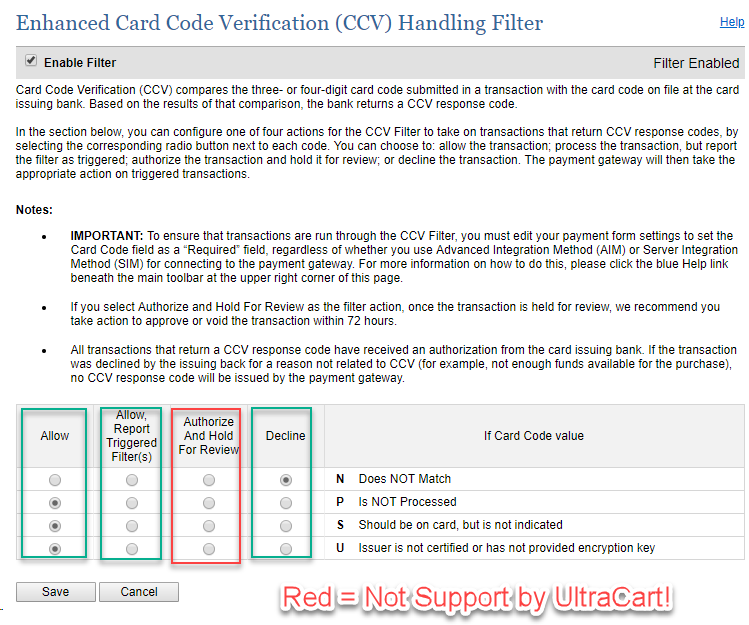
- Click on "Card Code Verification". Authorize.Net suggested to UltraCart support that (N) be checked. Individual settings may vary by merchant. Save.
- Click on "Address Verification Service (AVS)". Authorize.Net suggested to UltraCart support that (B), (E), (G), (R), (S), (U) and (N) be checked. Individual settings may vary by merchant. Save.
- Click on "API Credentials & Keys". A secret question will be asked to which you should know the answer. Answer the question and click submit. On the next page the transaction key will be disabled. Highlight the key with your mouse. Then choose Edit → Copy from the menu on your browser. This will place the transaction key in your computer's clipboard.
- You will also need to retrieve your "api_username": On the Settings page, under "Security Settings" section, Click on the link called "API Credentials & Keys": which will provide you both items together, that you must then copy and paste into UltraCart's transaction gateway configuration page.
- Log out of Authorize.Net
The following steps will take place inside of UltraCart
Step 1
Log in to your UltraCart account and Navigate:
Home → Configuration → Checkout → Payments
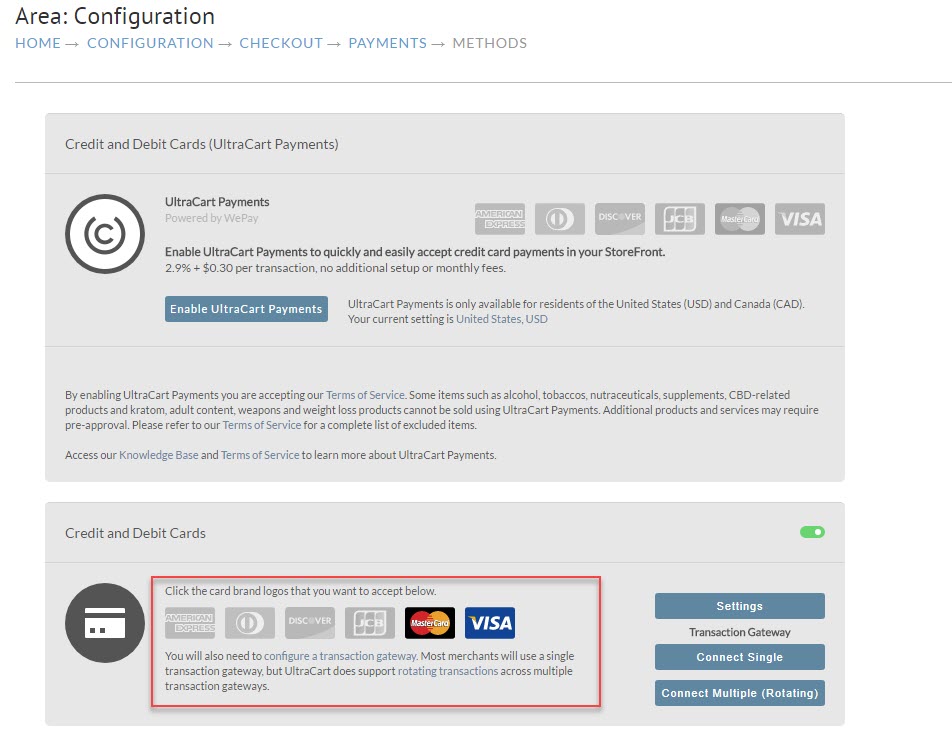
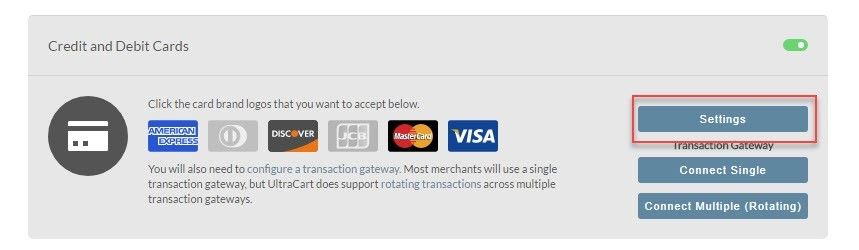
From the "Credit and Debit Cards section simply select the card types you would like to accept.
You can access additional setting options by clicking on the "Settings" button shown below.
When you click on Settings the following popup will be displayed.
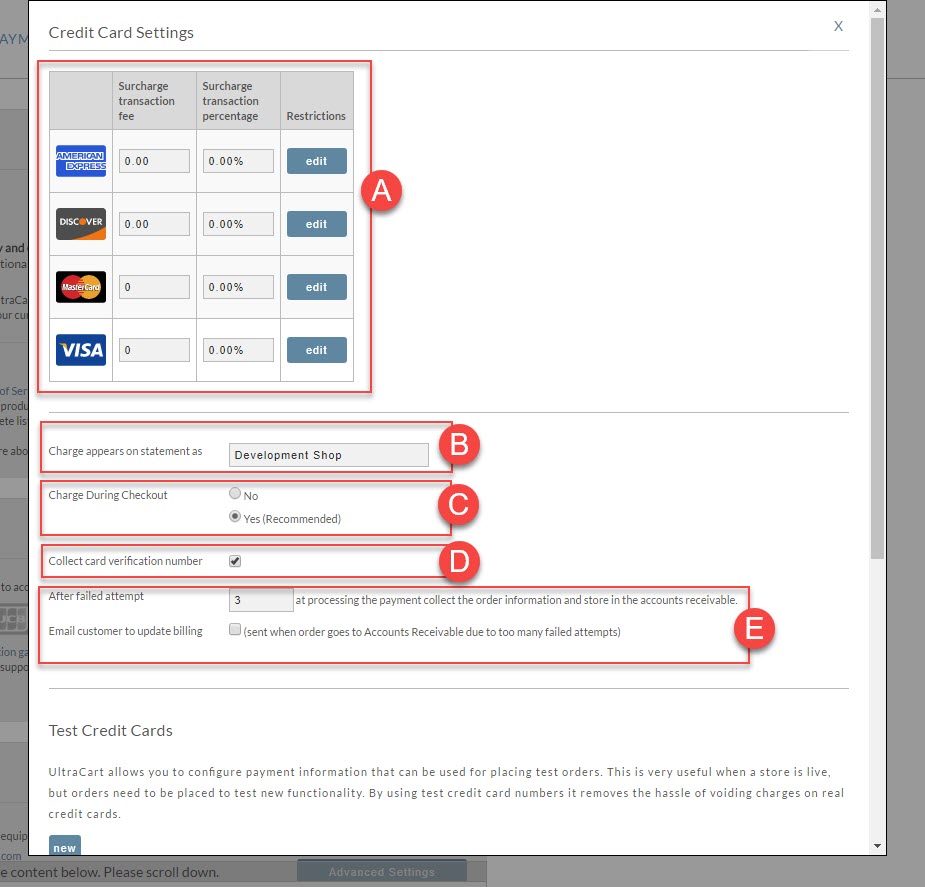
- A - Allows the setting of Surcharge fees and percentages - Not Recommended.
- B - "Charge appears on statement" (enter your business name as it will appear on their statement)
- C - Charge During Checkout
- No
- Yes (Recommended)
- D - Collect card verification number (checked is the recommended setting for most merchants)
- E - "After failed attempt" (Default setting is 3 attempts)
Simply click anywhere on the screen to close the window.
Step 2
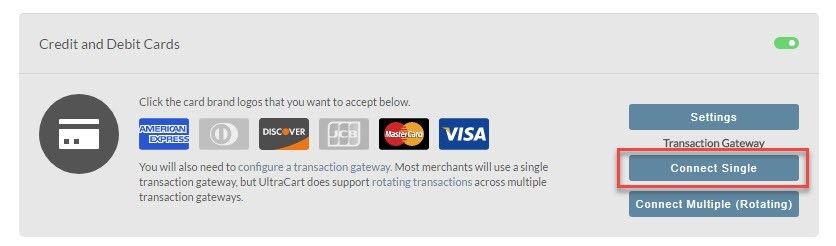
To configure the Authorize.net 3.1 gateway click on the Connect Single button as shown below.
The next screen will present an alphabetical listing of our integrated Payment Gateways.
Clicking on the check box to the left of Authorize.net JSON will expand the settings portion.
![]()
Your final objective is to enter the credentials that you were given when signing up with Authorize.net.
- Authorize.Net API Login
- Authorize.Net Transaction Key
- Authorize.Net Send Recurring Billing Flag (set to yes if instructed to when you establish your account)
- Methods (select card types your accounts is configured to process). You can also authorize E-Checks.
Click the Save button when finished.
Congratulations! Your UltraCart account is now configured to use Authorize.Net
Reviewing Transaction History of placed orders
When an order is placed that has not been successfully processed for payment, it will go into the Accounts Receivables department. There, you can review the transaction responses in order to determine why the transaction failed. To see the transaction history of an order in the A/R department, navigate:
Main Menu > Operation > Order Management > Accounts Receivables
![]()
Click on the hyper-linked OrderID of the order (it should be color coded in pink signifying a "bad transaction"). Then scroll down below to the "Last Transaction" section. It appears below the "Payment" section and above the "Merchant Comments".
![]()
If there has been more than one transaction recorded, you'll also see a link that will take you to the complete transaction history.
When viewing the transactions the following authorize.net documents will provide you more details on the various response codes. These should help you determine the exact cause of the failed transaction:
- https://developer.authorize.net/api/reference/responseCodes.html
- https://support.authorize.net/authkb/index?page=content&id=A50
- http://www.authorize.net/support/CNP/helpfiles/Account/Settings/Security_Settings/Fraud_Settings/Address_Verification_System_(AVS).htm
Frequently Asked Questions
FAQ's - Click any question to reveal or hide the answer.)