Item Assignment - Catalog
- Perry Tew
This information is for the legacy Catalog that has been replaced by UltraCart StoreFronts as of May 2015.
This information remains for long time merchants who may still be using a legacy catalog. Please see the StoreFronts User Guide for current catalog technology.
Introduction
The Item Assignment screen is a mini-app used to create a catalog group tree complete with items. The app provides Create, Read, Update, and Delete operations for catalog groups; complete with two grids for managing large numbers of item assignments.
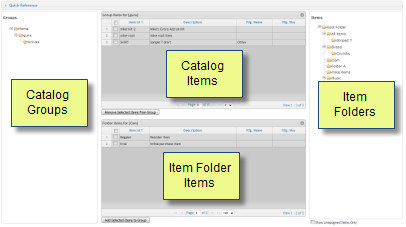
Figure 101 - Item Assignment Screen
Overview
Typical usage for the Item Assignment app follows this course:
- Create all the catalog groups using the left tree
- Add items to the catalog groups using all both trees and grids
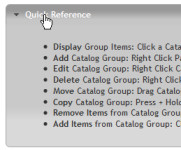
![]() Tip: The Item Assignment has a quick reference at the top of the screen. Click the "Quick Reference" link and a quick list will display showing how to perform the key operations.
Tip: The Item Assignment has a quick reference at the top of the screen. Click the "Quick Reference" link and a quick list will display showing how to perform the key operations.

Catalog Group Tree Maintenance
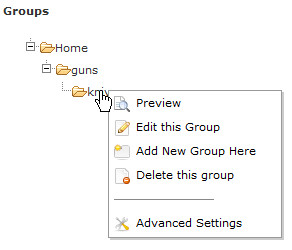
The Catalog Group tree makes heavy use of a context menu. Right click on any catalog group, and a context menu will appear. The menu items are explained in detail later. For now, just remember to right click if you're unsure what to do.
Creating a Catalog Group
To create a new Catalog Group, right click the Catalog Group you wish to be the parent group, and select "Add New Group Here" from the context menu. A pop-up screen will display to input Catalog Group fields.
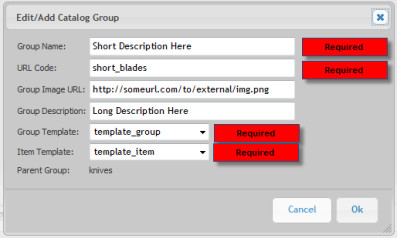
Catalog Group Field | Description |
Group Name | [Required] A short description of the catalog group. This field is often rendered on the store page offering a brief description of the page contents. |
URL Code | [Required] The URL code is the part of the URL made up by this catalog group. The full URL will be: |
Group Image URL | The Image URL allows for external images. This field is usually left blank. Images from the multimedia gallery are typically used instead. See the section on Catalog Group templates for examples of multimedia gallery usage. |
Group Description | A long description of the catalog group. This field is often rendered in a catalog group template. |
Group Template | A template for rendering a catalog group. This template usually provides a list of sorts for displaying items. |
Item Template | A template for rendering a catalog item |
Parent Group | A read-only field providing a reminder of the parent Catalog Group. |
When all required and desired fields are filled, click the OK button to create the Catalog Group.
Updating a Catalog Group
Updating a Catalog Group is nearly identical to Adding a Catalog Group. To edit a Catalog Group, right click a Catalog Group and choose "Edit this Group" from the context menu. The same pop-up screen as described in "Adding a Catalog Group" will appear. Edit appropriately and click OK to save.
Deleting a Catalog Group
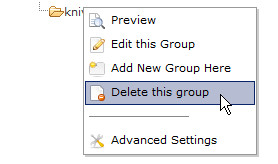
To delete a Catalog Group, right click the Catalog Group and select "Delete this Group" from the context menu.
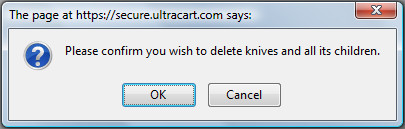
A confirmation pop-up will ensure you really wanted to delete the group. Click OK to finalize the deletion.
Moving a Catalog Group
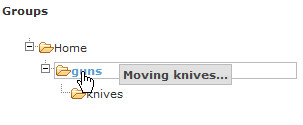
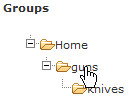
Moving a Catalog Group is accomplished by dragging a Catalog Group and dropping it onto a new parent. Click and drag the group to move it. During the move, a gray box will display the group being moved. A blue outline will highlight the new parent to help make the move easy.
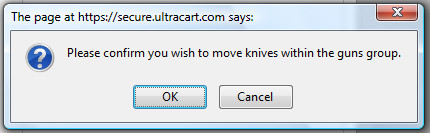
A confirmation pop-up will finalize the move.
Copying a Catalog Group
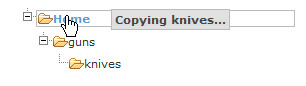
Copying a Catalog Group is identical to moving a Catalog Group with the only difference being the Control [Ctrl] key. To copy, hold down the Ctrl key while dragging and dropping. A red message will appear at the top of the Catalog Group folder when copy mode is activated.
While dragging, the gray box will say "Copying" instead of "Moving".
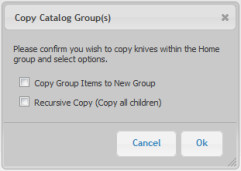
When you drop the Catalog Group, an options window will appear giving you the options of copying items, and performing a recursive copy.
Previewing a Catalog Group
To preview a Catalog Group page, right click a Catalog Group and select "Preview" from the context menu. A separate window will open displaying the Catalog Group as it will appear to a customer. This handy feature allows for real-time configuration of Catalog Groups.
Advanced Settings
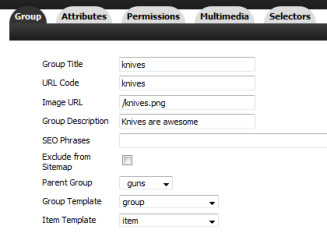
The only remaining context menu item not mentioned is the Advanced Settings item. Right clicking a Catalog Group and selecting "Advanced Settings" will display a pop-up window of the Catalog Group edit screen. Some functionality is duplicated between the Catalog Group edit and the Item Assignment screens, but the Catalog Group edit screen contains many more options for a Catalog Group.
Please notice that the first tab of the Catalog Group edit screen contains similar fields as the Item Assignment edit window. Please don't update these fields in the pop-up window below. This pop-up window cannot communicate these changes to the Item Assignment app. Editing these values in both the Item Assignment and Catalog Group edit screens will lead to indeterminate results.
Assigning Items
Adding Assignments
Quick List for assigning items
- Click on a Catalog Group
- Click on an Item Folder
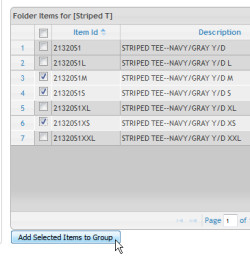
- Select the items in the bottom grid (from Item Folder)
- Click the "Add Selected Items to Group" button
Detailed Instructions
First, click on a Catalog Group.
This will load the existing item assignments into the top grid. The top of the grid will display the Catalog Group.

Second, click on an Item Folder (right tree).
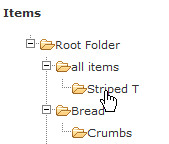
All items in the folder will display in the bottom grid (unless "Show Unassigned Items Only" is checked, but we'll get to that shortly).
To assign items, select them in the bottom grid and click the "Add Selected Items to Group" button located below the bottom grid.
Removing Assignments
Quick List for removing assignments
- Click on a Catalog Group
- Select the items in the top grid you wish to remove from the Catalog Group
- Click the "Remove Selected Items from Group" button
First, click on a Catalog Group.
This will load the existing item assignments into the top grid. The top of the grid will display the Catalog Group.
Check the items you desire to remove from the Catalog Group and click the Remove button located below the top grid.
![]()
Finding Unassigned Items
At the bottom of the Item Folders tree (right side) is a check box titled "Show Unassigned Items Only". Checking that box will reload the Item Folder tree with only those items that do not belong to any Catalog Group. This is a great way to examine item coverage.
![]()
Grid Features
Sorting
To sort either item table, click a blue column header.

Page Navigation
The item lists for each table are broken up into pages to keep everything running fast. To view a different page of items, use the navigation fields at the bottom of the grid.
![]()