QuickBooks Desktop - Terms and Lists
- Perry Tew
- Jonathan Tew
- Loyd James (Unlicensed)
- Hunter Schaeffer
QuickBooks Terms and Lists
QuickBooks Terms and Lists are applicable only to merchants that will download orders to QuickBooks and that will also utilize UltraCart's Customer Profiles. These Terms and Lists should not be confused with other QuickBooks Codes that are required when configuring QuickBooks for downloading orders. For more information about QuickBooks Codes, see Section 13 - UltraBooks.
By entering the Payment Terms, QuickBooks Classes and Sales Rep Code a single time on the QuickBooks Terms and Lists screen (in UltraCart), they will then appear in drop-down lists to simplify entry when editing your Customer Profiles.
Terms and Lists descriptions
| ITEM | DESCRIPTION |
|---|---|
Payment Terms | If you would like to set the terms by customer profile you can configure the list of available terms here. These should match up identically with the terms list in your QuickBooks (complete those first). Each term should be no longer than 31 characters. Place each term on a different line. |
| Sales Rep Code | If you would like to link (and track) orders and customer profiles to sales representatives in your organization, then enter the list of codes that you would like to use. Each sales rep code should be no longer than 10 characters long. Place each sales rep code on a different line. |
QuickBooks Classes | Customer Profile: If you would like to set the QuickBooks class by customer profile you can configure the list of available classes here. These should match up identically with the class list in your QuickBooks. Each class should be no longer than 31 characters. Place each class on a different line. Users of BEOE: If you would like to assign a QB class to orders placed via the Back-End Order Entry tool, you can configure a QB class for each user on the account. Please note that this will override any class associated with the customer profile. This type of configuration is typically used to track a commission structure for inside sales reps. Each of your configured users will appear in this section with a text box provided to enter their unique code. |
Configuring the Terms and Codes
QuickBooks Configurations
The Payment Terms, Sales Rep Code and QuickBooks Codes should be defined in QuickBooks first.
Payment Terms list
Open (run) your QuickBooks software and from the main menu, navigate to:
Lists → Customer & Vendor Profile Lists → Terms List
The following screen shows the above path in QuickBooks.
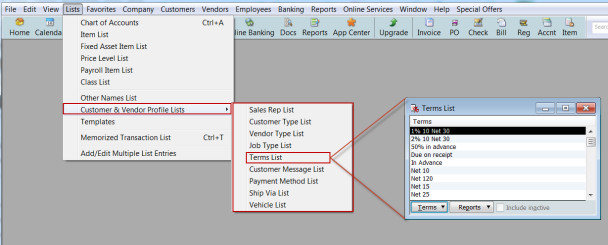
When the Terms List appears, click the "Terms" button in the lower left corner to select your editing option, (i.e., New, Edit, Delete, etc.)
Sales Rep Codes
Open (run) your QuickBooks software and from the main menu, navigate to:
Lists → Customer & Vendor Profile Lists → Sales Rep List
The following screen shows the above path in QuickBooks.
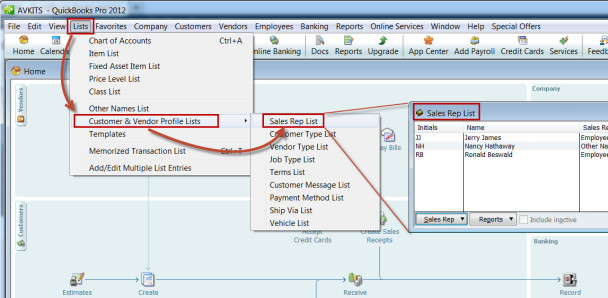
Editing the Sales Rep List is about the same as we learned earlier with the Terms List. Click the Sale Rep button in the bottom, left of the Sales Rep List and select your editing needs from the list.
Classes Lists
Open (run) your QuickBooks software and from the main menu, navigate to:
Lists → Class Lists
The following screen shows the above path in QuickBooks.
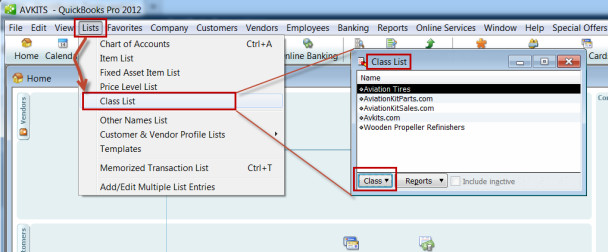
When the Class List appears, click the "Class" button in the lower left corner to select your editing option, (i.e., New, Edit, Delete, etc.)
If you cannot locate Classes, then it must be enabled. In QuickBooks navigate to:
Edit → Preferences → Accounting → Company Preferences
![]()
UltraCart Configuration
Now that your QuickBooks configurations are complete, it's time to configure the exact same codes (those that you want configured) in UltraCart. Log in to your UltraCart account and Navigate to:
Main Menu → Configuration → Back Office [section] → QuickBooks Terms and Lists
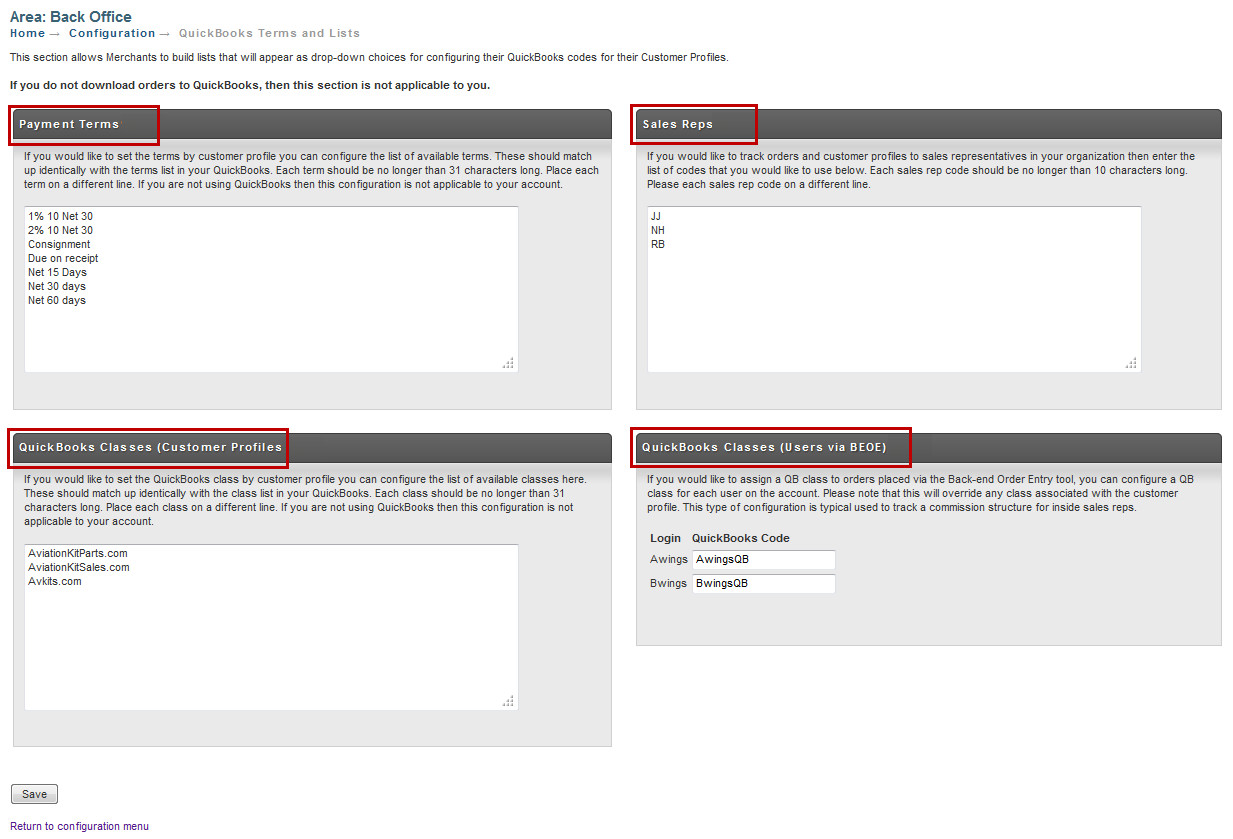
Enter your information for each section. Click the save button when finished.
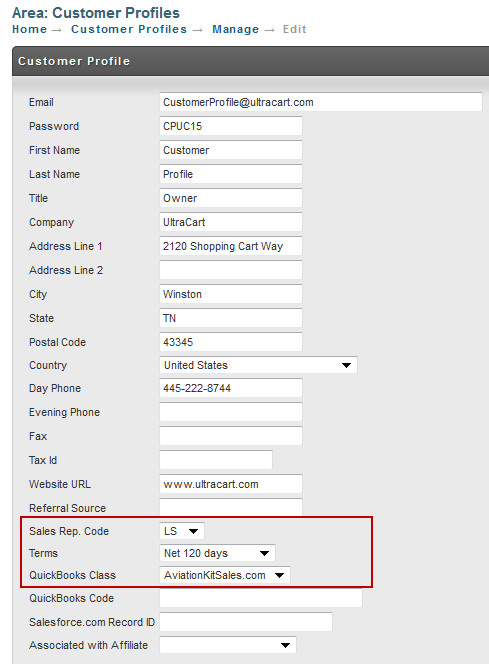
Customer Profile (edit) Screen
Once you have configured both QuickBooks and UltraCart codes they will appear at the Customer Profile editing screen. In UltraCart, Navigate to:
Main Menu → Customer Profiles → Manage → Edit
Below is a sample Customer Profile screen showing the Sales Rep. Code, Terms and QuickBooks Classes fields with drop-down choices. You would simply click the down arrow to select your choices for each field. Click the save button when finished.
- ff8080814e02fcbc014e02fcffdf0008 - examine