Adding new tab to Item page
- Chris Torigian
- Hunter Schaeffer
- Loyd James (Unlicensed)
About
This tutorial will guide you through the process of adding a new TAB to the item page.
Visual Builder Enabled Themes
This tutorial will guide you through the process of adding a "Facts" tab to the item page in the Elements theme. This process will apply to other Visual Builder enabled themes.
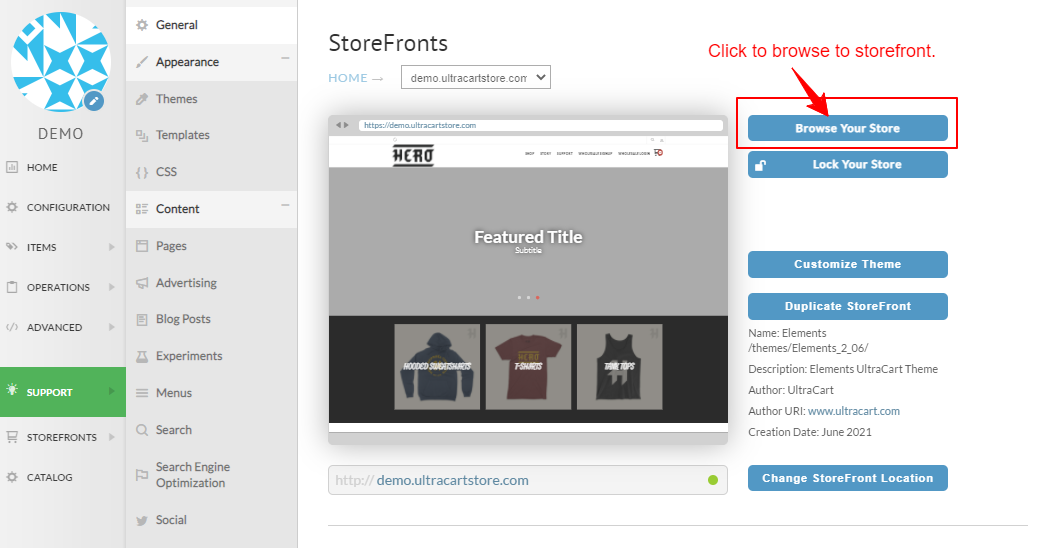
Log into Ultracart, then navigate to the storefront host, then click the "Browse Your Store" button that appears to the right of the storefront preview image:
Next, navigate to an item page and then click the 'Edit' button in the top left corner of the page:

(Please note that you must be actively logged into the UltraCart backend in order to see the Visual Builder menu at the top of the page.)
Next, scroll down to the tabs, there you'll see an "Add Tab" button:
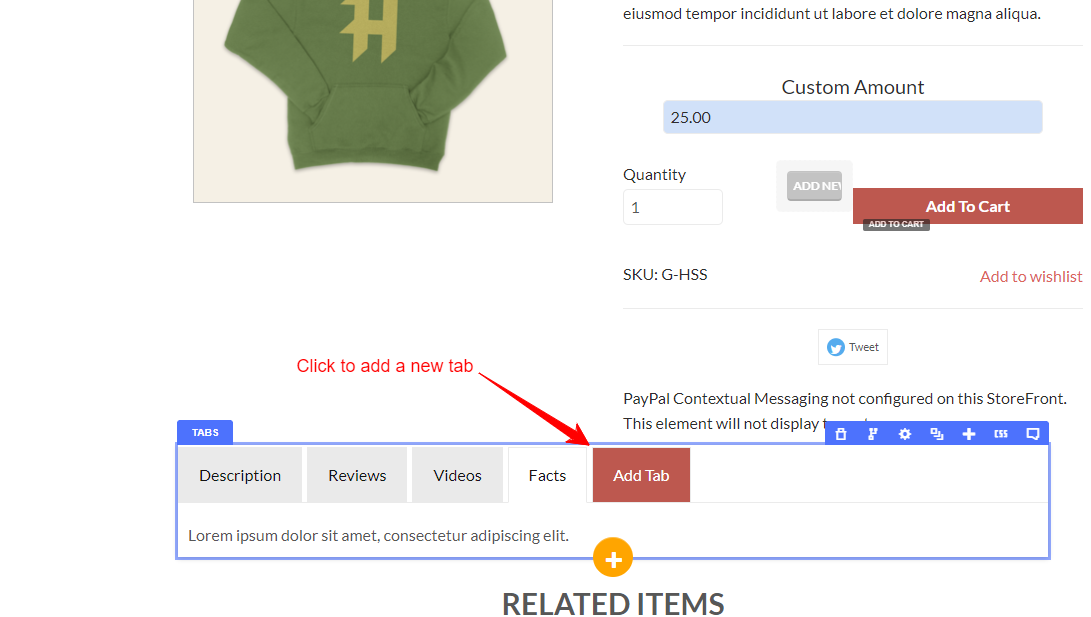
Clicking the tab adds the new tab, and you'll be prompted to "Add element" to the tab. In this case, I added a Text Block element (which initially appears with lorim Ipsum placeholder text .)
Please note: The new tab will initially appear with a placeholder for the tab name "Sample Tab Title", to rename the tab title, you'll need to go ahead and save the changes (click the save button that appears tin the menu along the right side of the page), then exit the Visual Editor by highlighting and removing the portion of the URL "?editMode=true" then reloading the page.
Once the page loads in the non editing view, click the edit button again to engage the Visual Editor. Then scroll back down and highlight the tab section and click the 'H' or the three boxes icon in the visual editor menu to open the Hierarchy panel, the scroll over the new tab and click the setting icon then in the setting panel, change the tab title, then click the save button to save the changes.
Please see the screenshot video for more details to this process:
Legacy Non Visual Builder themes
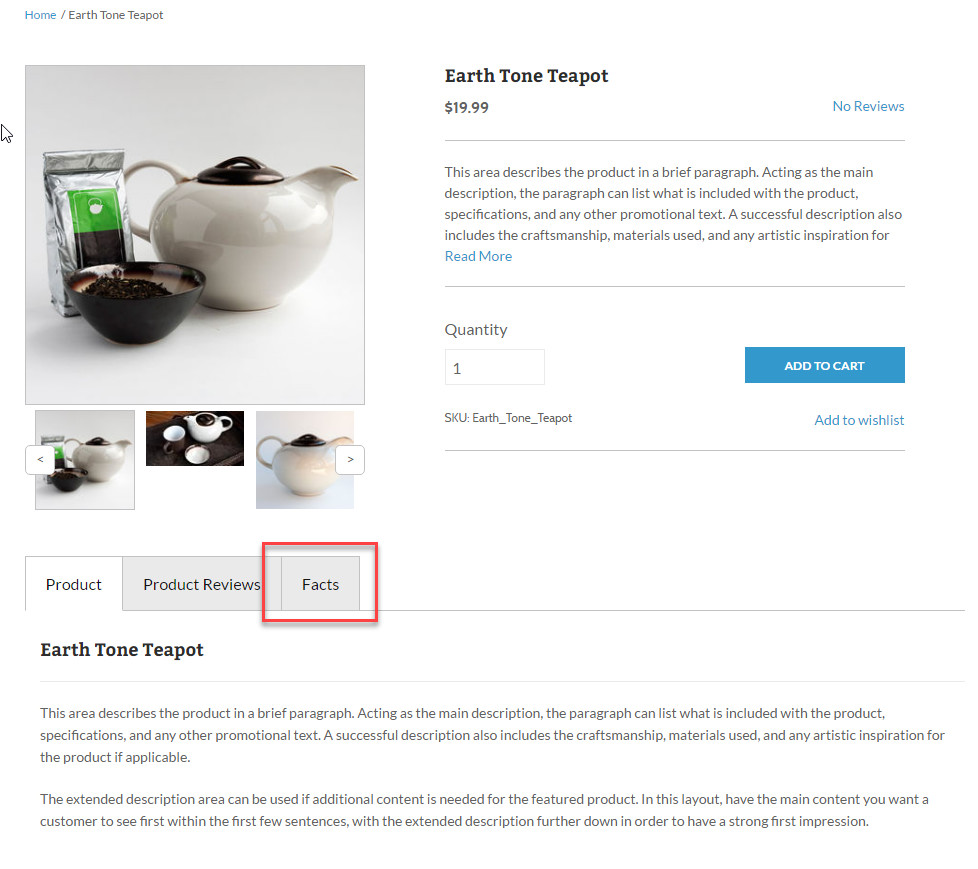
This tutorial will guide you through the process of adding a "Facts" TAB to the item page of the Mr Teas theme. This tab will automatically display if Facts information is added to the item.
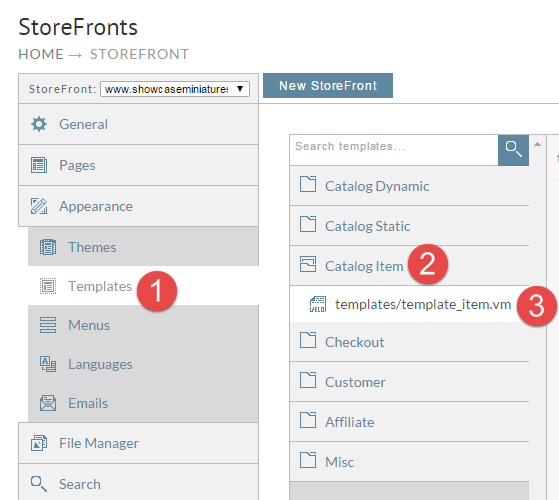
First click on Templates, Catalog Item, and then templates/template_item.vm as shown below.
The first thing we need to do is add a new attribute to the top item template, this can be done with the following code, for this example we will use a multiline attribute for "Facts".
## uc:item-attribute-multiline="facts"
The full code block at the top would look something like this.
## uc:theme-attribute-boolean="Information Only Theme"
## uc:theme-attribute-boolean="Use Cart Snapshot||none"
## uc:theme-attribute-string="Item No Image Available Image URL||.UC-default-item-multimedia"
## uc:theme-attribute-string="Item Image Processing URL|/core/assets/imgs/image-processing.png|.UC-default-item-multimedia"


## uc:item-attribute-multiline="facts"
Now that we have our item attribute we can add our code.
      #if ($item.getAttribute("Facts"))
      	<li id="product-facts-tab" data-title='${i18n.write("theme.templateItem.facts", "Facts")}' data-small-title='${i18n.write("theme.templateItem.description", "Facts")}'>
          <section class="ultratabs-tabs-content" id="panel-product-description">
              <article>
                  <h1>Facts</h1>
                  <div class="half-margin-top">$item.getAttribute("Facts")</div>
              </article>
          </section>
      	</li>
      #end
to add the tab to the page as shown below. This should be inside of the ul tag with the class of ultratabs around line 283.
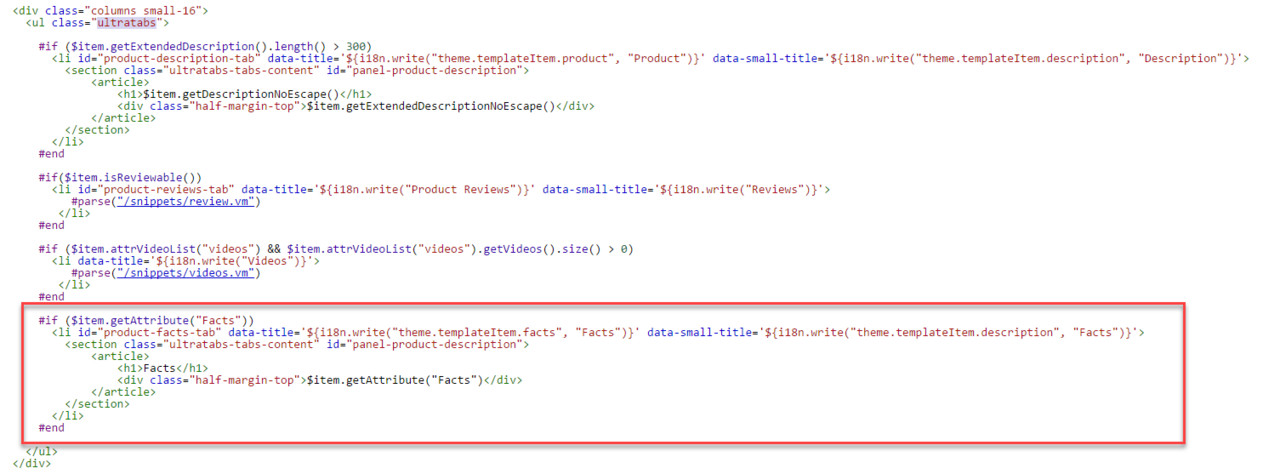
This code will contain both the tab and the content within a single block of code.
Now any item where we add content for Facts, the facts tab will appear.