/
Creating a Browser Key for a JavaScript checkout
Creating a Browser Key for a JavaScript checkout
- Perry Tew
- Chris Torigian
Owned by Perry Tew
Last updated: Aug 09, 2018 by Chris Torigian
The Browser key is used for the Javascript checkout only.
Steps
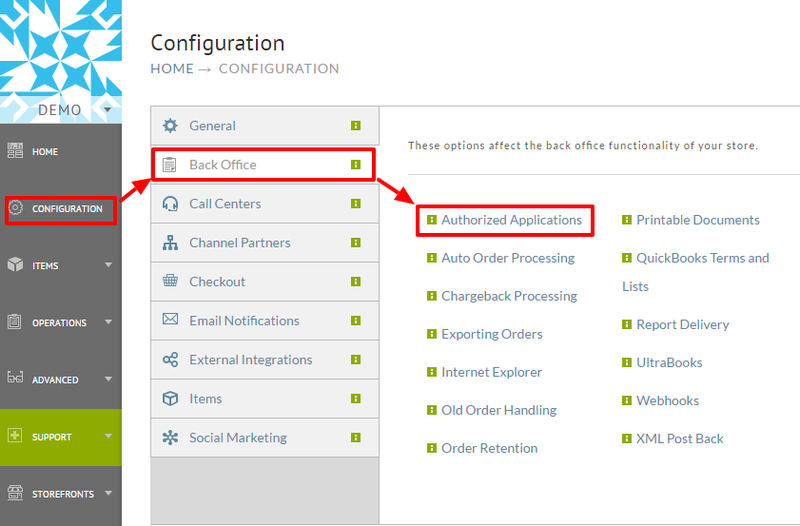
Log into your UltraCart account and then navigate:
Main Menu → Configuration → (middle menu) Back Office → Authorized Applications
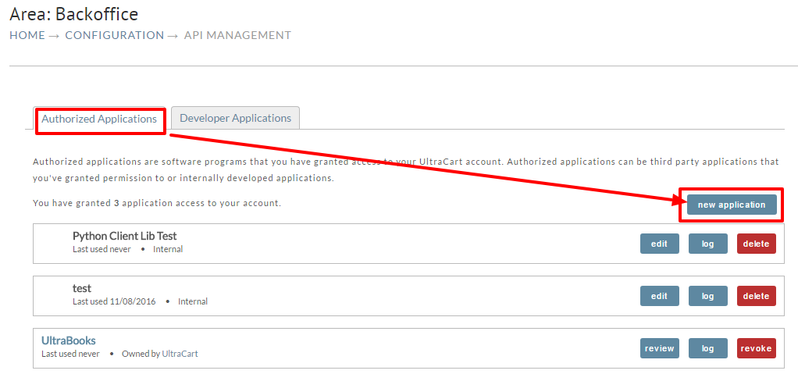
From the Authorized Applications page, select the "Authorized Applications" tab:
Then in the configuration section that appears, give your Application a name, then select Browser Key from the drop down list for "Authentication Type",and, optionally, enter in the Allowed HTTP Referrers. Then in the permission section to the right, select both the sRead/Write permissions for the API:
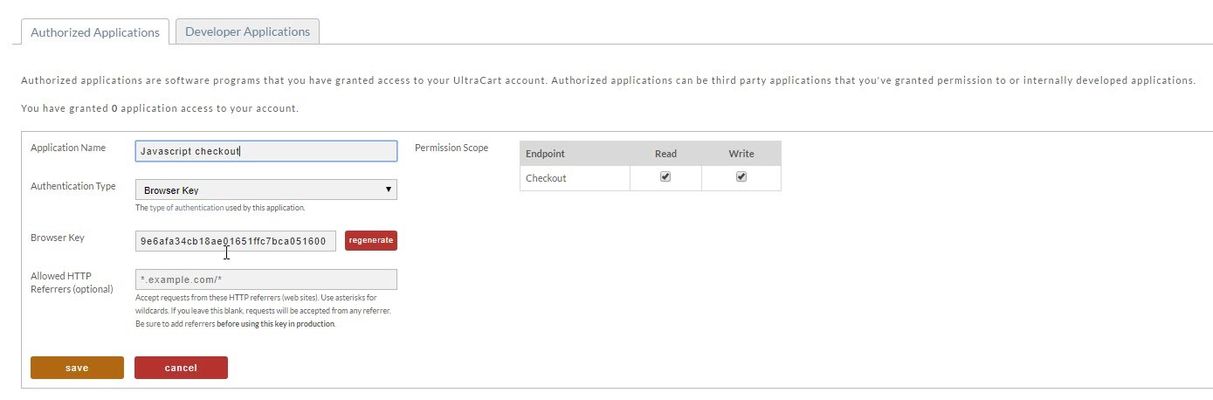
Click Save to save your Browser Key.
, multiple selections available,
Related content
API Simple Key
API Simple Key
Read with this
Using a StoreFront as a Checkout Only
Using a StoreFront as a Checkout Only
More like this
SSL Certificate Custom
SSL Certificate Custom
More like this
Signup with UltraCart
Signup with UltraCart
More like this
Configuring PayPal at UltraCart
Configuring PayPal at UltraCart
More like this
Channel Partner API - REST Guide
Channel Partner API - REST Guide
More like this