Storefronts Experiments and Split Tests
- Jonathan Tew
- Hunter Schaeffer
- Loyd James (Unlicensed)
The StoreFront Visual Builder allows you to create server side A/B tests. This means that you can create the content for your test using the same tools as the rest of the content of your StoreFront is created with. You can quickly duplicate a section of your site and run it in a test. The Experiment engine leverages the UltraCart Analytics engine to provide this functionality for free. This tutorial will cover the basics of setting up and running an experiment.
Features
- Completely integrated with StoreFronts Visual Builder
- Server side rendering of content
- Optimize on numerous metrics
- Detailed statistics on the performance of experiment
- Only counts statistics for customers that actually see the experiment content
- Filters out search engine crawler sessions and traffic from logged in user IPs
- Automatic traffic shifting during the experiment towards the winner
- Automatic cleanup of the experiment and promotion of the winner
- Free!
Types of Experiments
The StoreFront Experiments system allows for three different types of experiments:
- On Page Content
- URL
- Theme
Experiment - On Page Content
On Page Content experiments allow you to test small portions of pages such as call to actions (CTAs), etc.
Adding an Experiment to the Page
Open your site and engage the visual editor. Next, open the hierarchy sidepanel.
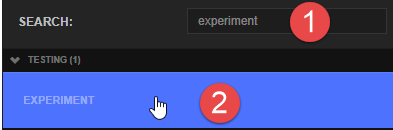
The first thing you have to do is add an Experiment element to the page. Locate the area of the page that you want to add an Experiment, click the + button and then select Experiment as the element type as shown below.

The quickest thing to do is just type "experiment" into the element type search box and then click on the Experiment element when it highlights or hit the ENTER key.
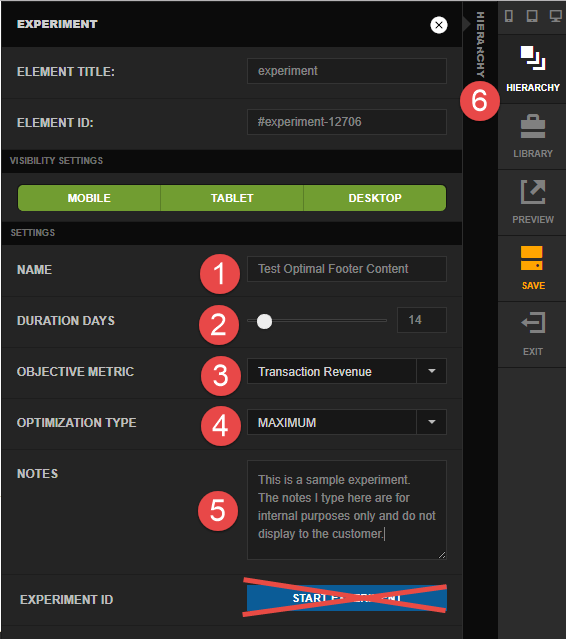
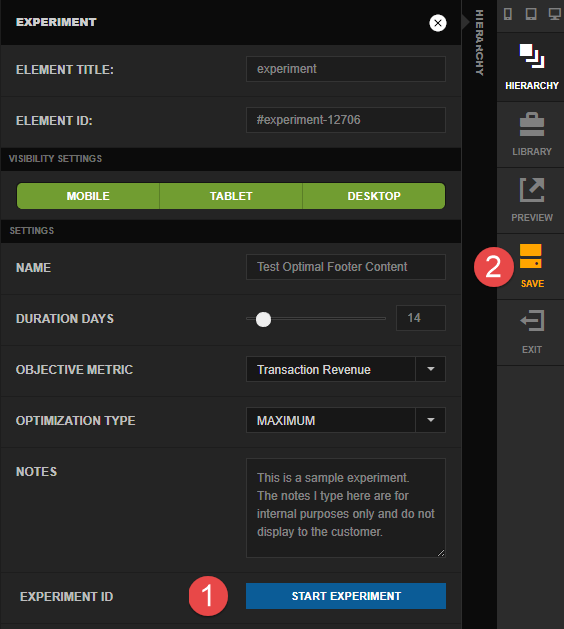
When the Experiment settings sidepanel opens, go ahead and follow these steps to fill out the name, duration days, objective metric, optimization type, and optionally the notes. DO NOT CLICK START EXPERIMENT YET!. When you are done click on the collapsed Hierarchy side panel as shown below in step 6.
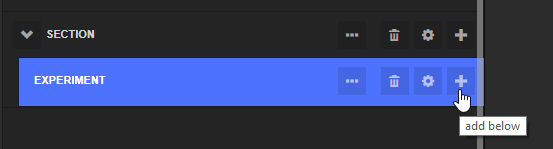
On the hierarchy panel click the plus button on the Experiment as shown below.
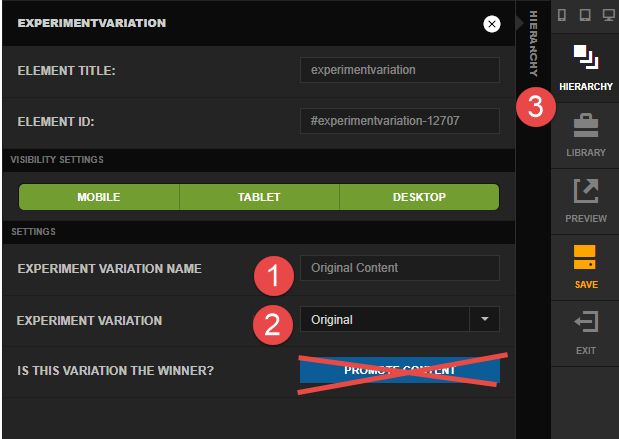
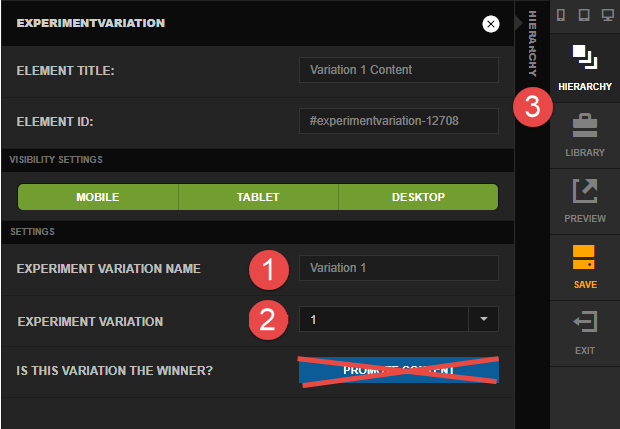
This will create our first Experiment Variation element. Give the variation a name and select "Original" for the Experiment Variation. DO NOT CLICK PROMOTE CONTENT! When finished click back to the hierarchy.
Click the plus button on the Experiment object again to add the second variation. Now that we select Experiment Variation as "1" instead of Original this time.
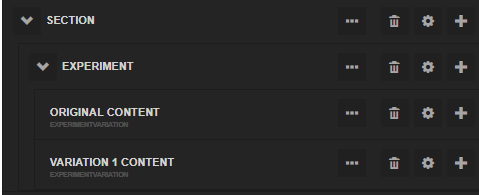
At this point we have an Experiment with two variations that will be tested. The hierarchy looks like this:
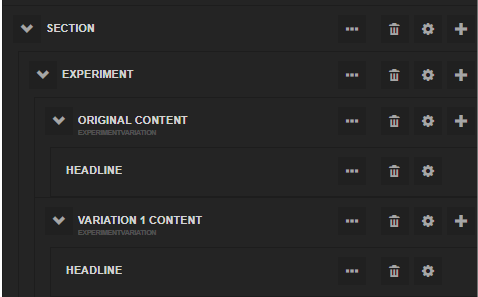
Continue adding content below each variation. In this example we are testing two different headlines so the hierarchy looks like this:
When we have the content at the desired state, click on the settings icon for the Experiment. Click the Start Experiment and once the Experiment ID is shown click the Save button on your page.
Experiment - URL
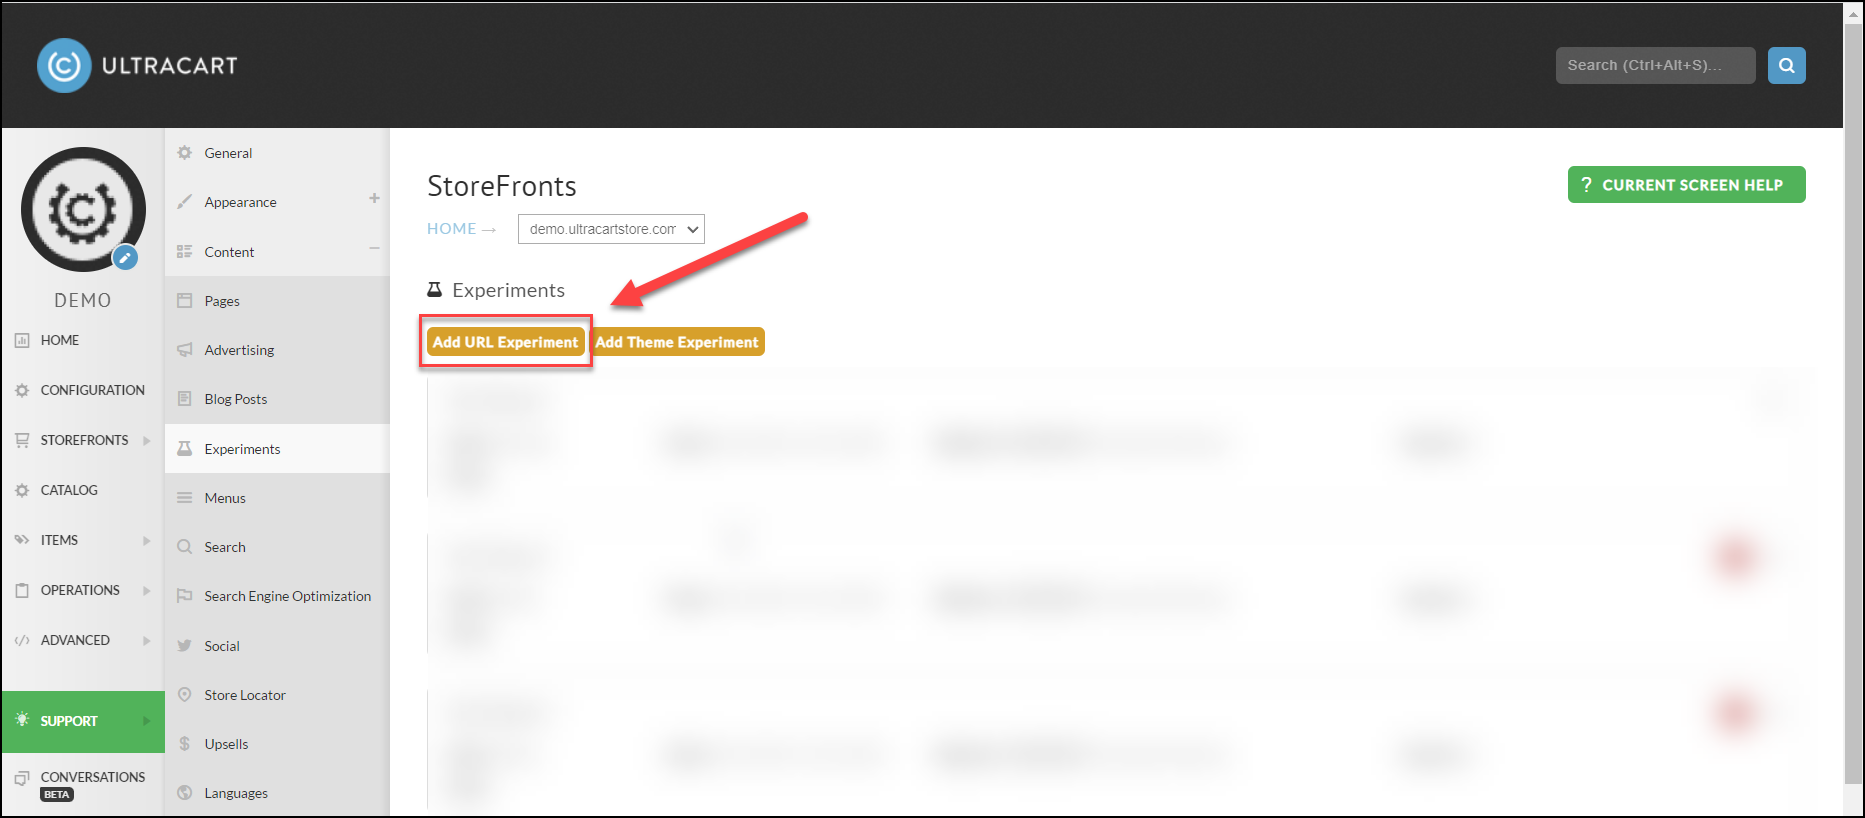
If you have two different URLs (such as landing pages) that you want to test against each other the URL test is good solution. Under the StoreFront → Content → Experiments click on the "Add URL Experiment" button as shown below.
This will open a dialog where you configure the details about the experiment. You need to specify at least two URLs to test against. These URLs should be on your StoreFront like the example below.
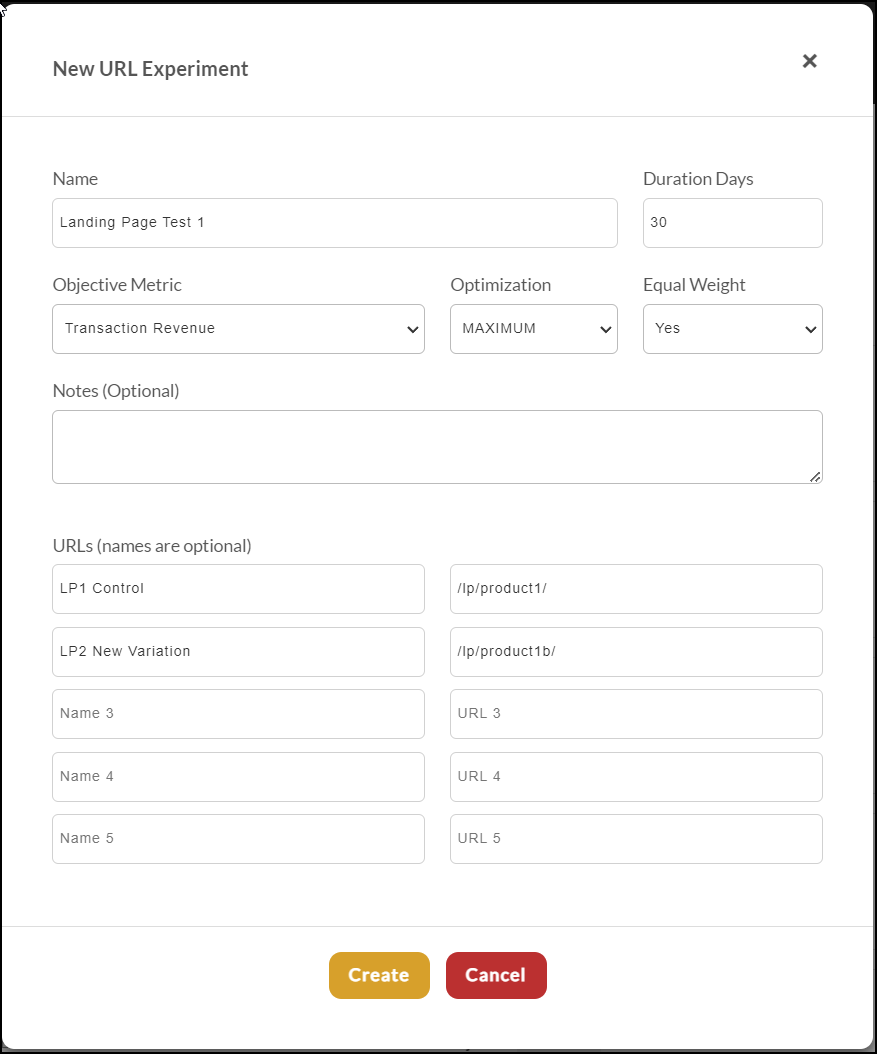
Once the experiment is created the system will give you a router URL like the example above. This URL is what you should target traffic to (such as from your PPC advertising). The router will automatically split the traffic to the landing pages according to the configuration.

Experiment - Theme
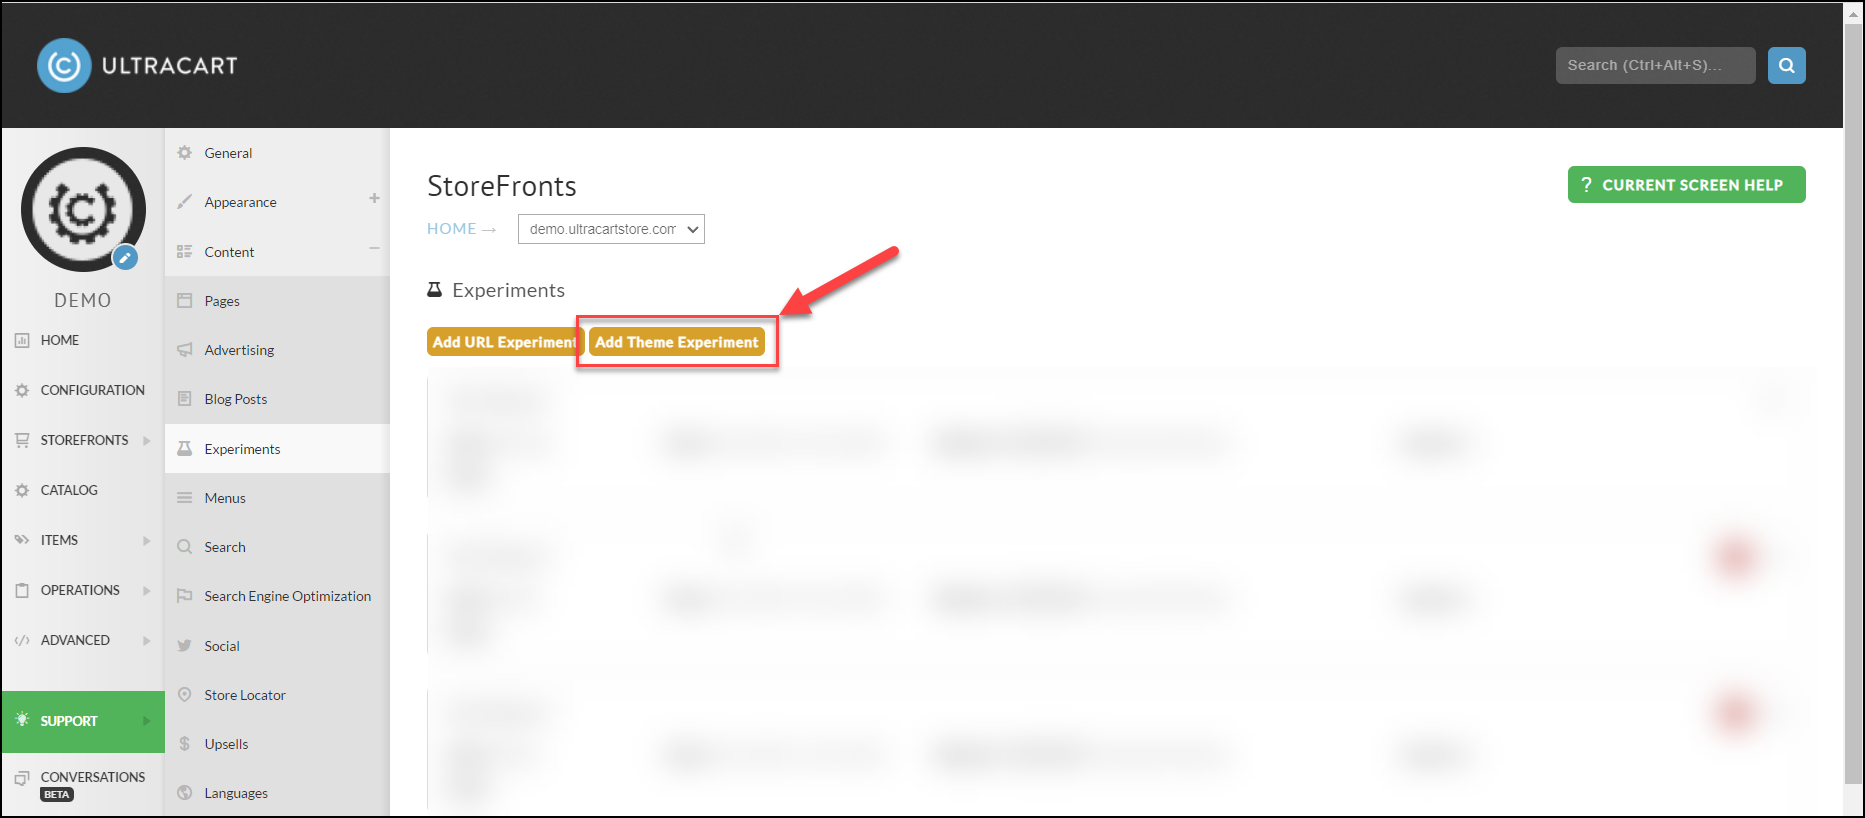
A theme experiment allows you to test one StoreFront theme against another. This test can be useful if you have two entirely different checkout styles that you want to test against each other. To get started with a theme experiment click on the "Add Theme Experiment" button as shown below:
Once you click the button a dialog will appear that will allow you to configure the experiment. At least two themes must be selected.
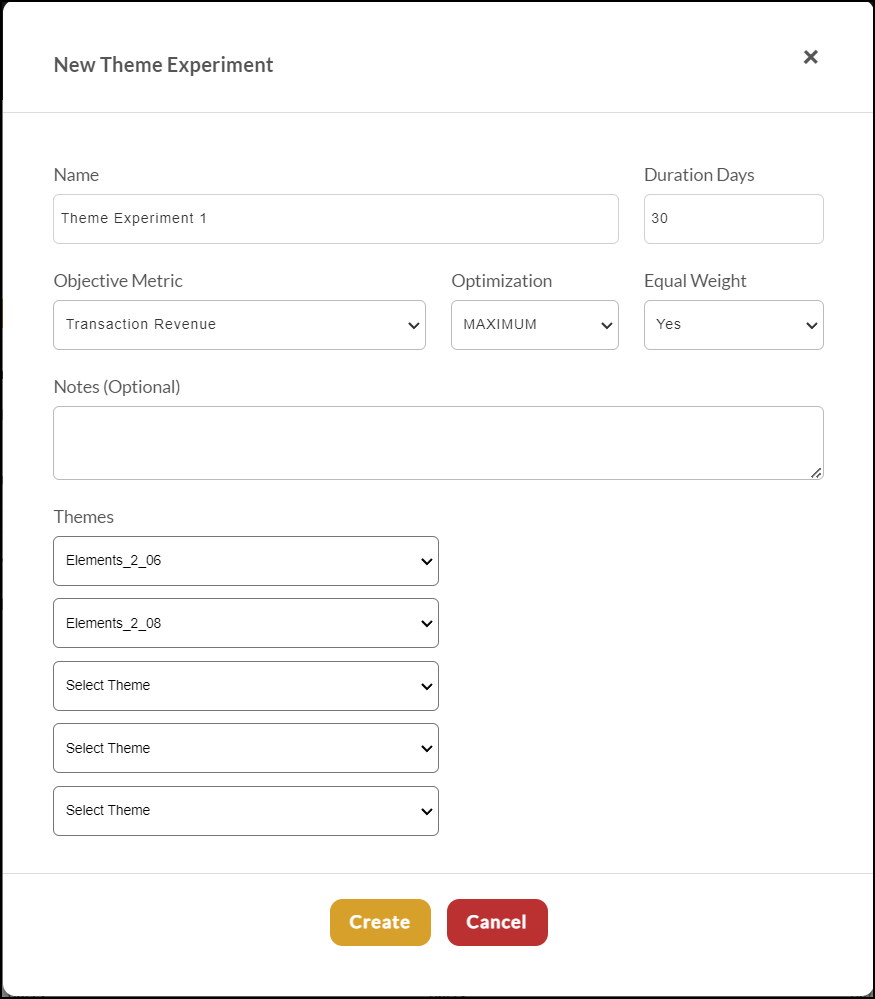
Only one theme experiment can be active at a time. If you try to create a new experiment before ending the previous one the system will give you an error message.
Viewing the Results
The progress and results for your Experiments are visible under StoreFront → Content → Experiments.
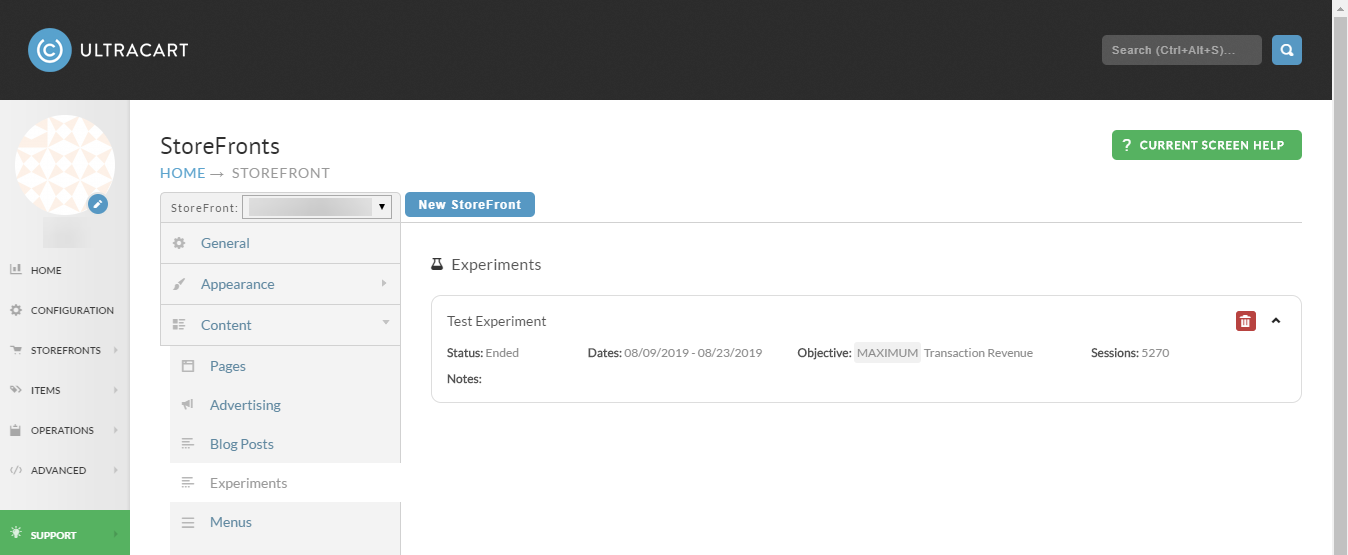
Each experiment can be expanded to show additional details.
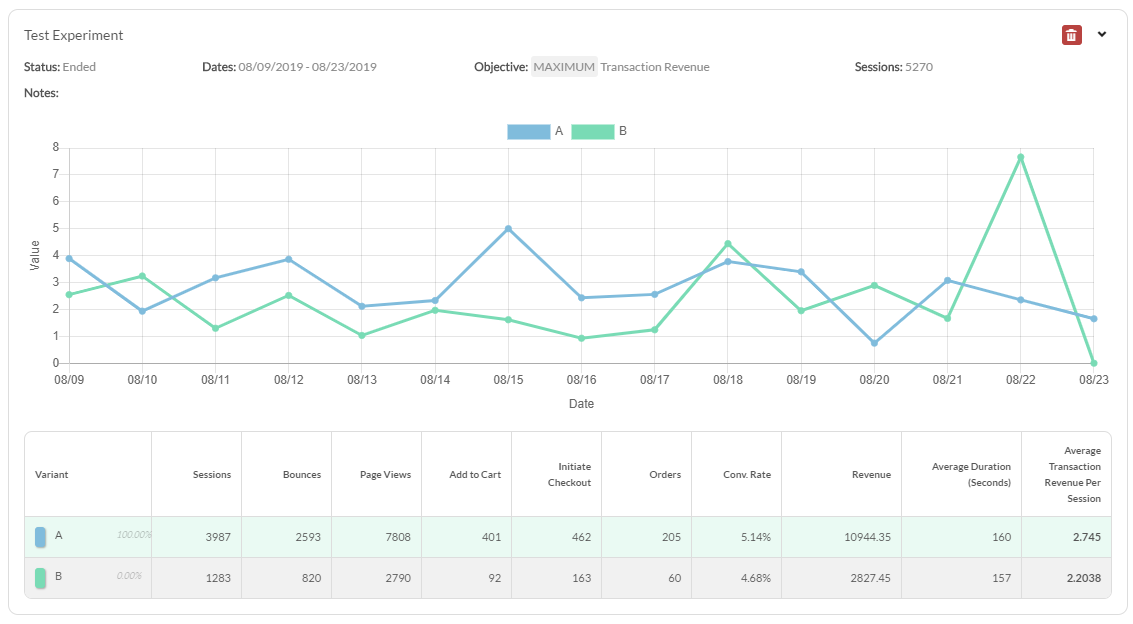
| Column | Description |
|---|---|
| Sessions | The total number of sessions (visitors) |
| Bounces | Number of sessions that bounced |
| Pages Views | Number of page views |
| Add To Cart | Number of times 'Add to Cart' button was clicked |
| Initiate Checkout | Number of times a checkout was initiated |
| Orders | Number of Orders Placed |
| Conversion Rate | The rate at which a session reached a placed order (Orders/Sessions=) |
| Revenue | Total revenue of placed orders |
| Average Duration (Seconds) | The average number of seconds per session |
| Average Transaction Revenue Per Session | The average transaction revenue per session |
How does UltraCart report the experiment session data?
StoreFronts utilizes UltraCart Analytics engine to track the session event data. This stream of data is processed with an approximate 45 minute lag.
- The content is potentially visible to the customer (i.e. if you're testing something mobile then a desktop user is not going to report anything)
- The content has actually seen the content. If you're testing something in the footer and the customer never scrolls down then we won't report anything.
Both of these are critically import points that lead to the experiment data being highly accurate.
We will also omit traffic that originates from the following sources:
- Search engine crawlers
- Traffic that originates from IP addresses that are logging into your UltraCart account. We don't want users in your call center or organization to skew the results of your experiments.
NOTE: Orders containing a test credit card number are also excluded.
How does the traffic split between each variation?
Traffic starts out with a equal split between the variations.
If equal weighting is set to No:
Over time traffic will shift towards the winner. Adjustments are made once a day to the traffic allocation until by the end of the experiment the winner has 100% of the traffic.
If equal weighting is set to Yes:
Each variation receives the same percentage of traffic throughout the entire test. At the end of the experiment the winner receives 100% of the traffic.
What happens when an experiment finishes?
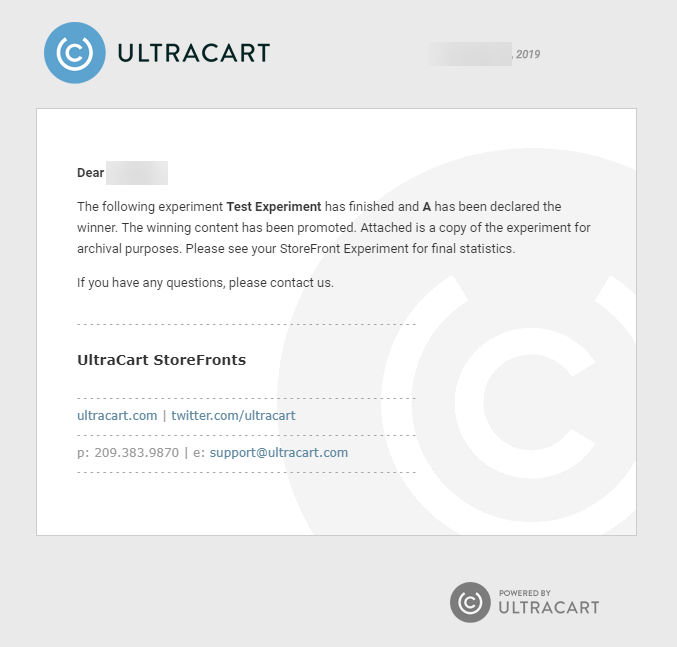
UltraCart will automatically learn of the winning variation, promote that variation's content and clean up the rest of your template automatically. The automated email will contain a .CJSON attachment with a complete copy of the experiment hierarchy for archival purposes. Below is an example of the email that you will receive.
This allows you to create experiments in a single working session, have them run, and clean themselves up. There is no manual cleanup process to engage in. Think of experiments like fire and forget cruise missiles that always hit their intended target.
What if I have existing content that I want to test?
We recommend using the wrap tool located in the hierarchy. When you wrap the existing content with an Experiment element the system will automatically make the existing content the original variation. You can then duplicate the original experiment variation to variation 1, 2, 3, etc. and make edits to that content. This working pattern allows you to quickly test minor changes to large blocks of content without having to recreate everything.
How do I force a particular variation to show?
Make sure that you are logged into UltraCart. If you're not seeing the admin bar at the top of your StoreFront then you need to login first to make this work.
Each variation in your experiment has a number from 0 (original), 1 (first variation), 2 (second variation), etc. If you pass the parameter expvid on the number with the number you want to view it will pull that particular variation during the page render. Example
http://www.mysite.com/?expvid=1
If you look at the Developer Tools → Server Log there will be entries in the log labeled "EXPERIMENT" which will indicate that the variation specified by expvid was chosen.
Frequently Asked Questions
Question: We'd like to configure an experiment, but only want the original content to initially display while our team tests the experiment variation, how can we do that?
Answer: The experiment engine operates at any point in the visual builder hierarchy. If you're going to test two different checkouts then it would be:
- container (checkout-single)
- experiment
- experimentvariation (0 = Original)
- All the content for checkout 1
- experimentvariation (1 = Variant)
- All the content for checkout 2