Chargeback Processing
- Hunter Schaeffer
- Jonathan Tew
- Perry Tew
About
UltraCart makes handling chargeback disputes easy through an automated workflow process. You can configure the information about your merchant accounts, common adjustment request text, and addendum pages ahead of time so that processing a chargeback is a few clicks. UltraCart will automatically assemble a document with a copy of the order, your adjustment request text, the credit card transaction, tracking details (from carriers website) as well as any additional addendum pages and send (fax, email, etc.) it to the merchant account chargeback department. This saves you enormous amounts of time. Please note there is a 10 cent per page fax fee. After you have configured all the information necessary for processing chargeback disputes you can easily initiate one by locating the order under Review Orders and clicking the Initiate Chargeback Dispute button.
Supported Payment Types
Credit Card Payments Only
Chargeback processing is valid for credit card payments.
PayPal payments are not supported, as the dispute resolution process must be handled within PayPal
Configuring your account for Chargeback dispute processing
Step 1- User Permission
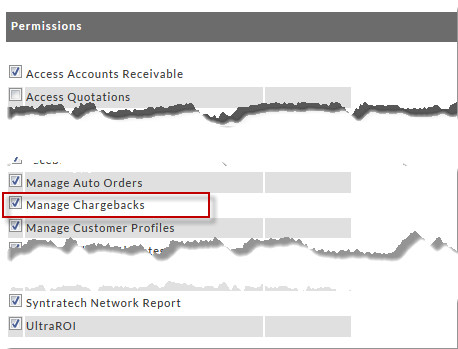
The first step to configuring your account for chargeback processing is to configure one or more of your users with the "Manage Chargebacks" user permission, as this is an area that you will most likely only wish to have certain users access and manage. (See Users for more details on managing users and user permissions)
Configuration → Users → Add/Edit user → "Permissions" section → "Manage Chargebacks" (checkbox field)
Step 2 - Configuring information needed to automatically fight chargebacks
Next step is to configure the "Chargeback Processing" system with information to produce the response documents. Navigate to:
Configuration (Back Office) → Chargeback Processing
There are three sections to the Chargeback Processing page that you'll configure as shown below.
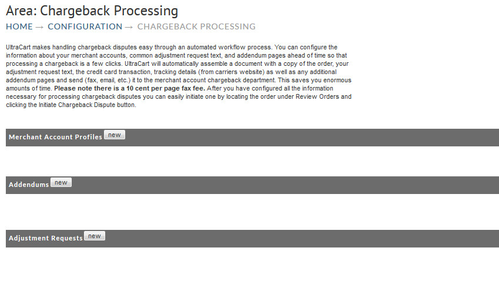
Initially, all three sections will be blank, you'll click the "new" button configure the sections in order they are presented
- Merchant Account Profiles
- Addendums
- Adjustment Requests
Merchant Account Profiles
Since UltraCart talks to payment gateways and not directly to your merchant account you need to configure a merchant profile. The merchant profile contains the information about how the merchant bank should be contacted in order to fight the charge back. The merchant profile page looks like the screen shot below.
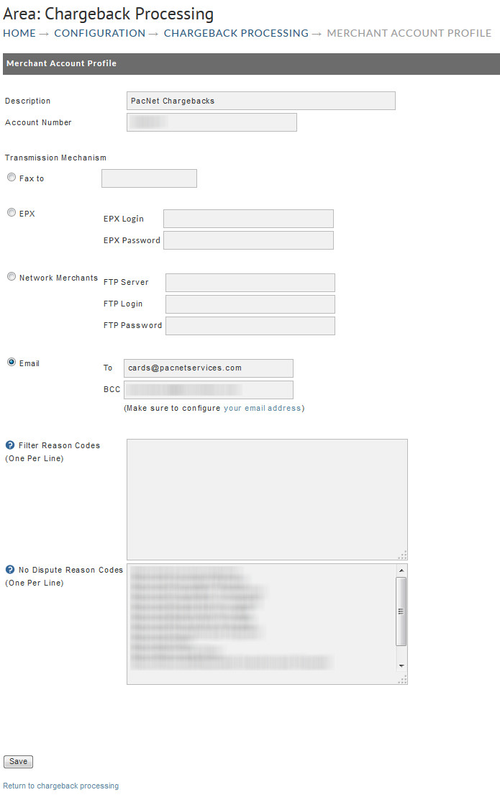
The following table describes each field on the form
| Field | Description | Example |
|---|---|---|
| Description | This is an informational description. Typically you will want to enter the name of the gateway and the merchant bank | BofA Authorize.Net |
| Account Number | The merchant account number. The chargeback response PDF will contain the merchant account number so the bank knows which account to associate it with. This number can be found on your merchant account statements. | 123456789 |
| Transmission Mechanism | The mechanism that you want the response to be transmitted. Typically banks want to receive responses via fax or email. There are two custom methods available for EPX and Network Merchants, but those probably do not apply to your account. | |
| Fax - Phone Number | Make sure to enter a 10 digit phone number | |
| Email - BCC | We recommend that you enter your own email in the BCC field when getting started with email responses. This allows you to keep you finger on the pulse of what is going to the bank initially,. | Your email |
| Filter Reason Codes | This comes into play later if you're importing a spreadsheet of chargebacks from your bank. Chargeback report spreadsheets always contain reason codes for the chargeback. Some reason codes you want to filter during the import. You can configure those here if necessary. Initially leave this field blank. | |
| No Dispute Reason Codes | Some merchants know they are going to get beat every time for certain reason codes so there is no point in fighting them. If you want to skip the dispute process for a reason code you can enter them here. Initially leave this field blank. |
Addendums
Addendums are additional pages that you want in the response PDF that is sent over to the bank. Typical addendums are:
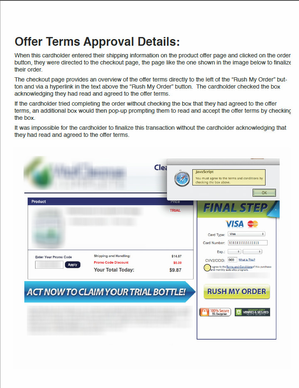
- Screenshot of the checkout process showing that they have to agree to the terms and conditions while checking out.
- Actual text of the terms and conditions
To upload an addendum click the new button. Give the addendum good description that helps you keep them internally organized. Typically it's the name of the site or the product. Select the image or PDF file to upload. We recommend using PDF files for more consistent formatting of the final response document.
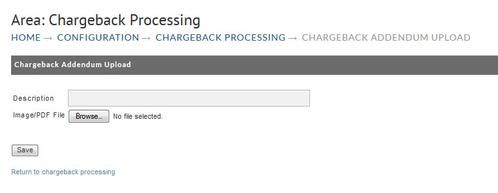
Below is an example of a typical addendum to show that the user must agree to the terms and conditions at checkout.
Adjustment Requests
An adjustment request is the written argument that you are making to the bank to justify why you should when the chargeback dispute over the customer. When you click new adjustment request you will see a screen like the one below.
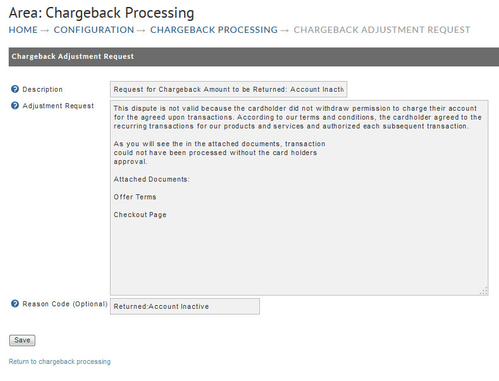
| Field | Description |
|---|---|
| Description | A verbose description to help you keep the various chargeback adjustment requests organized |
| Adjustment Request | Your written argument for winning the dispute. |
| Reason Code (Optional) | If you're importing chargebacks from a spreadsheet then the system can automatically pick this adjustment request based upon the reason code for the chargeback. |
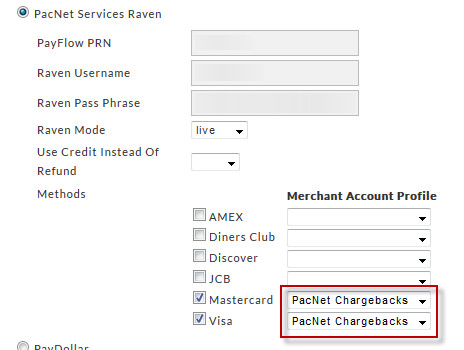
Step 3 - Assigning Merchant Profiles to Transaction Gateways
As we mentioned earlier, the merchant profile needs to be associated with the transaction gateway. To do this navigate to:
Configuration (Checkout) → Payments → Transaction Gateways
To the right of each payment method is a drop down box to select the merchant profile to associate. Typically you will have the same merchant profile for Visa/MasterCard, but a different one for AMEX and Discover since they operate as independent organizations. The screen shot below shows how the merchant profile is selected by card type.
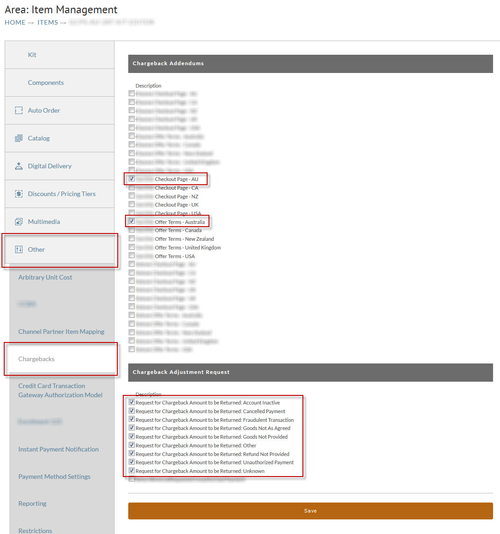
Step 4 - Associate addendums and adjustment requests to items (optional)
All the addendums and adjustments that we have configured now need to be associated with the item. This allows the system to select the appropriate parts to build the chargeback response. This is only necessary to configure if you're looking for complete automation of the chargeback fighting process by uploading a spreadsheet from your merchant bank. To begin item level configuration navigate to:
Store → Items → Click Item ID → Other → Chargeback Processing
Click on the Chargeback Processing sub-tab. Check the boxes next to the addendums and adjustment requests you want to associate and click save as shown below.
Two Options for Disputing Chargebacks
Now that configuration is complete you are ready to dispute chargebacks.
There are two ways to start a chargeback dispute:
- Dispute a Individual order
- Disputing a batch of orders
Dispute an Individual Order
Look up the order in the typically fashion you would any other order under:
Operations → Order Management → View All Orders
Notice on the left hand toolbar you have an option for Chargeback Dispute as shown below:
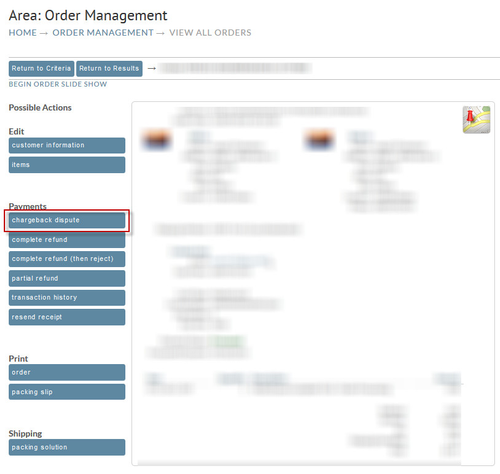
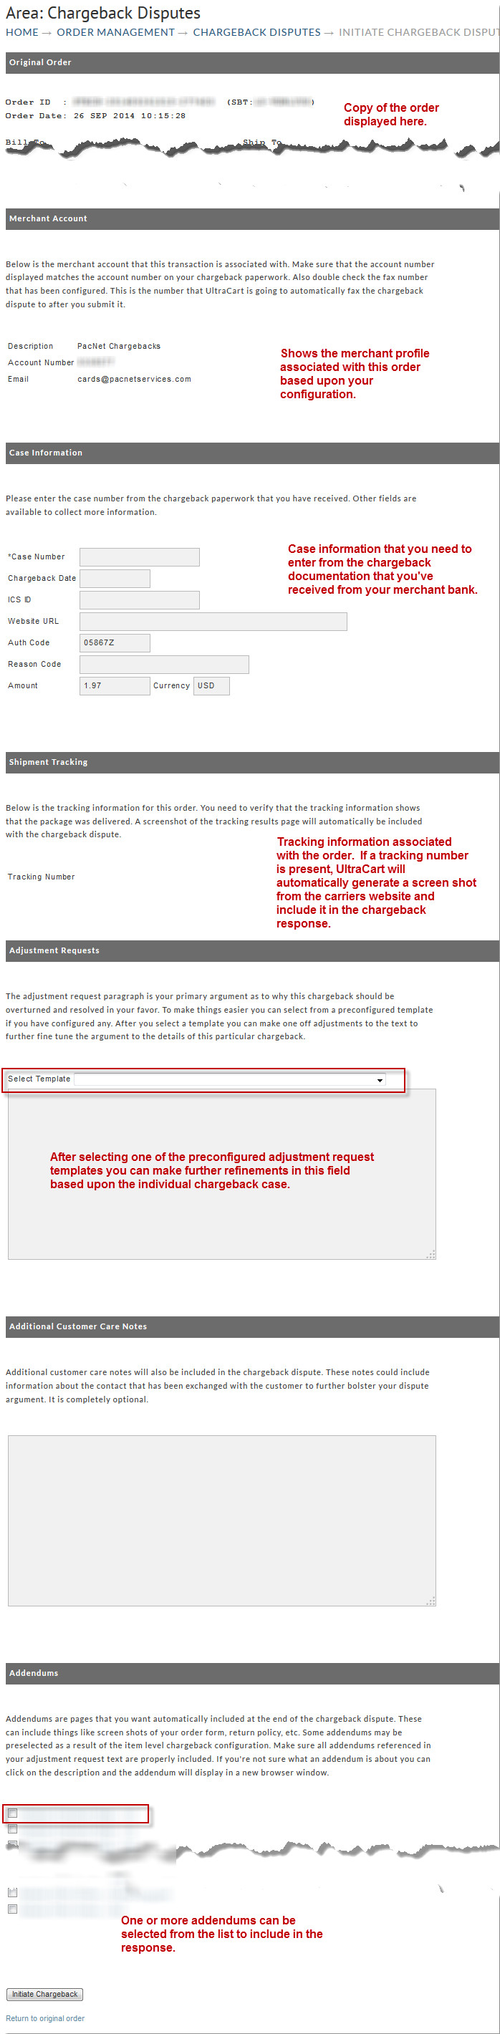
Click on the Chargeback Dispute button. The next page will allow you to input and select all the necessary information to fight this chargeback.
Dispute a Batch of Orders
UltraCart supports importing chargebacks from a spreadsheet. It is typical to get notified of chargebacks in spreadsheet format if you are a high volume merchant. To import the spreadsheet click on:
Operations → Order Management → Chargeback Disputes
Scroll to the bottom of the page and you will see a section to upload the chargeback spreadsheet.
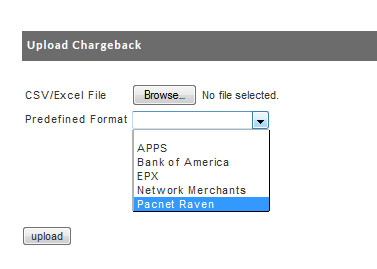
We recommend that you contact UltraCart support if your spreadsheet is not one of the pre-defined formats already supported in the system.
After you click upload the next screen will show you a sample of the data with all the fields mapped out. When you click submit it will process the entire spreadsheet and generate the chargeback disputes.
Monitoring the Status of Chargebacks
If you navigate to:
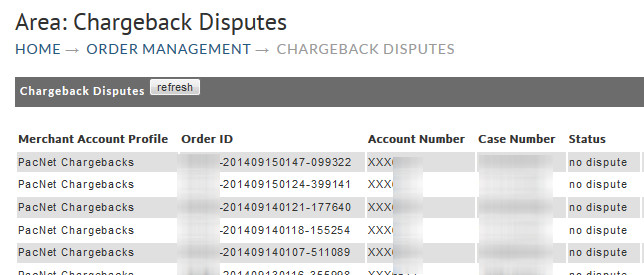
Operations → Order Management → Chargeback Disputes
This screen will tell you the status of the chargeback disputes. The list will look like this:
Reporting
If you navigate to:
Operations → Reporting → Chargeback Report
This report will show you all the details for a given time period regarding chargeback processing.