...
| Include Page | ||||
|---|---|---|---|---|
|
Copy
...
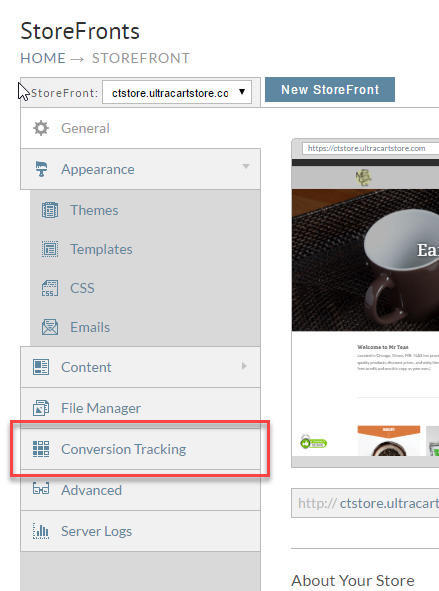
Conversion Tracking
If you are using the Legacy Screen Branding you may have some Conversion and Tracking configured, It is important to move this content over to your new StoreFronts checkout so that you maintain these settings.
Panel Navigate to Main Menu → Configuration → Checkout → Screen Branding Themes → Edit → Conversion and Tracking
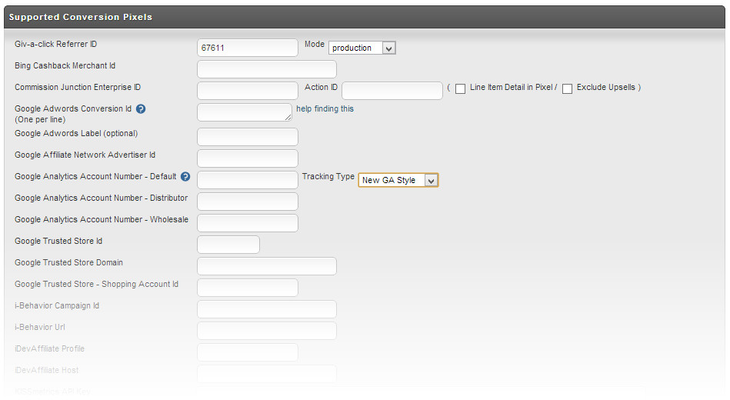
- Next we want to copy over conversion/tracking information from old storefront
- test it out
- change your buy links on your existing site
- test it outany information we have entered here for the different providers. Now that we have the information we need to take that over to our new StoreFronts checkout.
- From here you will have options to configure Google, Other, Custom and more.
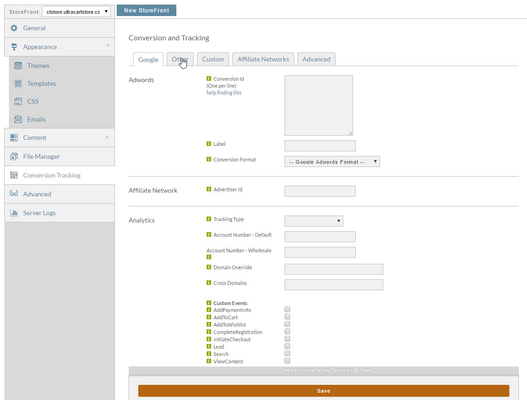
- Once you have copied over all of the details simply click "Save".
New Buy links
To find your Buy Links navigate to:
Panel Main Menu → Items → Item Management Next to each Item that is created you will see a set of action icons, by clicking on the Links icon you will be taken to the Buy Links page for that product.

- Clicking on the icon for a given product will then take you to the Item Links or Buy Links page show below.
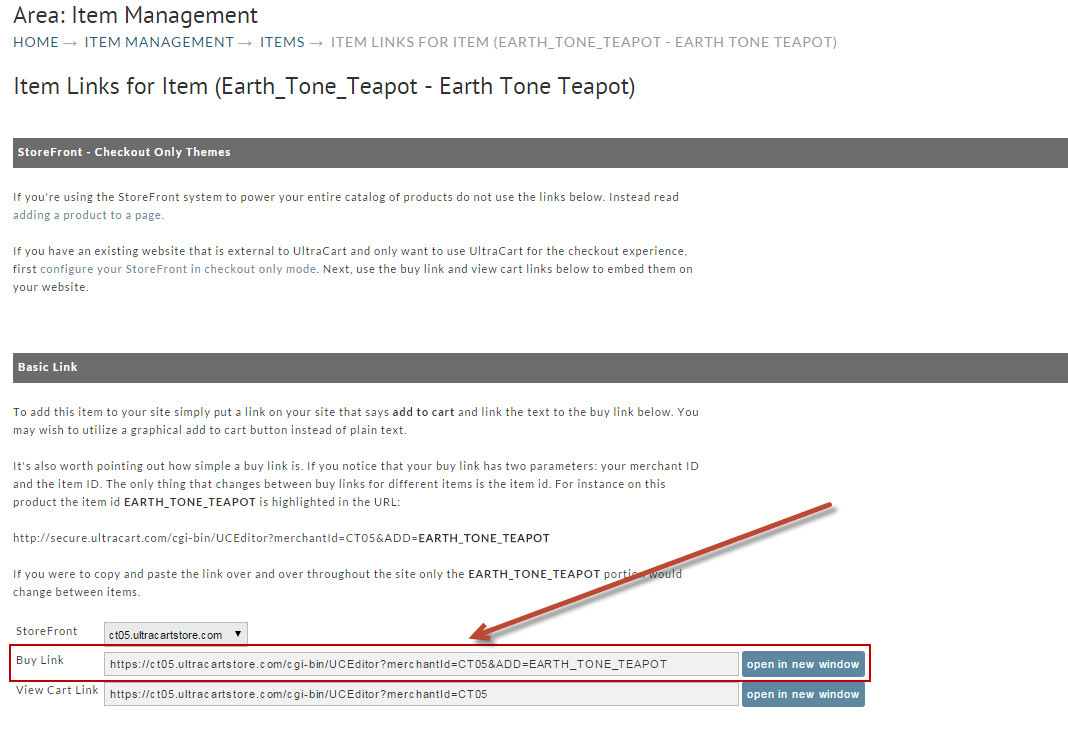
Because you can have multiple StoreFronts we do provide a drop down list just above the buy link that allows you to select which storefront the link should be assigned to, this allows you to have the same item pointed to different storefronts based on the link the customer user.
From here you would simply need to take the link and add it into your website, that code may look something like this:
<a href="https://ct05.ultracartstore.com/cgi-bin/UCEditor?merchantId=CT05&ADD=EARTH_TONE_TEAPOT"><img src="http://buttonImageUrl"alt=""/></a>