| Table of Contents |
|---|
| Warning |
|---|
This tutorial is for the old Kajabi. Please see Configuring New Kajabi |
...
Kajabi lets you create private content portals and sell access to them. This tutorial will guide you through using UltraCart's instant payment notification functionality to notify Kajabi of a successful purchase.
Step 1 - Setup on the Kajabi Side
This tutorial will guide you through the implementation of Kajabi's tutorial entitled "How do I setup the customer shopping cart option?"
...
So we are going to need to make an HTTP POST to the URL that they provide and give them seven parameters.
Step 2 - UltraCart Item Setup
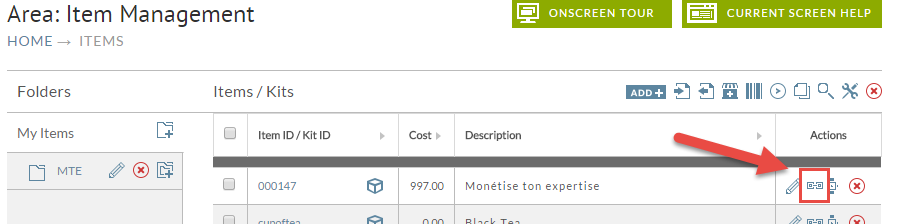
First hover over the Items menu and choose Item Management as shown below.
...
Congratulations! You have just configured your first Kajabi IPN.
Step 3 - Placing a Test Order
At this point the item is properly configured. First, make sure that you have a test card configured.
| Note |
|---|
When configuring the test credit card, make sure to choose the option for "Skip payment gateway, consider payment processed, then complete order to prevent shipment.". This is the appropriate setting for testing an IPN. |
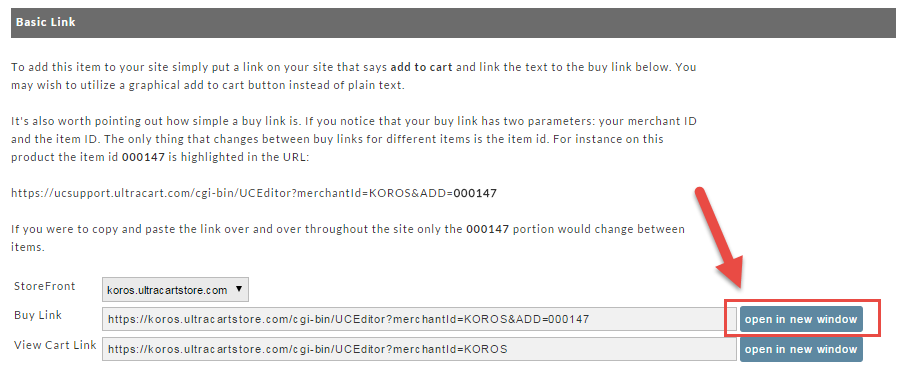
Next, place the item in the card and check out with it using the test credit card. The easiest way to place the item into the cart is to use the buy link provided by the system. From the item list click on the links icon as shown below for your item.
With the Basic Link section you will see a Buy Link. Click the Open in New Window button as shown below.
Complete the checkout as you would a normal customer. Make sure to use the test credit card you configured. When the order is complete, check your IPN log (covered in the Troubleshooting section below) and Kajabi's system.
| Warning |
|---|
Always remove test credit cards when you are finished testing to prevent fraudulent use by end customers. |
Step 4 - Troubleshooting
If you are having issues with Kajabi receiving notifications, then you should check the Log associated with the IPN.
...
Related integration documentation
...