| Table of Contents |
|---|
Background
...
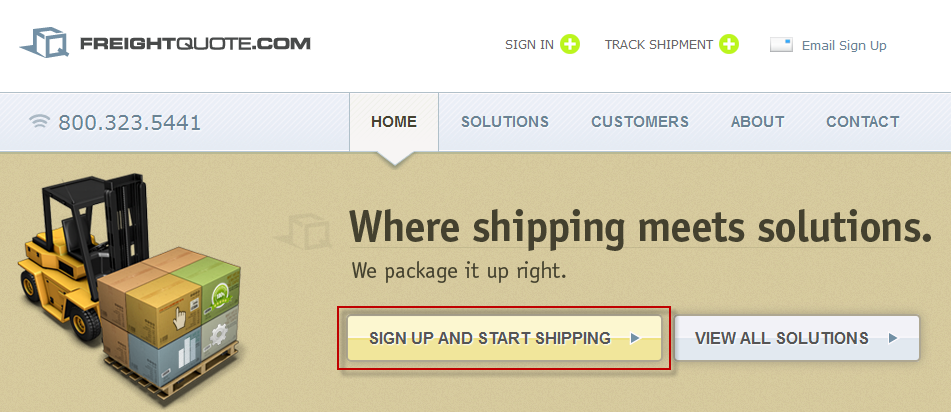
First you'll need to visit http://www.freightquote.com and apply for an account. Visit their website and click the "Signup and Start Shipping" link GET FREE QUOTES" button shown in the picture below.
After you have completed the signup and are logged into the Freightquote.com website you will see a section on their dashboard named "My API services". Go ahead and click on the "I would like to signup button" as shown below.
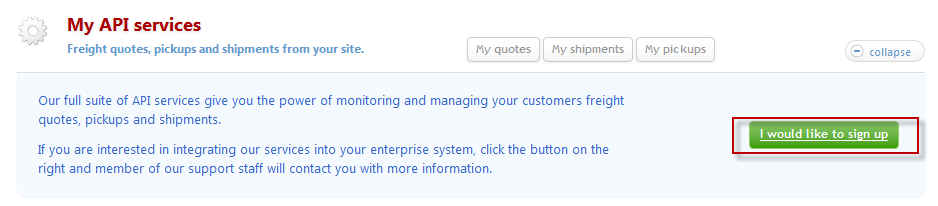
This will send an email to the proper personnel ( fqconnect@freightquote.com ) at Freightquote.com to issue your API credentials. (UPDATE: 03/07/2023 - A merchant stated that they were unable to locate the page above containing the "I would like to sign up" button. The merchant stated that they contacted Freightquote.com support to request the API credentials, and then they received the API credentials from fqsupport@freightquote.com)
Once you receive your API credentials you will need to configure them within UltraCart under:
...
On the Shipper Specific Options page there is a section for Freightquote.com as shown below.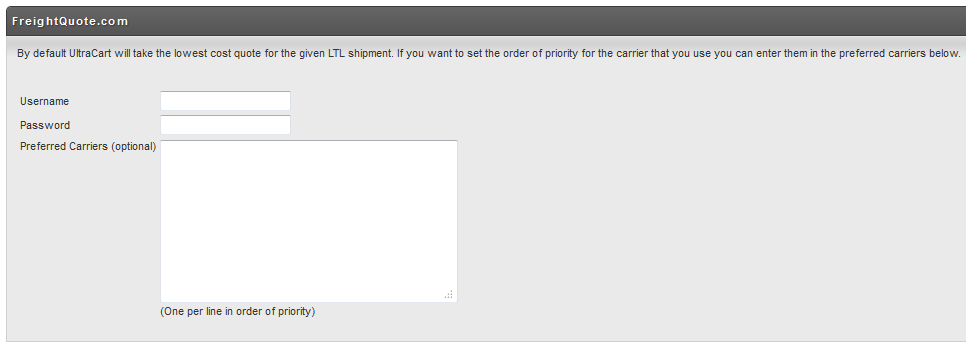 .
.
First select 'Carriers' then click the Checkbox for 'Freightquote' to make it an active carrier.
Next, select Freightquote in the Carriers list:

You'll need to configure your Freightquote.com Customer Code:
Your customer number or “C-Code” can be found under your Profile by clicking on “Account”. You will find your customer number located under “Contact Information”.

| Info | ||
|---|---|---|
| ||
The SOAP Web Services integration has been deprecated as of September of 2024. |
In this screen there are three two fields to configure:
Field | Description | Required | |
|---|---|---|---|
Username | The Freightquote.com API username. | Yes | |
Password | The Freightquote.com API passwordFreightCode | Your customer number or “C-Code” can be found under your Profile by clicking on “Account”. You will find your customer number located under “Contact Information”. | Yes |
Preferred Carriers (Optional) | The name(s) of the carriers that you prefer to ship with (one per line). If this field is configured UltraCart will choose the cheapest method from the carriers on this list. | No |
Setting up FreightQuote Shipping Methods
The next step in the configuration process is to setup the LTL shipping method associated with Freightquote.com. First navigate to the shipping methods section:
| Panel |
|---|
| Panel |
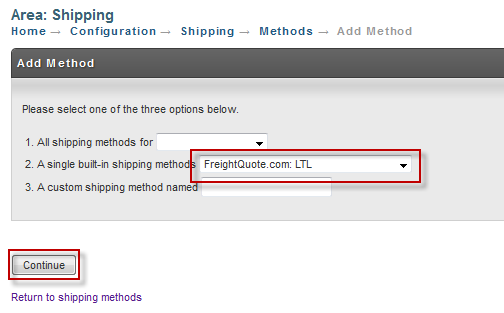
Click on the new method button as shown below.


From the list of methods select "Freightquote.com: LTL" and click Continue as shown below.

At this point UltraCart has added the method to your account.
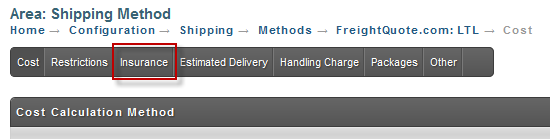
Configuring Insurance (Optional)
If you want to insure your shipments then continue following the instructions. If you don't insure your shipments skip to the next section of this article.
Click on the Insurance tab as shown below.

Select real-time calculation by Freightquote.com and click Save as shown below.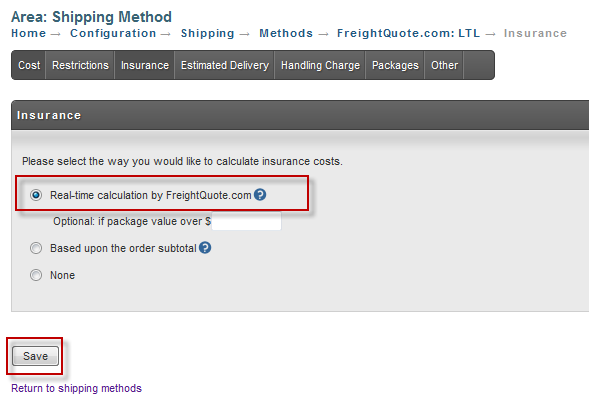
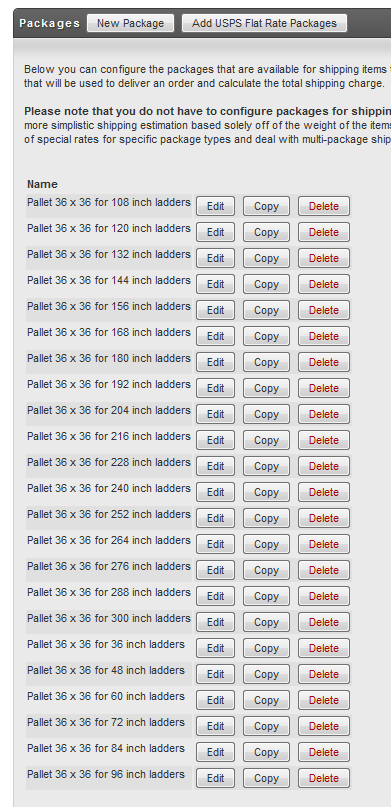
Setup of Packages
...
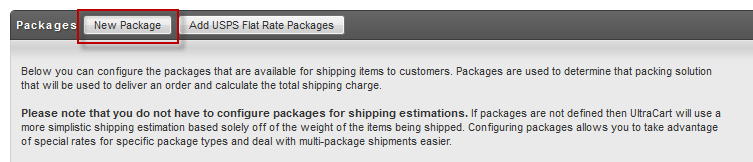
Click on the New Package button as shown below.

This will bring up the package editor. Below is an example of the configuration for the pallet holding up to 108" ladders.
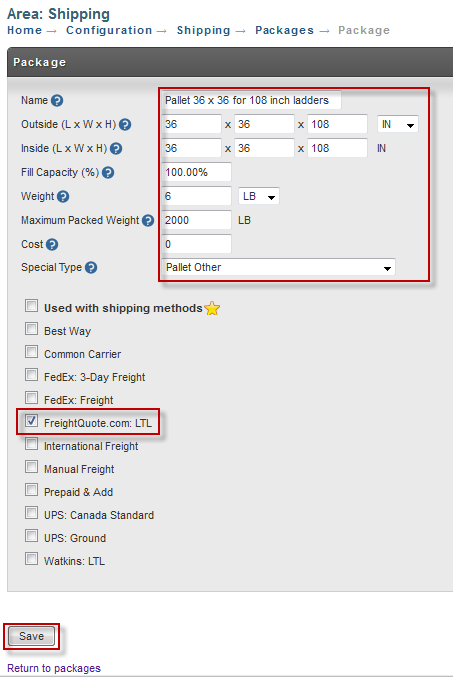

An explanation of each of the configuration fields is provided in the table below.
...
Click Save. You will want to repeat this process for as many different packages as you need. In this example we have configured packages ranging from 36" to 300".
| Info | ||
|---|---|---|
| ||
| Notice that there is a "Copy" button beside each package. This makes it incredibly fast to replicate the configuration of one pallet and adjust only the one dimension and description. |

Basic Item Setup
...
This tutorial assumes you are familiar with the basics of item configuration. We'll cover how to configure the four options listed above.
On the Item tab (first tab) of the Item Editor make sure to configure the dimensions and weight as shown below and then click the Shipping tab.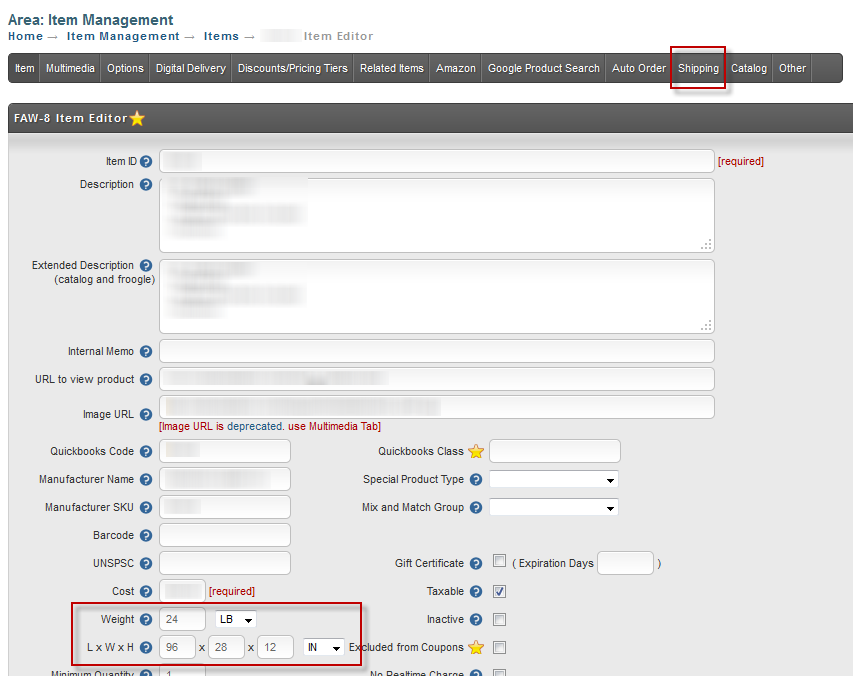
Item Tab

Shipping Tab
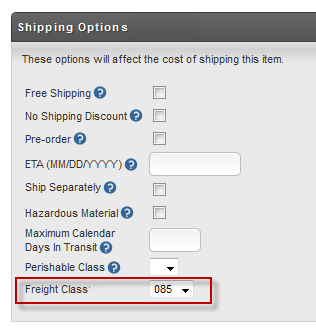
Basic Settings
On the Shipping tab set the freight class inside of the Shipping Options section as shown below.
Next 
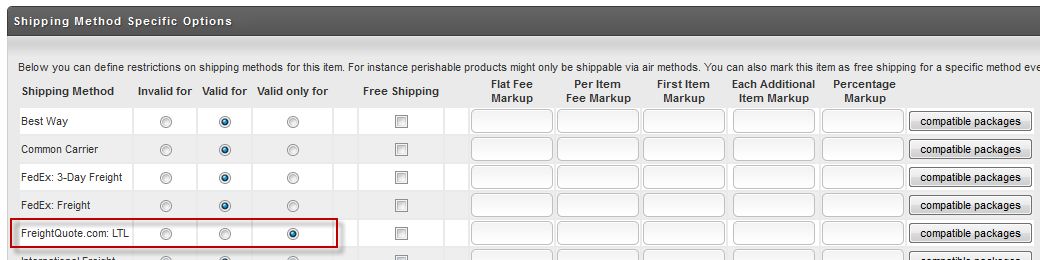
Method Specific Options
Next, navigate to the shipping sub-tab 'Method Specific Options', then select "Freightquote.com: LTL" as the only valid shipping method for this item as shown below.

Now click the save button located at the bottom of the page. This covers the basic additional requirements for a freight item.
...
Some freight items are large and ship in their own crate. For items that fall into this category there are a few more configuration changes that need to be made in addition to the basic freight item explained above. On the shipping tab, in the 'Basic Settings' subtab of the item editor, select the ship separately 'Ship Separately' checkbox and then configure the additional options as shown below.
In this example we are going to ship a 10 foot ladder that is in a crate.
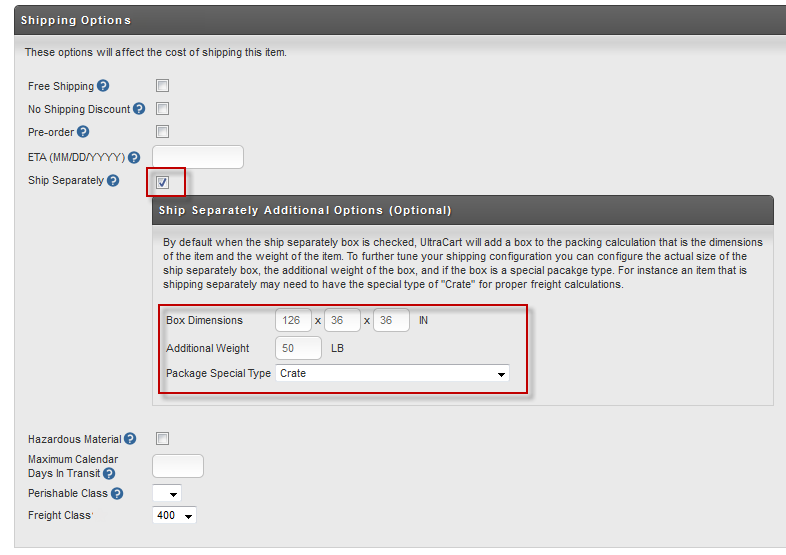

Notice that when the Ship Separately box is checked an additional options section appears. Although the item itself is configured as 120" x 36" x 36" we are specifying that the box this ships in is 126" x 36" x 36". The box dimensions are the figures that will be communicated to Freightquote.com. The create itself also weighs an additional 50 lbs. Finally we select the Package Special Type. In this case we are dealing with a Crate. It is critical to select one of the pallets or create for the special type when dealing with Freightquote.com shipments.
...
In this tutorial we have covered numerous Item Configuration settings. We recommend using the Batch Item Import and Batch Item Export tools located under the Item Management menu to batch change these settings. 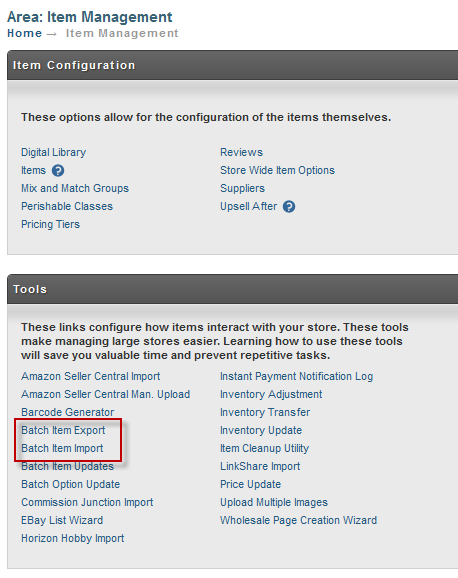
Navigate: Main Menu → Items → Tools → Batch Item Export / Batch Item Import

We recommend creating a spreadsheet with the following columns to update your freight settings:
...