...
- Log in to your Authorize.Net account
- Navigate: Home Page → Account → Settings:
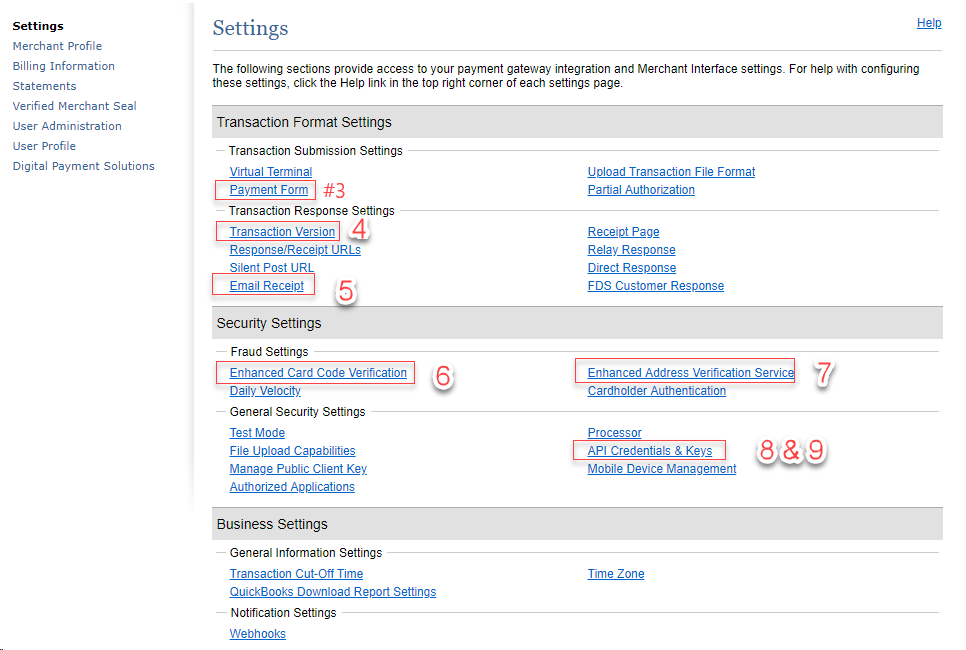
- In the first section of links click on "Payment Form". Then click on "Form Fields". Make sure none of the boxes have "Required" checked and then save. Click "Settings and Profile" on the left hand side of the screen.
- Click on "Transaction Version" and set it to "3.1" then Save.
- Click on "Email Receipts" and make sure "Email transaction receipt to customer" is not checked. Save.
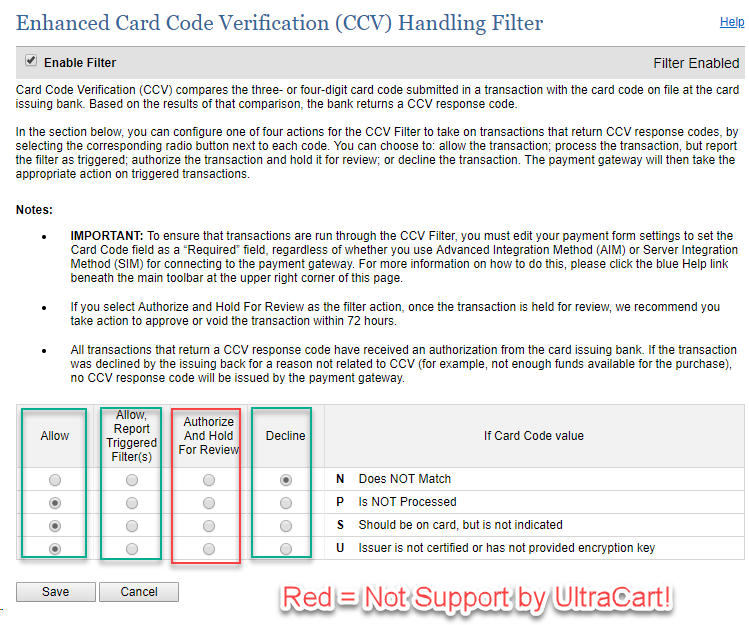
- Click on "Card Code Verification". Authorize.Net suggested to UltraCart support that (N) be checked. Individual settings may vary by merchant. Save.
- Click on "Address Verification Service (AVS)". Authorize.Net suggested to UltraCart support that (B), (E), (G), (R), (S), (U) and (N) be checked. Individual settings may vary by merchant. Save.
- Click on "API Credentials & Keys". A secret question will be asked to which you should know the answer. Answer the question and click submit. On the next page the transaction key will be disabled. Highlight the key with your mouse. Then choose Edit → Copy from the menu on your browser. This will place the transaction key in your computer's clipboard.
- You will also need to retrieve your "api_username": On the Settings page, under "Security Settings" section, Click on the link called "API Credentials & Keys": which will provide you both items together, that you must then copy and paste into UltraCart's transaction gateway configuration page.
- Log out of Authorize.Net
...