...
The following steps will all take place inside of UltraCart
Step 1
Log in to your UltraCart account and Navigate:
| Panel |
|---|
...
Home → |
...
Configuration → |
...

Select Credit Card checkbox then click save.

Navigate: HOME → CONFIGURATION → CHECKOUT → PAYMENTS →CREDIT CARD (Tab)
...
Checkout → Payments |
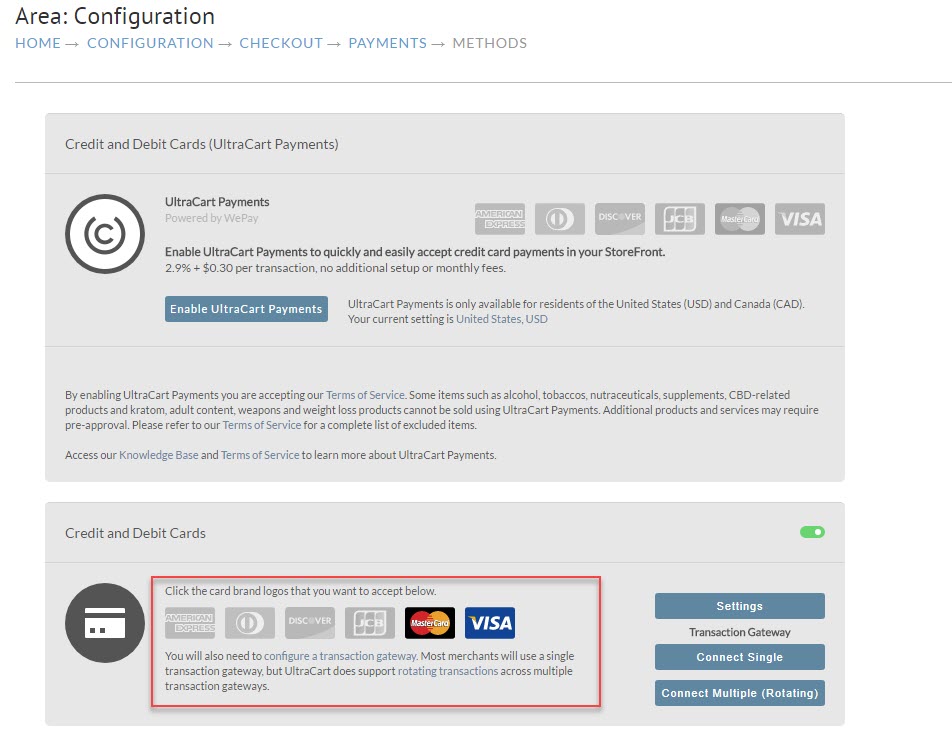
From the "Credit and Debit Cards section simply select the card types you would like to accept.
You can acces addition settings options by clicking on the "Settings" button shown below.
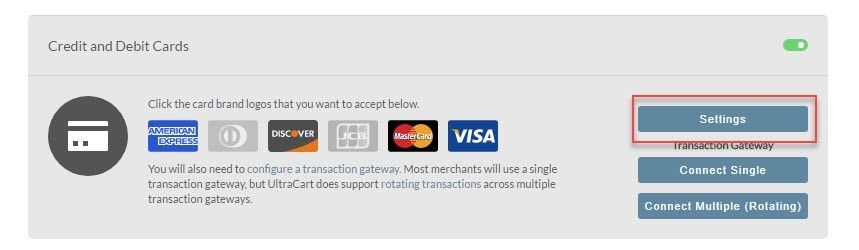
When you click on Settings the following popup will be displayed.
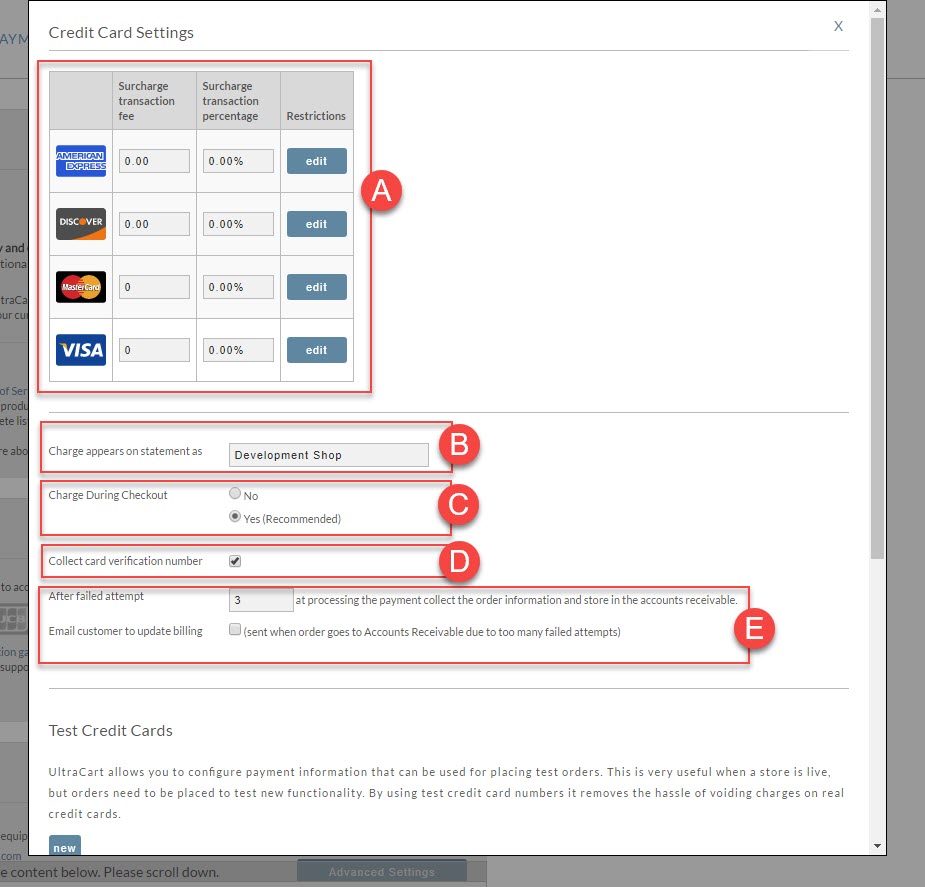
- A - Allows the setting of Surcharge fees and percentages - Not Recommended.
- B - "Charge appears on statement" (enter your business name as it will appear on their statement)
- C - Charge During Checkout
- No
- Yes (Recommended)
- D - Collect card verification number (checked is the recommended setting for most merchants)
- E - "After failed attempt" (Default setting is 3 attempts)
Navigate:: HOME → CONFIGURATION → CHECKOUT → PAYMENTS →TRANSACTION GATEWAYS (Tab).
![]() Simply click anywhere on the screen to close the window.
Simply click anywhere on the screen to close the window.
Step 2
To configure the Authorize.net 3.1 gateway click on the Connect single button as shown below.

The next screen will present an alphabetical listing of our integrated Payment Gateways.
Clicking on the radio button check box to the left of Authorize.net 3.1 will expand the settings portion.

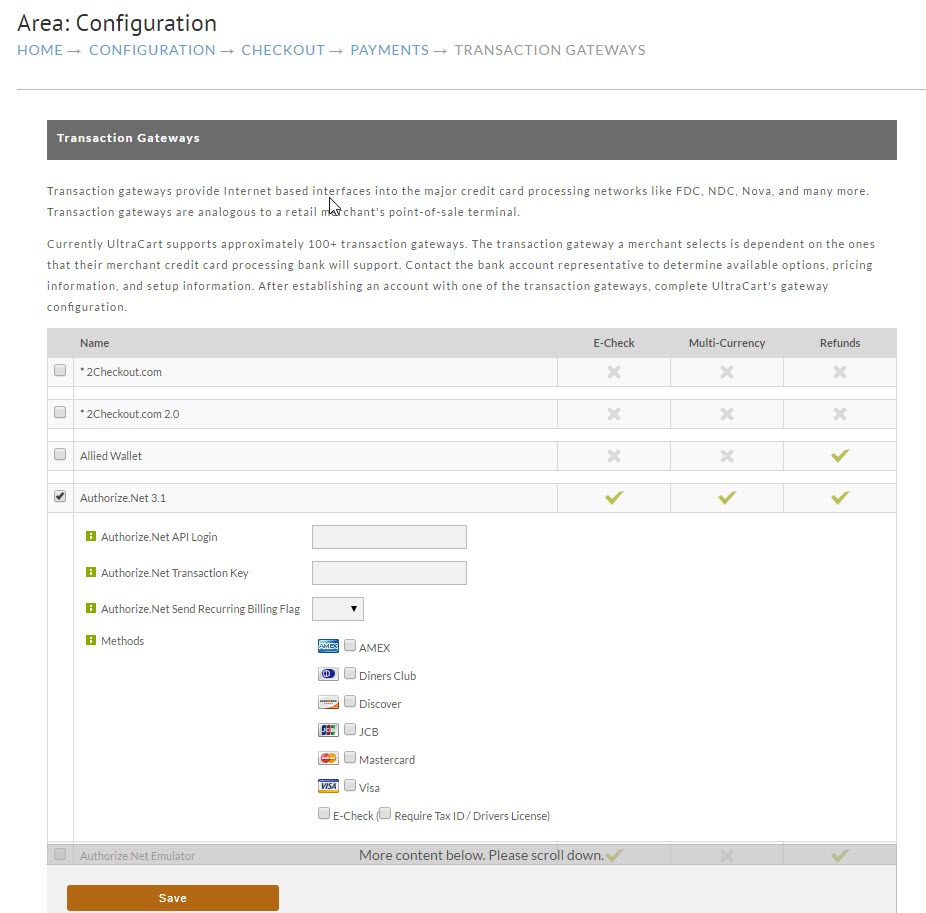
Your final objective is to enter the credentials that you were given when signing up with Authorize.net.
...
Main Menu > Operation > Order Management > Accounts Receivables
![]()
![]()
Click on the hyper-linked OrderID of the order (it should be color coded in pink signifying a "bad transaction"). Then scroll down below the "Last Transaction" section. It appears below the "Payment" section and above the "Merchant Comments".
...