Before you start adding blog posts, you should create a blog first. Please see this tutorial if you have not created any blog pages yet.
Click on the StoreFront Blogs tab for the StoreFront you wish to add posts.
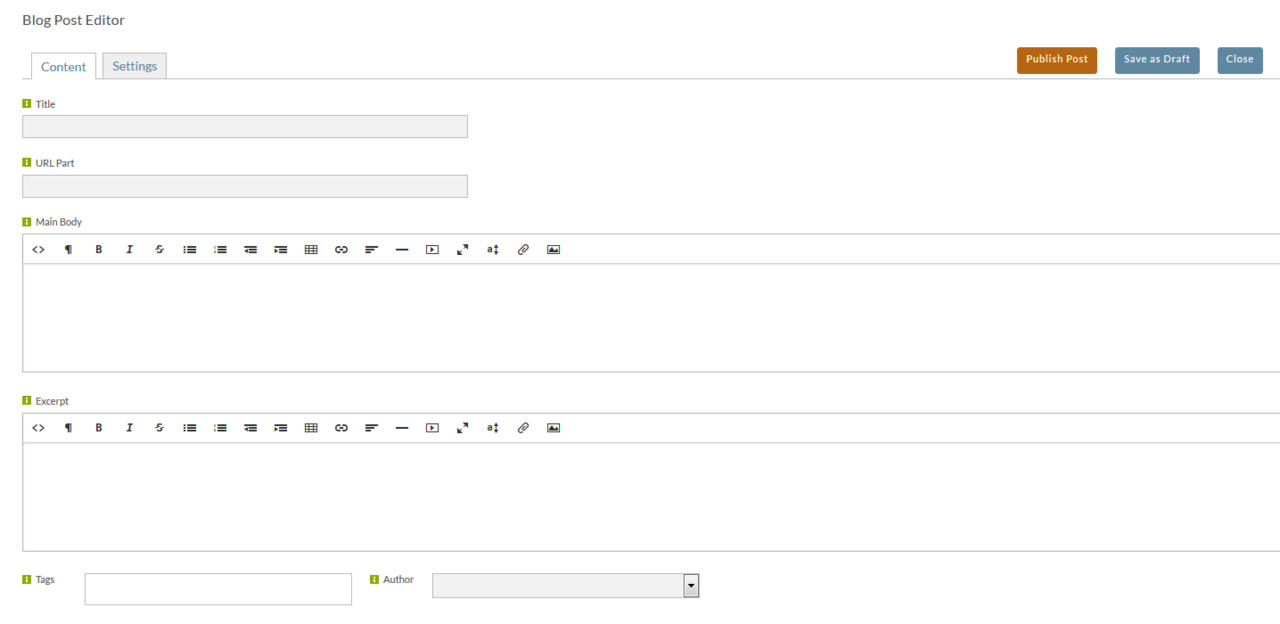
On the content tab, add the following:
- Title - This will be use to automatically create the url part for you (try it!).
- Main Body - This is the blog content.
- Excerpt - This is a small excerpt that will display on the blog page when displaying multiple posts. Please keep this as brief, yet informative, as possible.
- Tags - Tags are used to categorize blog posts further. To enter multiple tags, type a comma after each tag.
- Select an author of the blog post. Authors are managed on the Settings tab of the Blogs page (this is NOT the Settings tab you see below – that is settings for this individual post). If you need to add authors, click Close, and then click the Settings tab that appears.
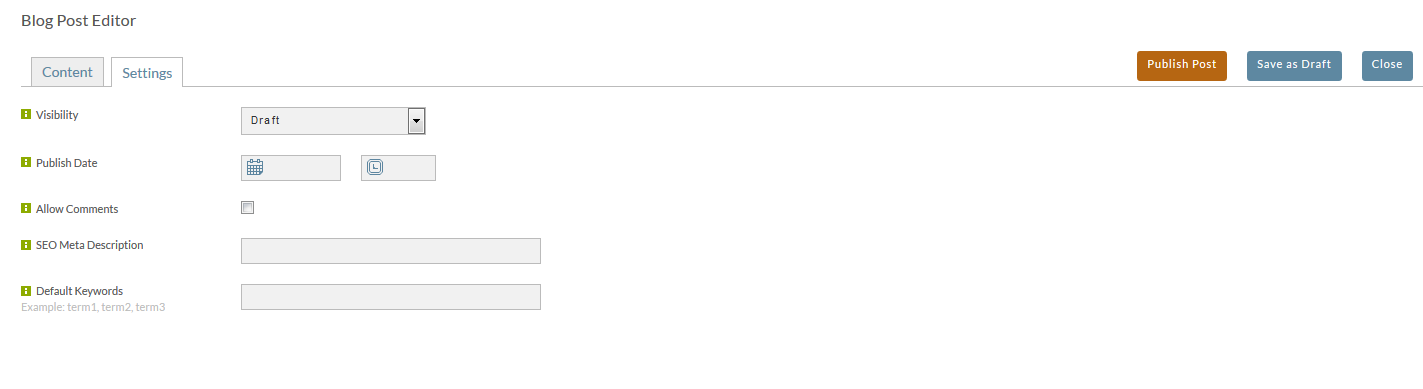
When you've finished adding content, click on the Settings tab.
On the Settings tab, you may configure visibility and publish dates to control when the post appears. You may also control comments for this individual post here.
Visibility may be Draft, Published, or Logged in Customers Only. If the last is chosen, this post will be invisible to anyone not registered and logged into your web site.