Introduction
UltraCart provides a facebook app that displays product on your fan pages. You control what product is displayed, and how that product is organized. The page provides links to your product pages and a means of 'Adding to Cart'.
The easiest way to create a store is to follow the steps below. If you need to edit or delete a store, navigate to:
[Main Menu]
[Configuration]
[Social Marketing Section]
[Facebook]
Frequently Asked Questions
Q. How do I make my store the default landing page for my Facebook site?
A. You must have 10,000+ 'likes' for your page before you can use an unauthenticated (non-Facebook) app as the default page.
Q. Is there a way to make my UltraCart store app authenticated so I can use it as the default page.
A. Yes. Get 10,000 'likes'. ![]()
Creating an Online Store for your fan page.
Steps:
1. Login to facebook.
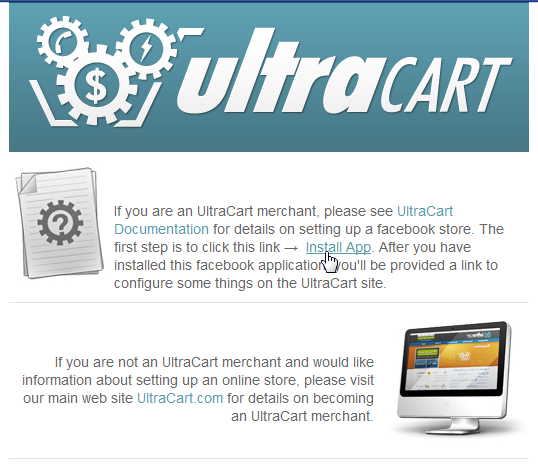
2. Navigate to this URL: http://apps.facebook.com/ultracart/.
3. Click the 'Install App' link in the middle of the first paragraph.
4. When the pop up window appears, install the app.
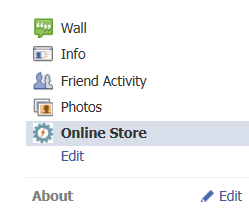
4. Navigate to your fan page. There will be a new link on the left side of your page. It will say "Online Store".
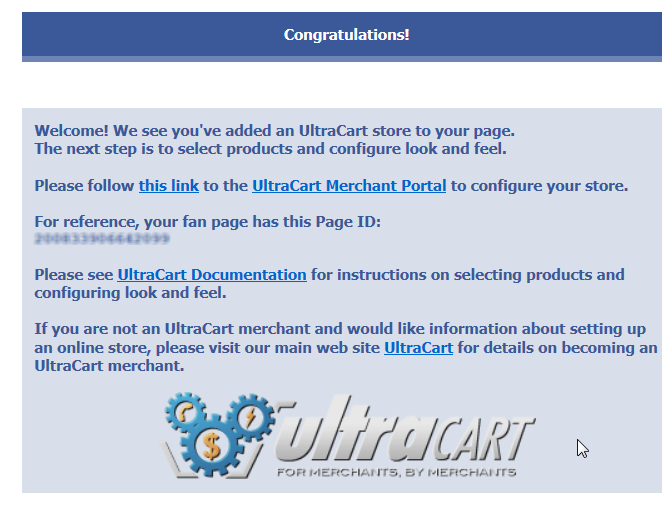
5. Click on the Online Store. You should be presented with a 'Congratulations' message. Within this page will be a link to configure your store on the UltraCart side. Click it, log in, and then configure your page.
6. Complete the configuration and click the save button. Your store is now active!
Configuration Options
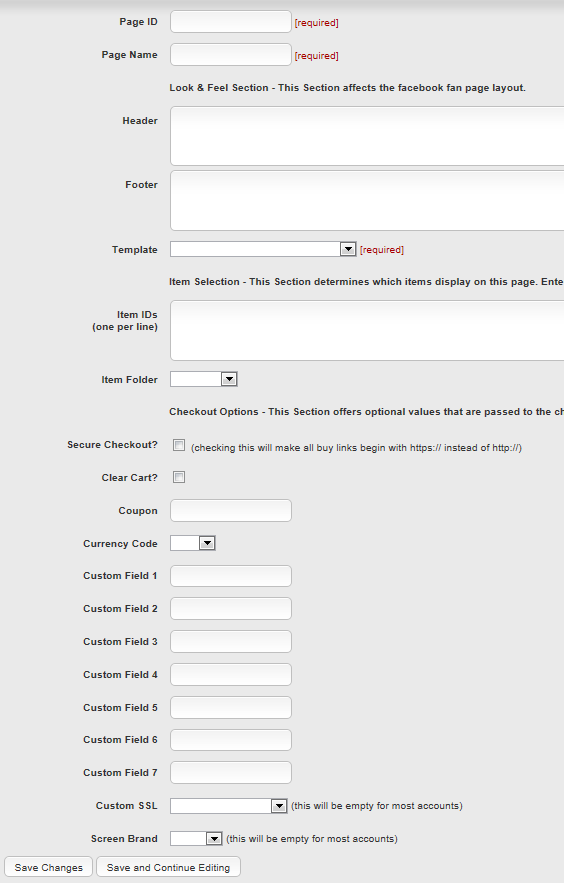
The screen looks like this:
Page Configuration |
Required |
Description |
Example |
|---|---|---|---|
Page ID |
Required |
The unique Facebook ID for your fan page. This should be filled in for you if you followed a link from Facebook to the configuration page. |
200811906645059 |
Page Name |
Required |
Any text you desire. This is for your internal use only to help you know which page is which within the UltraCart Facebook configuration section |
My Product's Fan Page |
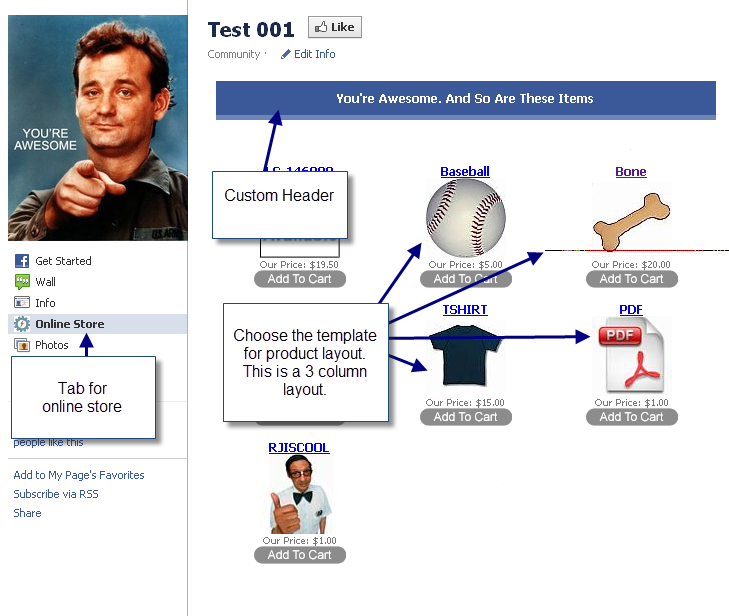
Header |
Optional |
Any html you wish to appear on the page. This html appears in the |
<img src='mylogo'><h1>My Store!</h1> |
Footer |
Optional |
Any html you wish to appear on the page. This html appears in the |
<strong>Order today!</strong>, etc.. |
Template |
Required |
Select a template. They determine how your product is displayed on the page. |
3 column layout / 80x80 thumbnails |
Item IDs |
Required |
You must provide either 1) a list of items or 2) an item folder. For items, enter them one per line in the text field. |
|
Item Folder |
Required |
If you wish to use an Item Folder to contain your items, select it from the list |
Each product displayed within the Facebook store page will have an 'Add to Cart' link. The following options may be used to customize that link. All of the following configuration fields are optional.
Checkout Configuration |
Description |
Example |
|
|---|---|---|---|
Secure Checkout |
determines whether the buy link begins with http:// or https:// |
||
Clear Cart |
if checked, a customer's cart will be cleared before the item chosen is added. |
||
Coupon |
A coupon code |
See Coupons |
5OFF_CODE_5245 |
Currency Code |
Select a currency code if you wish the cart to display in something other than USD |
||
Custom Field 1 |
Any custom value you wish passed to the cart. Perhaps 'facebook' so you can track the purchase? |
||
Custom Field 2 |
|||
Custom Field 3 |
|||
Custom Field 4 |
|||
Custom Field 5 |
|||
Custom Field 6 |
|||
Custom Field 7 |
|||
Custom SSL |
If your store uses a custom SSL, select it here. |
||
Screen Brand |
If your store uses a custom theme, select it here. |
The Final Result
Here's an awesome example.