| Table of Contents |
|---|
Introduction
Clicking on an order ID will take you to the Shipment Screen where you can view and edit order information. This screen is divided into three sections; Actions, Order Details, and Merchant Comments.
| Note |
|---|
| Previous / Next navigation buttons In the top right corner of the order (while viewing from the Shipping Department) you may see the Previous Order and Next Order buttons. These options will only display if you have more then one (1) order within the shipping department. |
...
| Option Name | Description |
|---|---|
| Edit Customer | Click this to edit customer information: billing, shipping, coupons, ect. |
| Edit Shipping | Click this to edit the customers shipping information. including address and shipping method selected. |
| Edit Items | Click this to edit the Item on this order. If this is an Auto order then the items can not be edited. |
| Copy Order | Allows you to copy this order into a new order. The new order will be sent into Account Receivable. |
| Refund and Reject | Simply rejects the order removing it from the shipping department. |
| Print Packing Slip | Allows you to print the packing slip for this order. |
| Print HTML | The "Print HTML" button will send the file to your printer. It will also be displayed in a new browser window. You can view the html from the browser window by selecting "page source" under the VIEW menu at the top of the screen. |
| Address Clipboard | Copy Shipping Address |
| Order Clipboard | Copy order details |
| Resend Receipt | The "Resend Receipt" button will send the receipt notification to the customers email address listed on the order. |
| Tracking Numbers | This section allows you to add up to 5 tracking number to this order. you can also mark the order as shipped and skip the customer shipment notification. |
...
Edit Customer
Introduction
...
The Customers personal information, the payment date and method, credit card information and merchant notes can all be edited here.
IF you need to charge the customer's credit card for the difference between the original order and the modified order, click the "terminal" button.
See Virtual Terminal Button

Click the "Save" button when finished.
Shipping Tab
On the Shipping screen you can edit the customers shipping details.
The shipping method, handling charges, tracking number and shipping date can all be changed if need beneeded.
Space is also provided for special instructions.
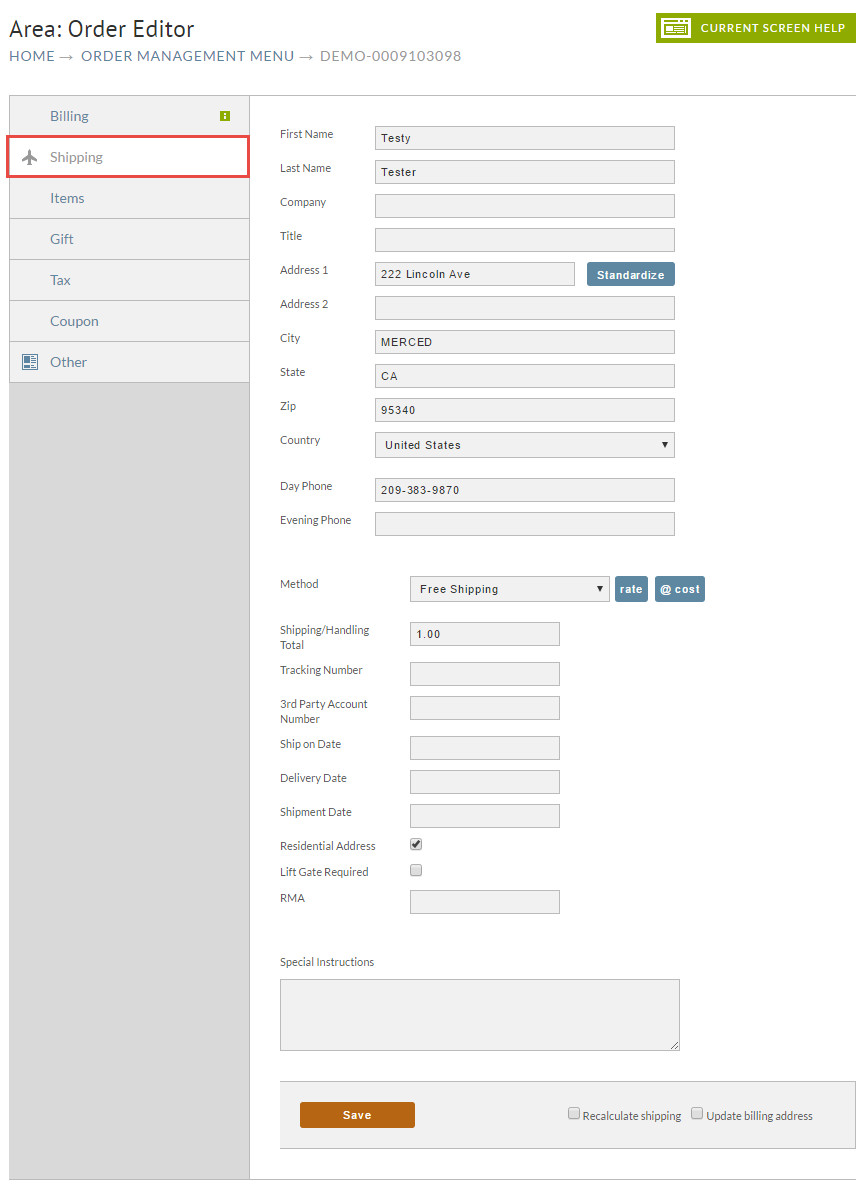
Once you have completed the editing, Shipping Costs can be recalculated by clicking by either clicking on the "Recalculate Shipping Cost" button. Click on the "Save" button when finished.
the "Rate" or "@cost" buttons.

- "Rate" button will recalculate the shipping/handling based on your shipping method configuration.
- "@cost" button will recalculate the shipping cost, excluding any handling fee's you have configured on the shipping methods.
Click the calculated shipping method rate to which you wish to update the order. (Alternatively, you can also hand edit the "Shipping/Handling Total" field directly.)
Items Tab
This will list all items of the order. Merchants can modify all item details as well as delete or add individual items from the order. This page is broken up into two section, Items currently on the order and a section to add new items.
| Note |
|---|
Note: you may need to deal with additional collections if If items are added or changed after payment is processed. has been processed for the original order details, you'll need to proceed to the billing tab and use the virtual "terminal" button to perform the payment processing for the difference. |
Modifying an item is very straightforward. Once you have made your changes, click on the "SubmitSave" button.
(Re-calculations calculation of subtotal/totals for the order will automatically occur. If you want to see the new figures before submitting, click on the "Recalculate" button., based on the changes to the items and item quantities. )
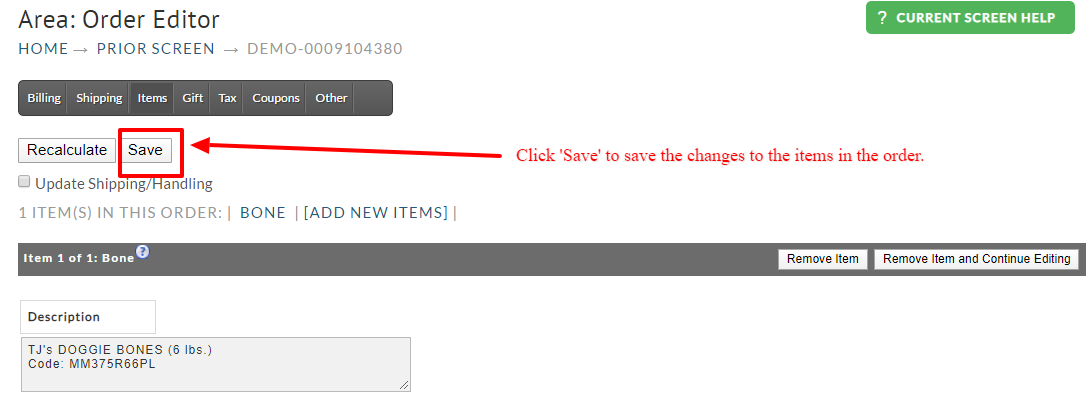
To update the shipping/handing after editing the items, click the checkbox "Update/Shipping/Handling" then click the "Recalculate" button:

| Info | ||
|---|---|---|
| ||
Please Note: There are additional options for modifying the shipping method selection and recalculating the shipping/handling amount in the Shipping Tab of the order editor. |
Editing Items
Each item ordered will be separated by a dividing line. The "Options" section (below the Description box) is auto-expandable. Once you complete one entry and click on the "Recalculate" button at the top of the screen, another empty line will be generated for your next option.
...
Below the last item listed in this screen, is a section for adding an item. additional item(s) into the order.
Enter the Item ID and Quantity into the two fields provided and click on the "Add" or " Add and Continue Editing" buttons to top. The newly added item will appear is the list with the others. You can also edit this item as well.

Gift Tab
At the Gift Tab you can edit the gift charge, wrapping paper title, wrapping paper cost and gift message. Click on the "Save" button when finished.
...
| Option Name | Description |
|---|---|
| Referral Program | |
| Screen Branding Theme | If a Screen Branding Theme was passed via the buy link for this order, its name will be displayed here. This field is editable. |
| Exported to QuickBooks™ | A check in the box for this field will indicate that a user has run UltraBooks and the order has been exported to QuickBooks™. It basically insures that the order will not be exported again. Removal of the check in the box will cause the order to be re-exported to QuickBooks™. |
| Mailing List | If the customer selected to receive email updates and information this option will be set to Yes. This field is not editable. |
| Test Order | If a test credit card was used on the order this box will be checked. |
| Current Location | The Current Location will show the "state" of the order which could 1 of the following:
|
| New Location | This field is used to change the present "state" of the order. You can move an order from its present state to any of the locations listed above. Select the new location from the drop-down list and then click on the "move" button. This will now become and be shown as the Current Location. |
| Advertising Source | If the customer has selected an Advertising source during checkout that information will be displayed here. This option must be configured in order to display this option to the customer at checkout. |
| Custom Fields 1-7 | If a merchant has passed custom field data for the order via the buy link, it can be viewed and edited here. |
| Customers IP Address | This will display the IP Address of the system that was used to place this particular order. This field is not editable. |
...
Clicking on the "Copy Order" button will take you to the following screen. Here you simply enter the number of duplications you desire and click on the "copy" button.
After creating the copies, a confirmation screen will appear showing the list of newly created orders (by order ID) that will appear in Accounts Receivable. Click on the "return to original order" button.
Edit Items

Items
This will list all items of the order. Merchants can modify all item details as well as delete or add individual items from the order. This page is broken up into two section, Items currently on the order and a section to add new items.
Note: you may need to deal with additional collections if items are added or changed after payment is processed. |
Modifying an item is very straightforward. Once you have made your changes, click on the "Submit" button. Re-calculations will automatically occur. If you want to see the new figures before submitting, click on the "Recalculate" button.
...
Click on the "Search" button (in the Item ID column) when the item ID is unknown. The Item Search screen will appear in a separate browser window.
Here you can enter your search criteria to help find items. Clicking on the "Search" button will begin the search. The Item Search Result screen will appear (below) showing the items that matched the search criteria. No items will appear in the list if nothing matched. To search again, simply provide new criteria.
Once you are satisfied with your search, you can return to the Item Editor Screen by closing this browser window. Then, at the Item Editor screen, enter the item ID and Quantity in the fields provided. Click on the "Add" button. Your newly added item will now appear as an additional item in the order editor screen.
Click the "Recalculate" button at the top of the screen if you have made changes that need recalculation. Click the "Submit" button when you are finished editing or adding items to the order. You will be returned to the Shipment Screen.
Order Details
This Section displays the customer information. Within the shipping department all orders will display the customer billing, shipping and contact information.
...