Create an Imported E-mail list
Introduction
The Create Import Email List is considerably different than the other Email creation routines. This list allows you to include (in your import) two additional fields.
To create an Imported E-mail list navigate to:
Main Menu → Marketing → Email Lists
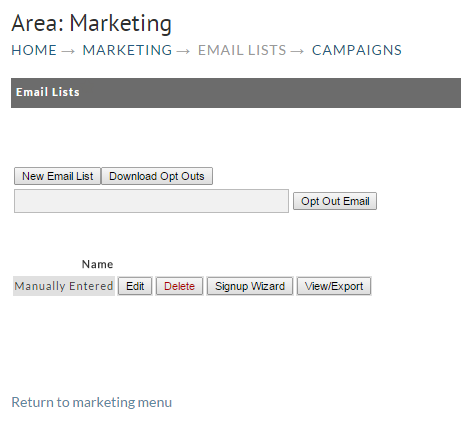
The following screen will appear. Notice that we now have previously created Email List; a Manual list.
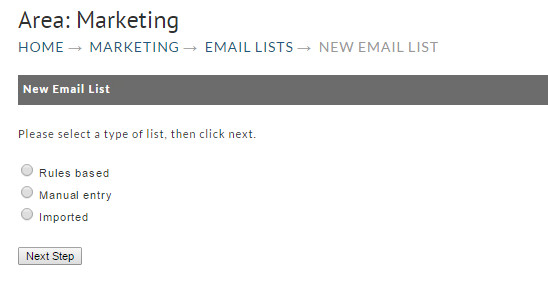
To create a new list, click on the "New List" button. The following screen will appear.
To create an Import Email List, click on the radio button next to "Imported". Then click on the "Next" button. The Import screen will appear.
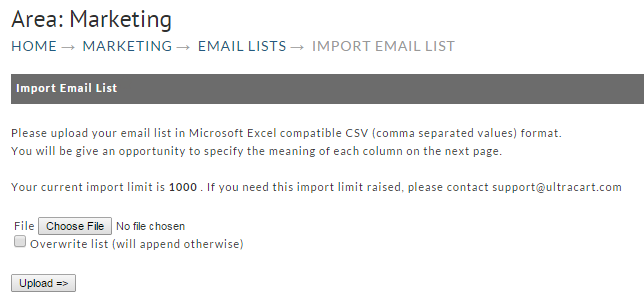
The import function will only import a .csv (comma separated values) file. In order to prevent abuse of the e-mail marketing system, each imported list has a system imposed limit. This limit is displayed on the import CSV file screen. If you would like to increase your limit, contact customer support at support@ultracart.com.
To transfer a CSV file for import, click on the "Browse" button to the right of the File field. You will then be shown a system file dialog box. Navigate to the desired CSV file that resides on your system, select the file, and click "OK". The filename will then be shown in the File field box.
If you want to "overwrite" an existing import file, place a check in the box to the left of the word "Overwrite". If you want to add (append) the new list to the original, leave the box unchecked.
Click on the "Upload" button to continue. Please note that this may take a few minutes, depending on the speed of your internet connection and the size of the file.
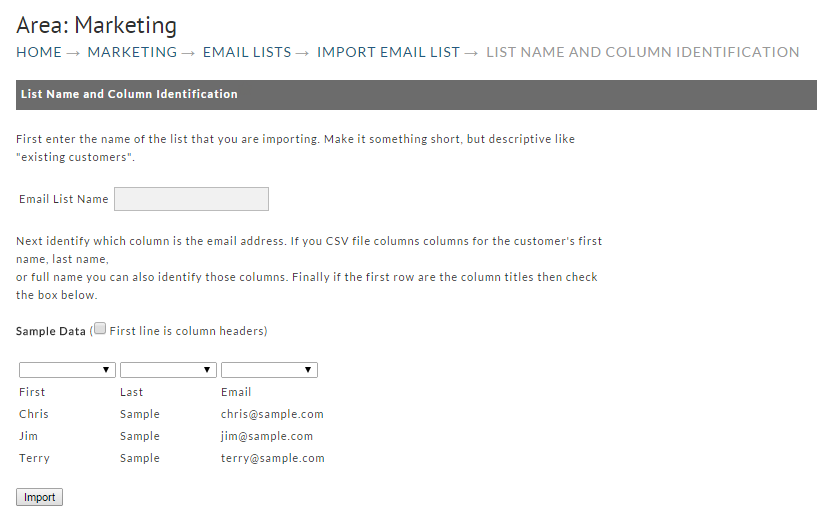
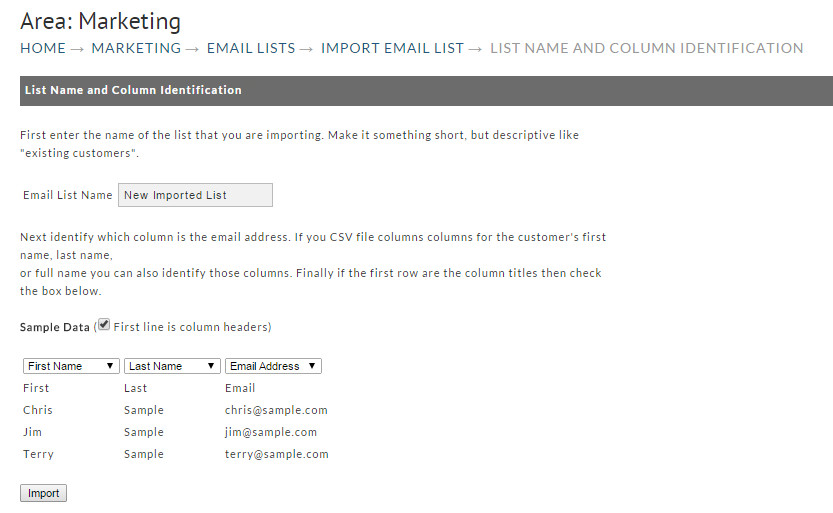
When the file has been transferred, you will be taken to the "Identify Columns" screen. Here you will match the columns of your file with the columns in UltraCart (field matching).
On the column identification screen, you will first need to specify a list name in the Email List Name field. Next, you will need to tell UltraCart which columns match up to the desired import information. In the above example, the first name is in column 1, the last name in column 2, and the e-mail address in column 3. Select the appropriate column identifiers and click the "Import" button to save the imported addresses.
