Legacy Sales Tax
- Perry Tew
- Chris Torigian
This page details how to use the Legacy Sales Tax interface within UltraCart. This interface was replaced Nov, 2018.
Please visit the Sales Tax documentation for instruction on using the current configuration screens.
Tax Rates, Taxable Address, Automatic Exemption and Tax Tools are discussed in this section.
Tax Rates
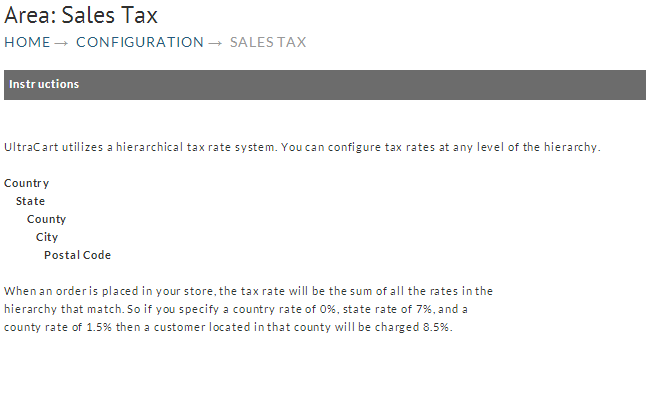
UltraCart allows you to configure the appropriate tax rates for your geographic location. When an order is placed, the tax rate is calculated as the sum of all tax rates matched by the tax location. For example, if you specify a county tax rate of 1%, a city tax rate of 1%, and a state tax rate of 5%, then a customer in that city will be charged a tax rate of 7%. In order to allow you maximum flexibility, UltraCart utilizes a hierarchical tax structure system. You can specify tax rates at any level of the hierarchy.
Each level (screen) displays two parts; upper and lower. The upper portion displays the information you are editing. The lower portion of the screen displays the next level in the hierarchy. For example, if you are at the Country level, the top half of the screen will display the country that you selected to edit from the previous screen (Tax Rate Configuration) and the lower half displays a listing of the States (if any).
Set-up
Although you can configure a tax rate for a Country, State, County, City and Postal Code all in succession, the following explains the setup in a one-at-a-time fashion (saving data as you go) to allow the first-time user an opportunity to become familiar with each of the steps. To begin, navigate to:
Country
The first field to configure in the Tax Rate configuration screen is the Country. The message “There are no countries configured” will be displayed until you add your first Country.
![]()
Once you click the New Country button the following screen will appear.
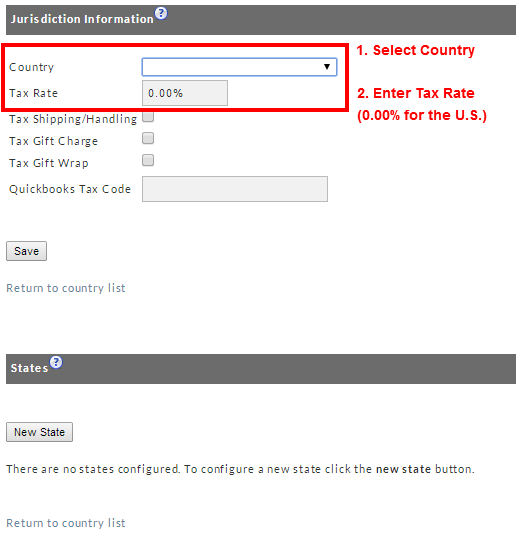
In the Country Field (drop down list) select the country desired. In the next field, enter the Tax Rate you wish to set for this Country (if any). Click the Save button. You will now return to the tax configuration screen.
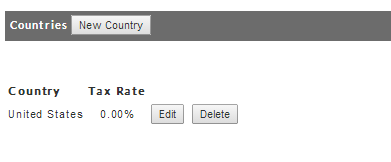
To add another Country, click on the New Country button and repeat the steps above. Each Country you add will be listed on this screen once you Save. To delete a Country, click on the Delete button. To change the Tax Rate percentage for a particular Country, click on the edit button to the right of the Country desired.
State
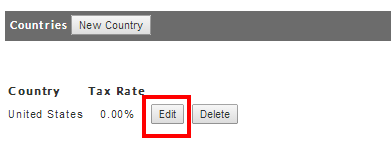
To add a State you must be at the Country Tax Rate screen. Click on the Edit button to the right of the Country desired. You will return to the Country Tax Rate configuration screen.
Your Country information will be listed in the upper half of this screen as shown below. The message “There are no States configured” will be displayed in the States section until you add your first State.
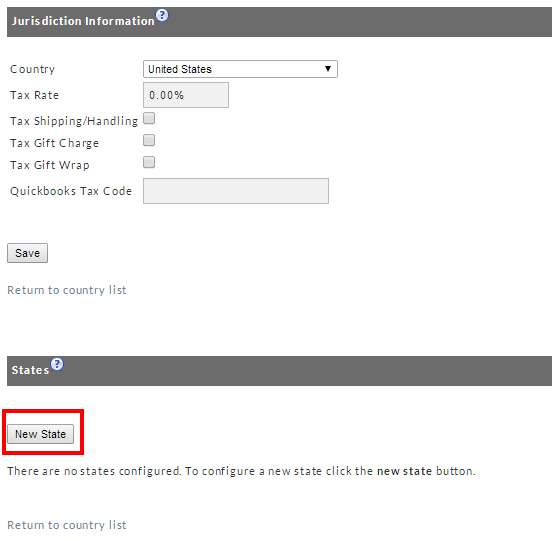
Adding A State:
Click the New State button to add a new state. The following screen will appear.
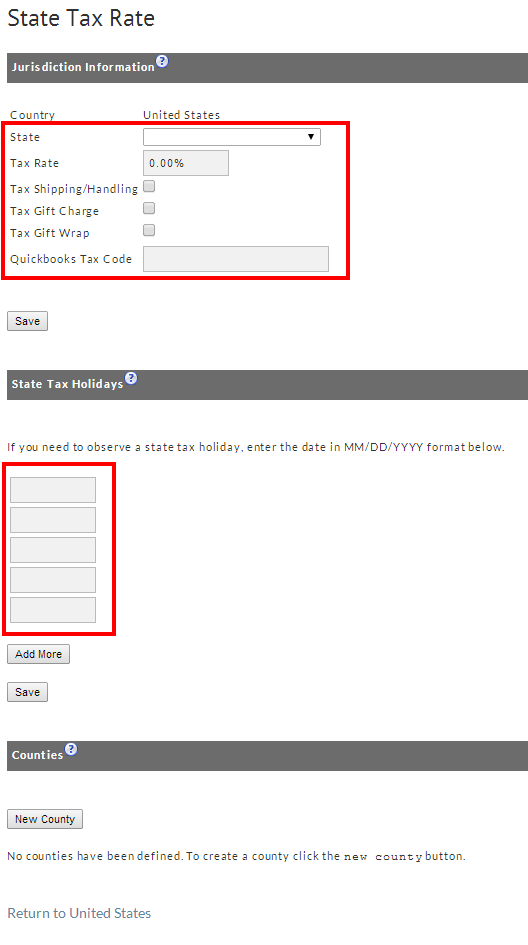
Select a State from the drop-down list. Enter the tax rate for that state and determine whether you desire to tax the shipping and handling or not.
If so, click on the check box to the right of the statement “Tax Shipping/Handling”. Click on the Save button and you will be returned to the Country Tax Rate screen.
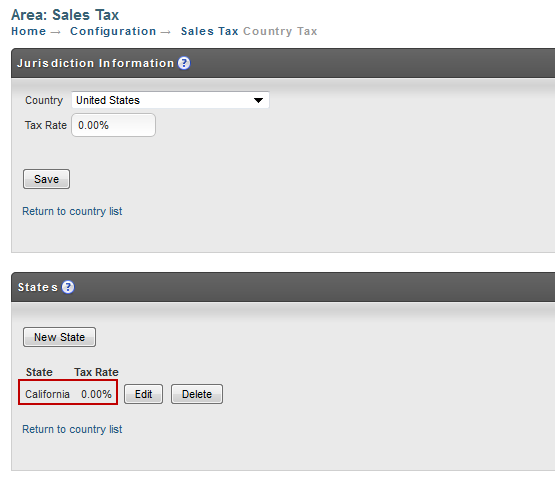
You'll now see the configured State Sales tax rate listed.
To add another State, click on the New State button and repeat the steps above.
To delete a State, click on the Delete button. To change the Tax Rate percentage for a particular State, click on the Edit button to the right of the State desired.
County
To add a County (for a particular state) you'll start at the Country Tax Rate screen. Click on the Edit button to the right of the desired State.
The screen will now show the State Tax Rate settings. Your State information will be listed in the upper half of this screen. You'll find the Counties section at the bottom of this screen.
We are showing only the Counties portion of the screen below to save on space.
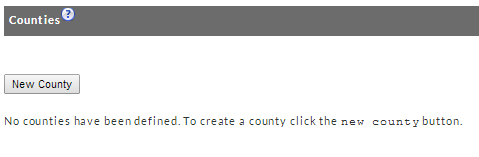
The message “No counties have been defined...” will be displayed until you add your first County.
Adding a County:
Click on the New County button. The County Tax Rate screen will appear. .
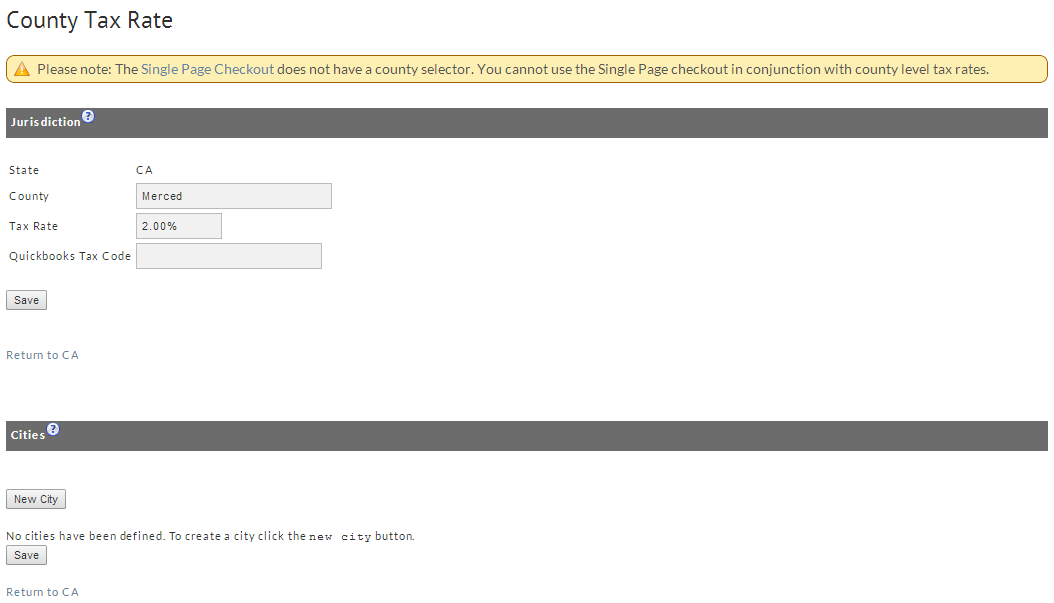
Enter (type) the County name. Also enter the Tax Rate (if any). Notice there is a warning about the use of county in conjunction with our Single Page Checkout.
Click on the button. The screen now shows your County configuration.save
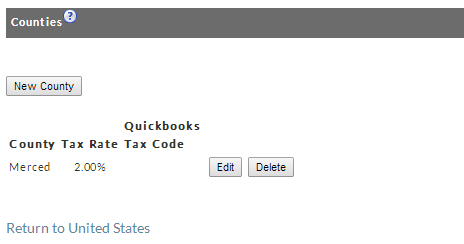
To add another County, click on the New County button and repeat the steps above.
To delete a County, click on the Delete button.
To change the Tax Rate percentage for a particular County, click on the Edit button to the right of the County desired, make your changes and click save.
City
To add a City you must be at the State Tax Rate screen which shows your State and County configurations. Click on the Edit button to the right of the County desired. The County Tax Rate configuration screen will appear.
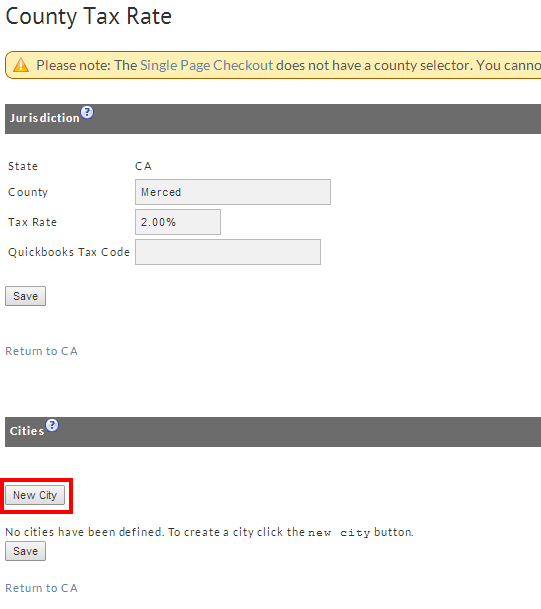
Your County information will be listed in the upper half of this screen. The message “No cities have been defined....” will be displayed in the lower portion of the screen until you add your first City.
Adding a City:
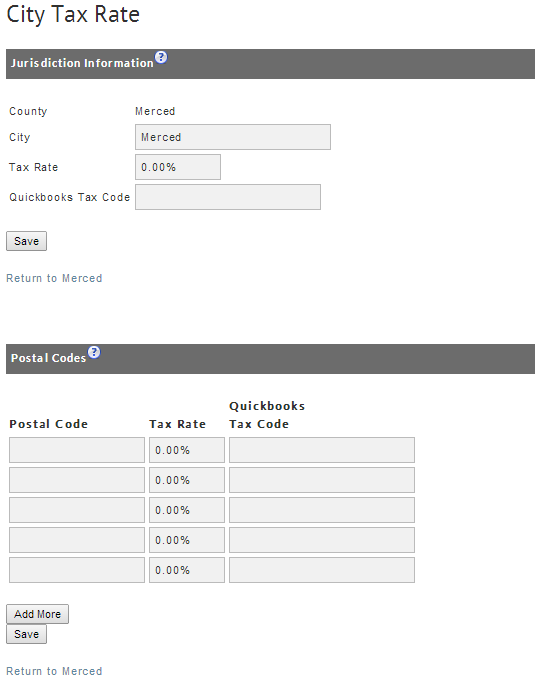
Click on the New City button. The City Tax Rate screen will appear. Enter (type) the City name.
Enter the Tax Rate. Now that you are experienced with this hierarchy, we'll configure the Postal Codes before saving the state configuration.
Postal Code
Adding Postal Codes:
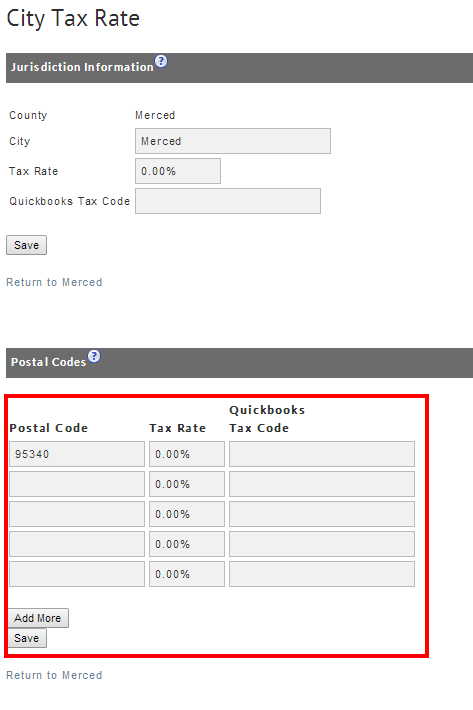
Postal Codes are entered in groups of five (5) input fields. If you have more than five codes to enter, click on the Add More button.
Continue this process for each additional group until all codes are entered. Then click on the button. You will be returned to the County Tax Rate screen. save
Congratulations! You are all finished configuring your Tax configurations. You can come back to make changes or updates at any time.
Now that you have them configured, you can continuously click the edit button for each category (i.e., Country, State, County, City) to drill down to the level you want to edit.
Taxable Address
You can select which address from which tax rates should be calculated. This varies by jurisdiction, so you will need to verify with your local officials the correct settings. At the Tax Rates Configuration Screen, click on the radio button to the left of either Billing or Shipping.

When you have completed your changes, click the button to continue.save
Automatic Exemption
Here you can exempt orders with email addresses ending in .gov or .edu from sales tax. Simply click the check box to left of the statement ending in .gov or .edu or both.
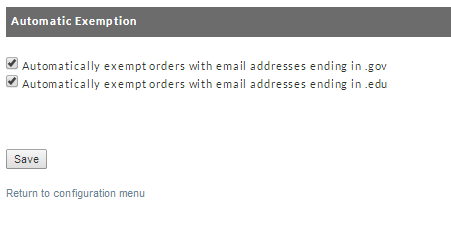
When you have completed your changes, click the button to continue.save
Tools
We have provided three links for tax data feeds. When you click one of the links, you will be taken to their web site or to a wizard to assist witht he download.
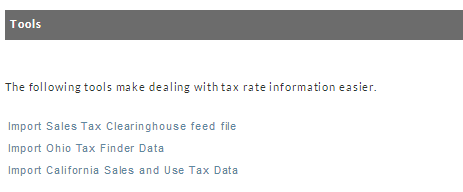
Import Sales Tax Clearinghouse feed file
The Sales Tax Clearinghouse (STC) offers raw sales tax data by ZIP code with either quarterly or monthly updates for a fee (www.thestc.com). The data format is a simple, fixed-length text file containing ZIP code, state, county, city names, and state, county, city sales and use tax rates. After subscribing, you will receive periodic instructions on how to download the data file. After downloading the data file, you can configure UltraCart to automatically import it into your Tax Rate section thus eliminating the manual entry method.
![]()
Note: the STC file must reside on your system in order to enable this feature. Using this tool, you can import the STC feed file quickly and easily into your UltraCart store. This is a simple two-step process:
1. File Import field: Either type in the path to your STC feed file or click on the Browse button and navigate to where the file is located on your computer. 2. States field: Manually enter (type) the two-letter abbreviations for all the states that you would like to import. Each state must be placed on its own line (press the enter key at the end of each abbreviation). Enter ALL to import all the states. Click the Continue button when finished.
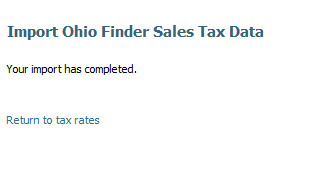
Import Ohio Tax Finder Data
The link will take you to an UltraCart wizard that will automatically retrieve the latest Ohio The Finder County Rate Table by Zip and import it automatically into your UltraCart account.
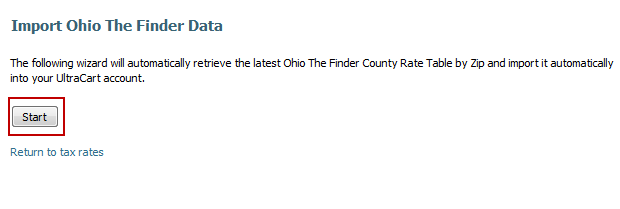
Click the start button to begin.
When the import has completed, the following screen will be displayed.
Import California Sales and Use Tax Data
This link will take you to an UltraCart wizard that can automatically retrieve the latest California Sales and Use Tax data and import it into your UltraCart account.
Click on the start button to begin.
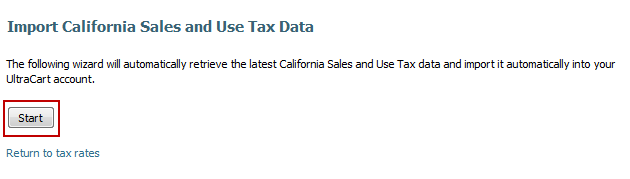
The wizard will import the State, County, City and Zip tax amounts and place them appropriately in the Tax Configuration Tables. You can later edit them at will.