Overview
This tutorial will walk you through the process of creating an upsell using the new Visual Builder powered upsell functionality. This new upsell functionality provides for several important benefits:
- Design everything visually
- Easier to understand visual layout of the order of the offers
- A/B path variations
- A/B offers
- Superior statistics about the upsell offer and path performance
Webinar Video: Upsell After Visual Builder
Storefront Themes that have the Visual Builder
It's important to note that this new functionality is available in the following theme:
- Elements version 0.96 or higher
- Fashion 0.20 or higher
- Mr Teas 0.48 or higher
- Natural 0.27 or higher
- Woodland 0.21 or higher
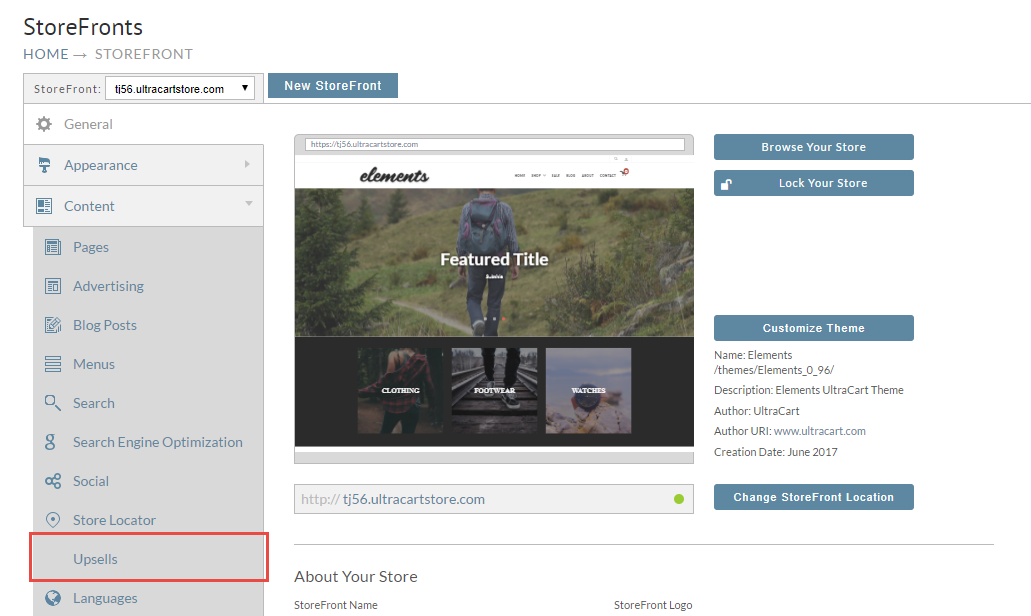
To get started, expand the content section of your StoreFront and click on Upsells. If you do not see Upsells listed, then you are not running a theme that supports visual upsells.
The first thing that you want to do is create a path by clicking on the new path button. A path is a sequence of offers that a customer will experience during the checkout if the customer has an item in their cart that triggers the path. A customer will go through each path that they qualify for starting at the top of the page and working their way to the bottom.

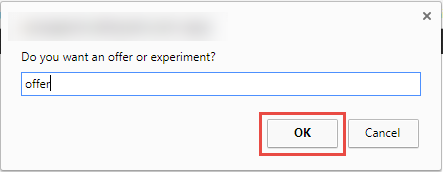
Click on the + button to create your first step.

A prompt will appear on the screen. We're going to create an offer so click on OK as shown below.
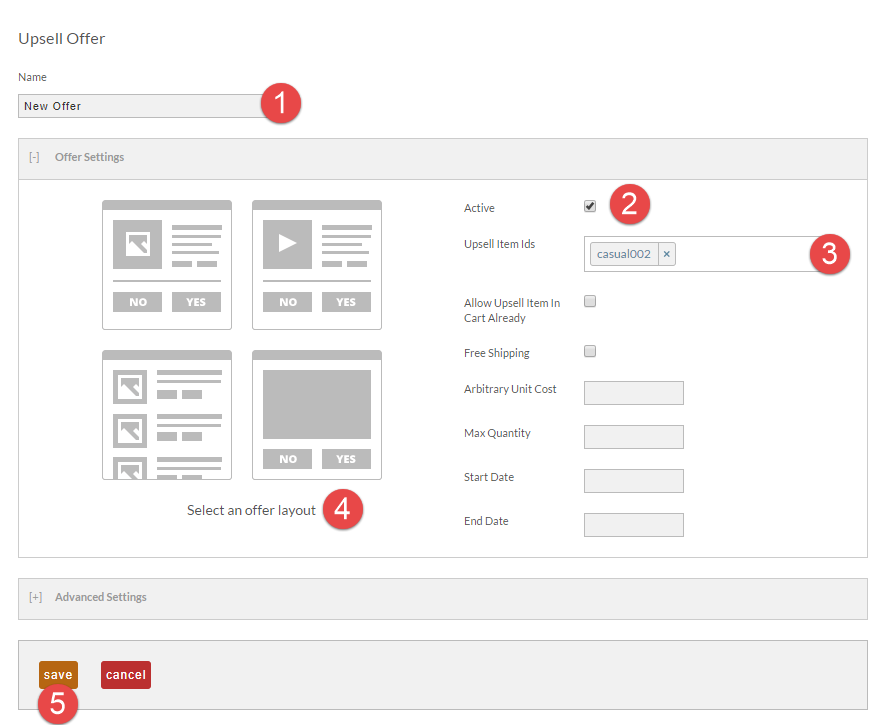
When the editor appears, there are 5 minimum things that you have to complete. Follow the steps below:
- Give the offer a meaningful name (not visible by the customer)
- When ready, set the offer to active.
- Choose the item(s) that are being upsold to the customer.
- Pick one of the pre-defined layouts that you want to start with. After picking the layout you can click on the preview of the offer to launch the visual editor for the upsell. Make whatever content adjustments to the offer that you want. Note that the first two pre-defined layouts use a textblock of "lorem ipsum" as a placeholder. So make sure you change that to some meaningful marketing verbiage.
- Save
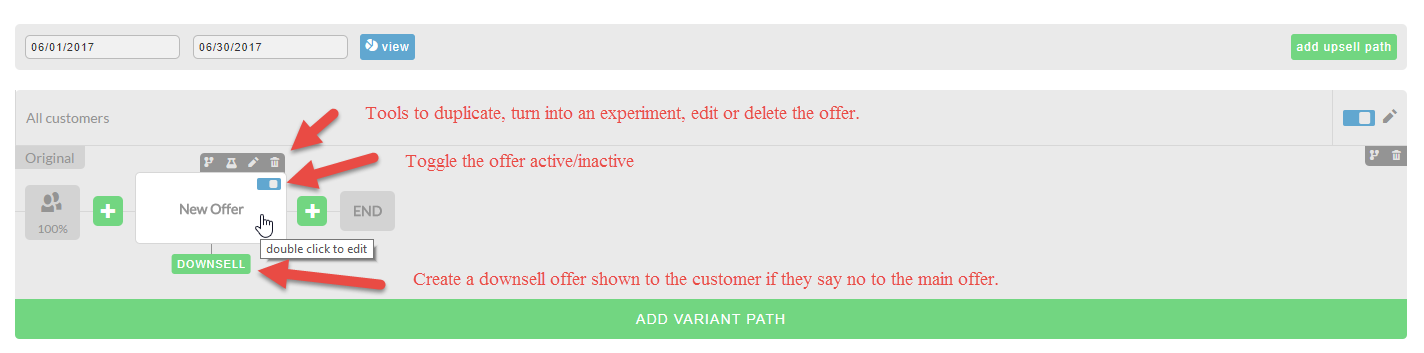
Now that we have our first offer created, let's look at how it shows in the path. When you hover over the offer you will see a grey popup set of tool icons along with a DOWNSELL option. There is also a quick toggle to make the offer active (blue) OR inactive (grey).
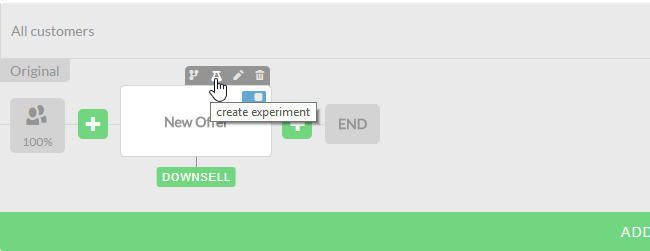
Creating an Offer Experiment
Hover over an offer and click the experiment icon as shown below.
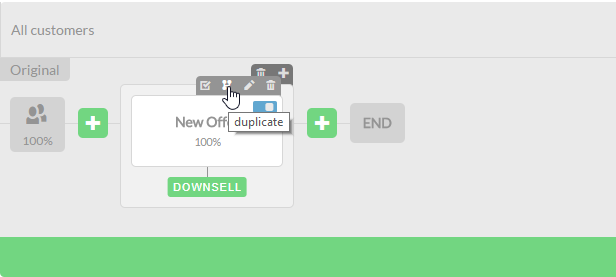
Now that the single offer is contained in an experiment we can hover over the offer and use the duplicate tool as shown below.
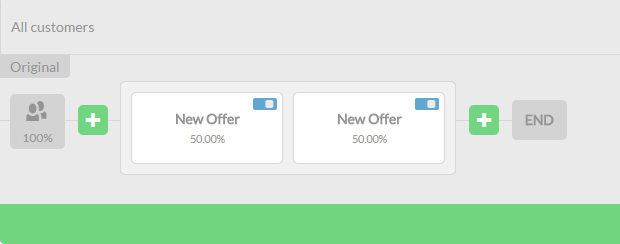
We now have two offers within an experiment. Since there are two offers, each one will receive 50% of the traffic. If there were three offers in an experiment then each one would receive 33.33%, etc.
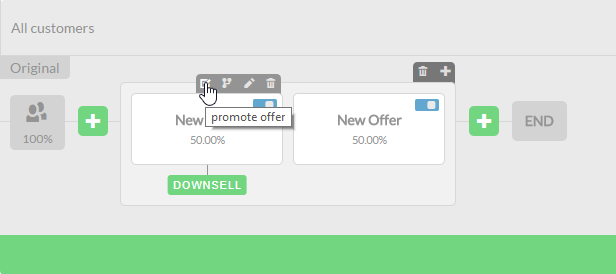
When you've decided on the winning offer in an offer experiment, hover over that offer and click the promotion tool as shown below. Once done, only the winning offer will remain.
Creating a Path Experiment
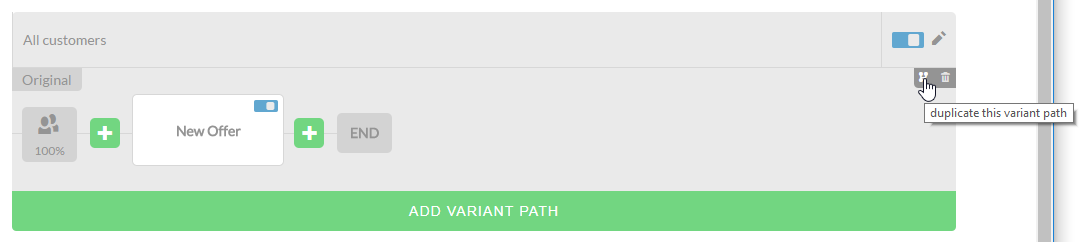
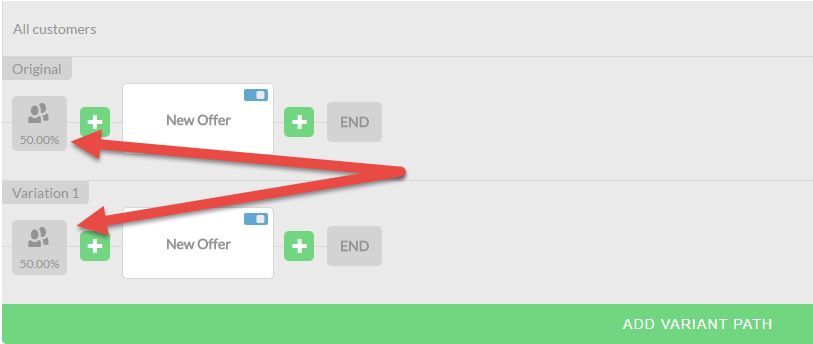
You can also create A/B tests for a particular path. These can be used to test different sequences or combinations of offers to see what is the optimal arrangement. To create a test you can either click the "Add Variant Path" button or duplicate an existing path as shown below.
Once you have two or more variants to a path, you will see that the traffic is going to be split between the variant paths.
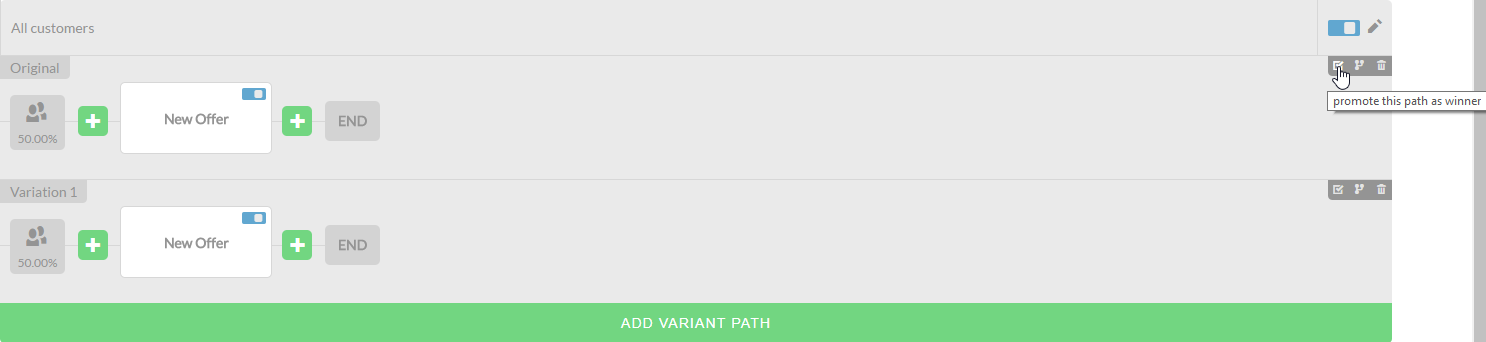
After a winner has been determined you can click the promote tool for the variant path winner. The looser will automatically be removed.
Drag and Drop
You can drag and drop offers/experiments to rearrange their position within the path or move them into new paths. You can also drag and drop offers into or out of an experiment. See the video below.
Viewing Statistics
To view the statistics enter the start/end dates and then click the view button as shown below.
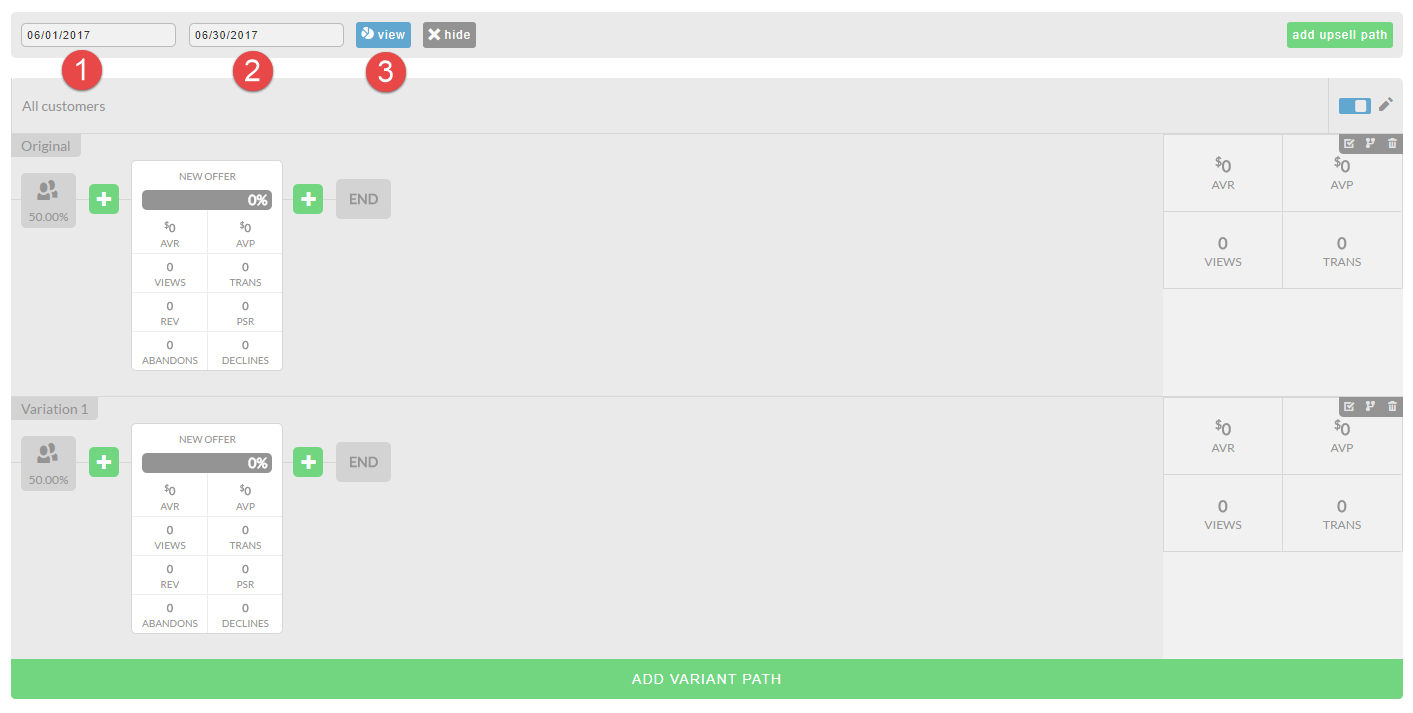
For each offer you will see the following statistics
- Conversion percentage
- Average Visitor Revenue (AVR)
- Average Visitor Profit (AVP) - requires configuration of cost of goods sold (COGS) on your items
- Views
- Transactions (TRANS)
- Revenue (REV)
- Per Sale Revenue (PSR)
- Abandons
- Declines - number of people that clicked no to the offer.
For each of the paths you will also see:
- Average Visitor Revenue (AVR)
- Average Visitor Profit (AVP)
- Views
- Transactions (TRANS)
Frequently Asked Questions
Q: When I create the VB version of the upsell, will it automatically replace the legacy one, or will I need to switch it over, or delete the old one? What's the mechanism that switches from the old to the new?
A: Once you have created an upsell offer in the Visual Builder, it will take over and the old offers will be ignored. You will not need to delete the old offers for the VB offers to take affect.