This is a great tool to allow a merchant to easily view an Affiliate's dashboard. This will take you to the exact same screen that your affiliate will see when they log in. Since you want your affiliates to be as successful as possible, you the merchant will need to have a good understanding of how this section works so you can explain things to the novice affiliate.
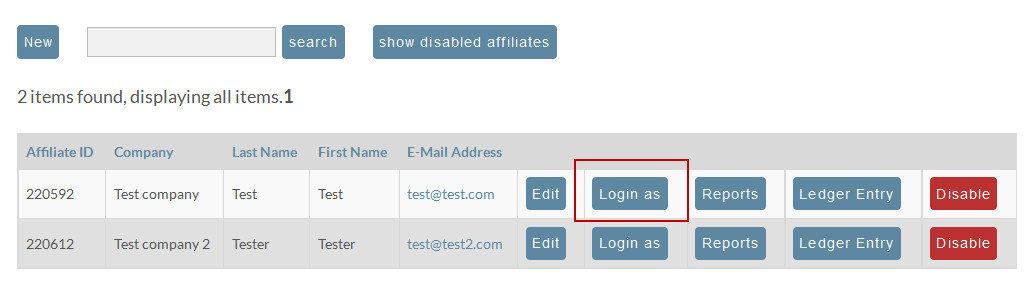
Click on the "Login as Affiliate" button. This will take you directly to their dashboard (no password needed).
The dashboard displays five topics; Reports at a Glance, Commissions, Affiliate Tools, Affiliate Recruiting Link and a Simple Affiliate Link.

Reports at a Glance
Here you can view the affiliate's statistics for a certain period. You can filter the report by one of the following two criteria:
- pre-defined periods from the drop down list

- Date Range; simply select, via the drop downs, the from/to dates.
![]()
Click the radio buttons to the left of the search method desired and make your selections via the drop downs. When finished, click the "Change" button to view the results.
Commissions
This section simply shows the commissions the merchant has configured for this affiliate.

Affiliate Tools
Your Affiliate has three tools to help them manage their affiliate program; Manage Links, Update Your Information, and View Reports. These 3 options are displayed directly under the Affiliate Tools heading. The fourth item in the list is a "Log Out" button.
Manage Links

This is where your affiliates can create, view, edit and delete the links they will use on their web site to promote your products.
Manage Links
At the manage links screen, the affiliate will be able to select from the Creatives you already configured. When you click on the Manage Links link, the following screen will appear.

As usual, if no links have been created, you will see the typical invitation to create one. Click on the "new link" button to be taken to the Edit Link screen. 
There are basically four (4) items that need to be completed here; Name, Link type, Link Pointer and PPC Conversion Code for Receipt Page.
| Field Name | Description |
|---|---|
| Link Name | Enter the name you want to use to identify this Link. Your naming scheme will help you organize and manage your links. |
| Link Type | There are three options here; Image, text or Invisible. The user will click the radio button to the left of the Link desired. When the selection is made, additional fields will appear below the Link Type section for further choices. |
| Link Type Section | Image Link If Image Link type is selected, a new section will appear displaying all Images that you have uploaded when you configured your Image Creatives. The user must click the radio button to the left of the image desired. In the following example, only one image appears for choice.  Text Link If Text Link type is selected, a new section will appear displaying the Text Creatives you configured previously. The user must click the radio button to the left of the Text desired. In the following example, two text choices are offered.  Invisible Link If the Invisible Link type is selected, a new section will appear displaying an empty text box. The user will enter the URL they will be referring traffic from.  |
| Link URL | Affiliates are given the option to select where they want to take the user when they click the link. The affiliate can make their choice from this drop down list. There will be at least two options here (a third option will appear if the merchant has configured "Per Item Commissions"). Option 1: The Merchants Home Page. UltraCart will us the URL that the merchant configured at Main Menu Configuration Merchants Profile Store URL.  Option 2: "Custom Landing Page". If selected, a text box will appear to the right. If the affiliate has a special web page created to promote your product, they will enter the URL here.  Option 3: Store Item. If the merchant configured any "Per Item Commissions" in the affiliate program, then the Item Description of the items that are designated as such will appear as choices in this drop down window.  |
Pay Per Click (PPC) Conversion Codes
These fields are only visible if the merchant has enabled this feature at the Affiliate Management settings screen. If the affiliate would like PPC conversion codes to render on the receipt they can specify their account ID at these fields.

Once all the information has been completed, click the "Save" button at the bottom of the screen.
The next screen will show the html snippet for the newly created affiliate link. An optional link will also be shown that can be used if the affiliate wants to use their alternative content. 
Click the "Return to manage links" link to see a listing of your affiliate links. 
There are 3 buttons to the right of each Affiliate Link listed. Click the "edit" button to make changes. Click the "view" button to see the actual link (copy and past as needed). Click the "delete" button to remove the link. Caution, no warning dialog will appear.
Update Your Information
When this link is clicked, the affiliate will be taken to a screen listing their account information for editing. 
The two account ID fields at the bottom of the screen will only be available if the Affiliate clicks the checkbox under Receipt Settings on their initial signup form.
When finished making changes, click the "Save Changes" button at the bottom.
View Reports
Three different reports can be generated from this screen; Completed Transactions, Click History, or Impression Entries. For more about this section please follow the documentation provided.
Affiliate Recruiting Link
Clicking this link will take the Affiliate to the signup screen.
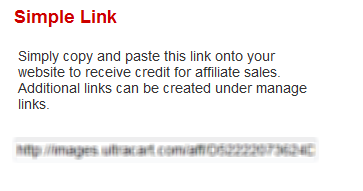
Simple Link
This is a default link created by UltraCart that the affiliate can utilize immediately after signup (approval). This is especially helpful for the novice to allow them to quickly get started without having to "create" links through this system.