...
To view, add or edit your store items, log in to your account and navigate to:
| Panel |
|---|
| Store → Items |
View from the Root Folder
...
Click the "new" button to add a new store item. You will be taken to the Item Editor screen where you can enter all the attributes of your new item. At a minimum, you should fill in an Item ID, Description, Cost and Weight. All of the Item fields and Screen Tabs (options) are explained in the Item Editor Section. You may want to skip to the Item Editor section to create your first item.
| Related Documentation |
|---|
| Add Folder, Item, Kits |
| Item Editor |
...
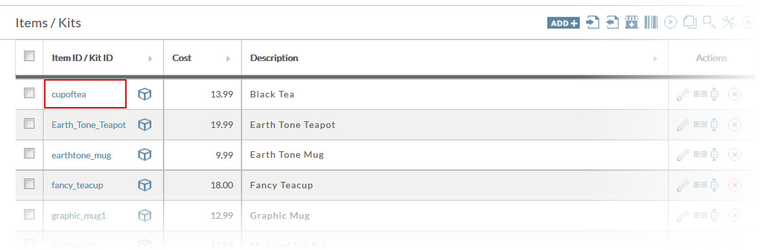
Item Listing
Store Items will be listed alphabetically under four columns (highlighted in the red box in the following figure). They are; Item ID, Cost, Description, and Actions.
...
You will be presented with the following confirmation dialog. 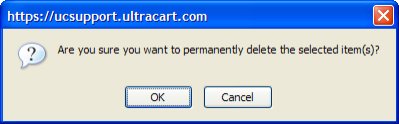
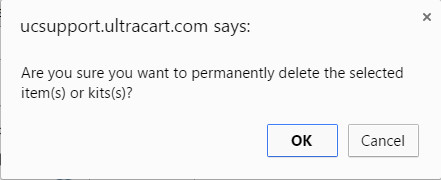
Make certain the warning dialog says "Item(s)" not "Folder". Click the "OK" button to delete the item(s) or the Cancel button to abort the process.
| Info |
|---|
|
Copying Items
It's sometimes easier to copy (duplicate) an Item rather than create a new one. After copying, you can change the attributes of the item in the Item Editor.
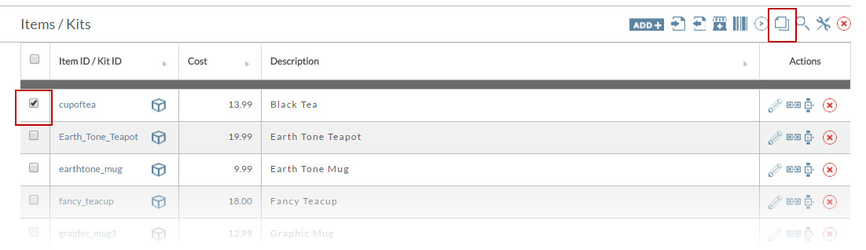
First navigate to the folder your item to be copied resides in. Click the checkbox to the left of the item. 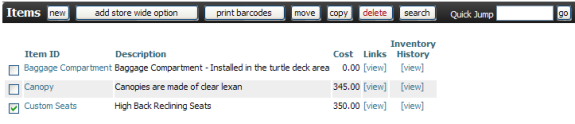 Once you've selected the item, click the "copy" buttonFrom the items list simply select the item you wish to copy and then click the Copy icon from menu.
After clicking the "copy" icon. The following screen will appear.
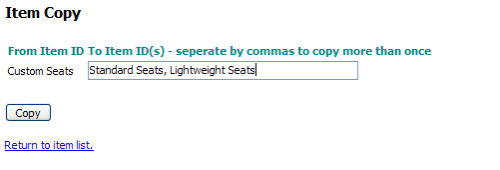 Item Copy screen
Since you cannot have two store items with the same Item ID, you will be asked to enter the new Item ID into the box. The screen shows the original Item ID to the left. If you want to create more than one copy, separate the new Item IDs with a comma (Figure 231 - Item Copy screen). Click on the "copy" button when finished. Your newly created (copied) items will now be displayed in the item list. 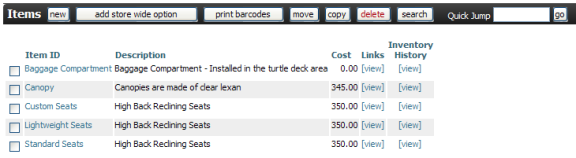
| Info |
|---|
It's suggested that you immediately go to the Item Editor and make the necessary changes to each item. Click on the Item ID (link) to be taken to the Item Editor for that specific item. |
Item Search
If your store has numerous items, it can sometimes be difficult to locate them, especially if you've nested them into folders. The item search feature turns that chore into a simple task. It will search all folders at all levels regardless of what level you are presently at.
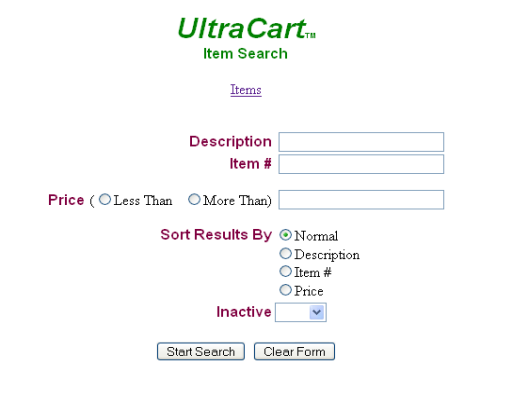
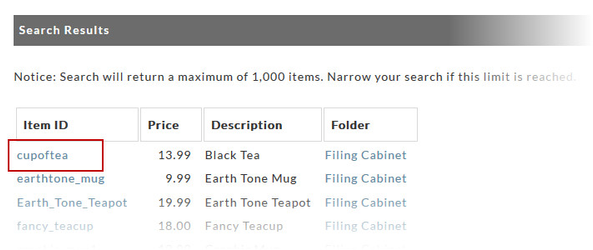
To start the search, click on the "search" button icon in the Items heading. This will bring up the following Item Search screen.
Item Search screen
You can search for items by Description, Item# (ID). Along with this criteria, you can specific a price with "less than" or "more than" parameters. You can specify how you want your items sorted; normal, by description, by item# or by price. Lastly, you can specify if the items are Inactive (yes or no). Once you have entered your search criteria, click on the "Start Search" button. If you want to clear the form to enter new search criteria, click on the "Clear Form" button.
Your search results will appear in a browser window. You can then print the listing or return to the Item Search screen by clicking on the browser's back button.
Quick Jump
The Quick Jump is a great shortcut to take a store item to the Item Editor if you know the exact Item ID. This finder will search your entire store item data base regardless of which folder you have navigated to.
![]() Enter the Item ID into the Quick Jump Field. Then click the "go" button. If the item is successfully located, it will appear in the Item Editor Screen.
Enter the Item ID into the Quick Jump Field. Then click the "go" button. If the item is successfully located, it will appear in the Item Editor Screen.
Add Store Wide Option
This feature will allow you to apply pre configured Item Options to any Items that reside in the folder (level) that you are presently in. Store Wide Item Options are discussed later in this chapter.
...
- click on an Item ID link from the Item List screen.

- click on an Item ID link from the Search results screen.

...
Item
...
![]()
...
Item Links and Buy Forms
Certain links are associated with your store items and are automatically created when you create your items.
...
UltraCart will create the HTML snippet (link) for each store item you create. The buy links are accessible from the Item List.
| Panel |
|---|
| Navigate: Main Menu |
...
| → Items → Item Management |
...
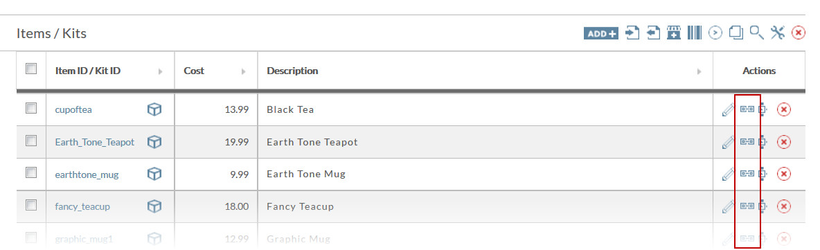
First locate the item list that contains the item desired. To obtain a buy link snippet click on the "[View]" link to the right of the Cost column in the row your item is on (see image below.)
The following screen will appear listing the Buy Link, Buy Form, Dynamic Pricing, and Other Links. 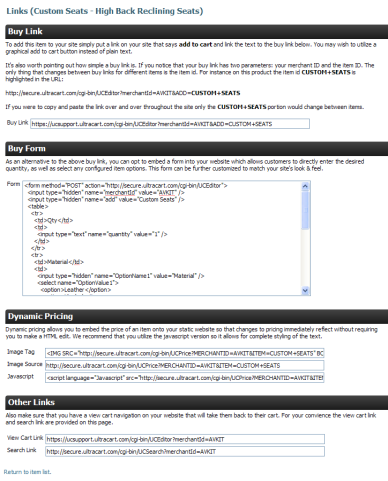
View of Item "
Buy Link
...
Buy Link
When customers browse your web site (store) and find an item to purchase, they generally click on a button that will place the item into a shopping cart for checkout.
Some buy button examples are shown below.
...
Below is an example snippet of html code for a buy link.
<A HREF="http://secure.ultracart.com/cgi-bin/UCEditor?MERCHANTID=DEMO&ADD=DOGBONE">Buy Now</A>
There are two key variables within any buy link, shown in bold above.
The first variable is the merchant ID. In this example, the merchant ID is "DEMO." Replace the merchant ID with your merchant ID (chosen during signup).
The second variable is the item ID. Each store item has a unique item ID associated with it. The item ID is included in the link's target. In the example, replace DOGBONE with your products item ID.
Buy Link HTML snippet
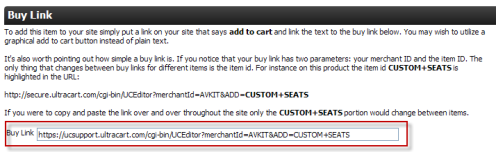
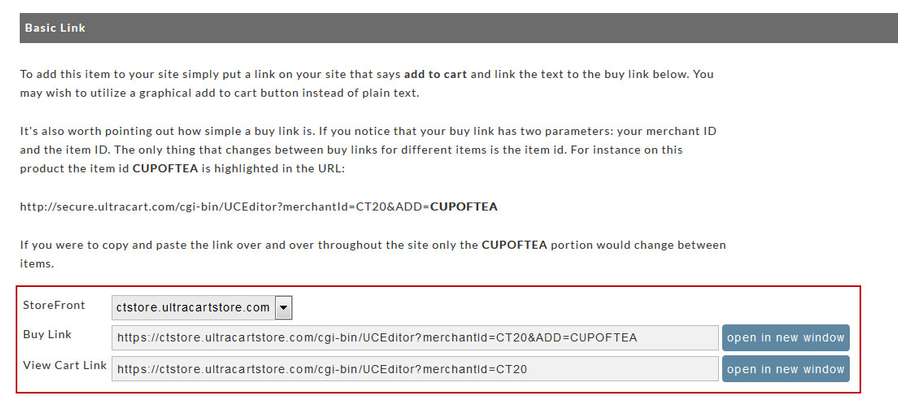
You or your web designer can copy all the text within the red box and paste it into your web page. With just a little editing it can be turned into the appropriate and complete HTML code.
...
As an alternative to the above buy link, you can opt to embed a form into your website which allows customers to directly enter the desired quantity, as well as select any configured item options. This form can be further customized to match your site's look & feel. A thorough working knowledge of html is necessary. Most merchants have a web designer/editor on hand to accomplish this kind of task. 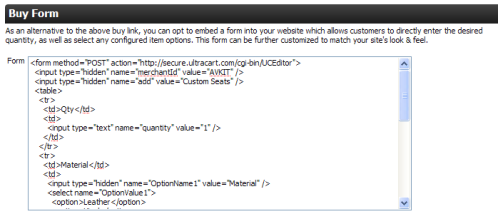
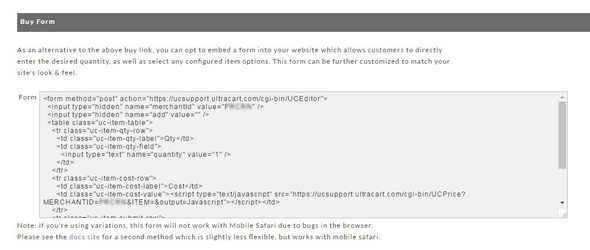 Item Buy Form
Highlight, copy the form from the above box and paste it into your web page.
| Info | ||
|---|---|---|
| ||
When you have item options (input fields and drop-down menu options) the buy form code will automatically have the configured options configured in the code. |
...
Embedding a Dynamic Price Link
Dynamic pricing allows you to embed the price of an item onto your static website so that changes to prices in the item editor will be immediately reflected on your site without requiring you to make a HTML edit.
Prior to embedding, you need to configure your Dynamic Price (font style, size and colors). See Dynamic Price in Chapter 3 – Shopping Cart Look and Feel Configuration (page ).
Embedding a Dynamic Price link is also a simple process and similar to the procedure for the Buy Link.
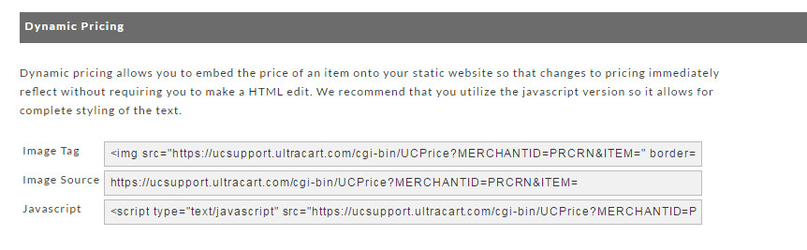
 Item Price Image screen
| Name | Description |
|---|---|
| Image Tag | Copy the Image Tag from the first box into your web page where you want the Dynamic Price to appear. |
| Image Source | To view the Dynamic Price (sample) in your browser, copy the Image Source code and paste it into a browser address window and press the enter key on your keyboard to view the Dynamic Price in your browser. |
| JavaScript | We recommend that you utilize the JavaScript version so it allows for complete styling of the text. |
Other Links
This section present has two special links; View Cart Link and Search Link.

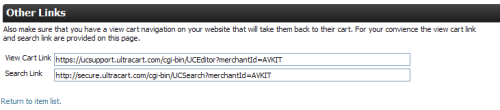
| Name | Description |
|---|---|
| View Cart Link | Often times customers will leave the cart to return to your website for additional shopping. Placing this link on your web pages provides navigation that will take customers back to their cart. |
| Search Link | This is a valuable link that takes the customer to an UltraCart search box page. Customers can enter search criteria to search your Item list. A successful search will bring the item(s) into view with buy now buttons so the customer can put them into the car. |
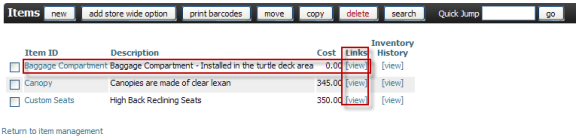
Inventory History Link
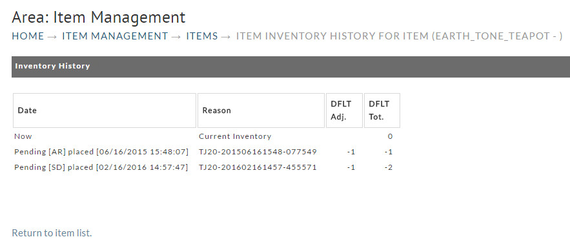
This feature applies only to those merchants that have the Track Inventory enabled at each item level (see page ). It basically provides an accountability method to show when, how much, and who adjusted the inventory level of a particular store item.
Adjustments to any item's inventory will be logged along with the date and time of the occurrence, adjustment amount, total (inventory count) and Reason (by whom). This activity can be viewed by merchants at the Item Level.
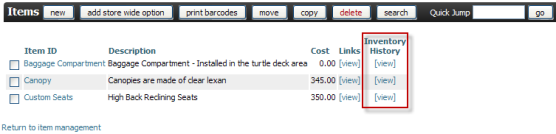
Navigate within the Item Editor List to locate the item you want to view. Click on the "[view]" link (the watch icon) under the Inventory History Action column in the row of the item desired (bordered in red box above). The Inventory History screen will appear.
Notes about the inventory tracking:
- .....
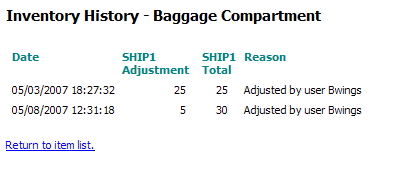
Each activity will be listed in separate rows. In the example above there are 2 entries:
...
Merchants Using Frames
UltraCart will work effectively with web sites that use frames, but there are some additional configuration requirements to ensure a consistent customer experience.
When the customer clicks the buy link on the merchant's web site their shopping cart displays inside the frame. In order for the secure checkout to take place without showing the customer a warning message, the system must stop using frames. This presents a problem because UltraCart by default returns them to the page that they clicked the buy link on once they've completed the order. This happens to be the contents of the frame instead of the parent URL of the frame.
There are two additional parameters to the buy link that determine where the UltraCart will take the user to:
...