...
After logging in to Amazon Seller Central you will see a dashboard. The Amazon Seller Central website manages your sales on Amazon.com as well as your Checkout by Amazon. Look at the top navigation bar. If the navigation bar has a drop down that shows www.amazon.com as shown below:
then click the drop down list and select "Amazon Payments Advanced Pay (Sandbox View)" as shown below:
Amazon Payments Getting Started Guide
...
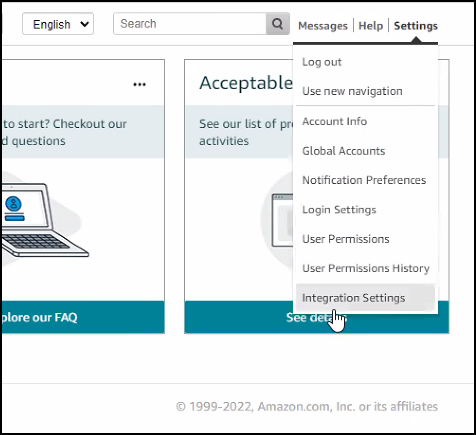
At this point we need to look up one more piece of information below going to UltraCart and configuring Amazon Payments. In the upper right corner of Seller Central click Settings -> Integration Settings as shown below.
Copy the Merchant ID as shown below into the same text document used in Step 2.
While on the Integration Settings page we can quickly configure the Instant Notification Settings URL. This allows Amazon to proactively notify UltraCart about the flow of Amazon payments through the various stages. Click Edit next to the Integration Settings and then configure the Integrator URL as:
...
After saving the Integration Settings should look like this:
Open another browser window, login to your UltraCart account and navigate to:
...
| Info | ||
|---|---|---|
| ||
Make sure that when copying the credentials into the UltraCart configuration fields that there are no extra spaces in the front or back of the credentials, as this will cause the credentials to fail the validation upon saving. You can copy the credentials into notepad or text editor to make sure that you have no additional whitespace. Then copy into the UltraCart configuration spaces. |
Copy and paste the Amazon Merchant ID, Amazon Access Key ID, and Amazon Secret Access Key into the fields provided (shown below). Check the Test Against Amazon Sand Box checkbox. We will perform a test transaction in this tutorial before turning the integration on live.
...
Scroll to the bottom of the page and click Save. At this point you can mark Step 3 as completed in Amazon's setup guide as shown below.
Step 4 - Test Your Integration
...
| Info | ||
|---|---|---|
| ||
In the screen shown below, make sure to use your own name and email address when creating the test user (leave all example addresses selected.) |
...
Once you've click the Create account butt, he page should show a confirmation and show the new test user.
...
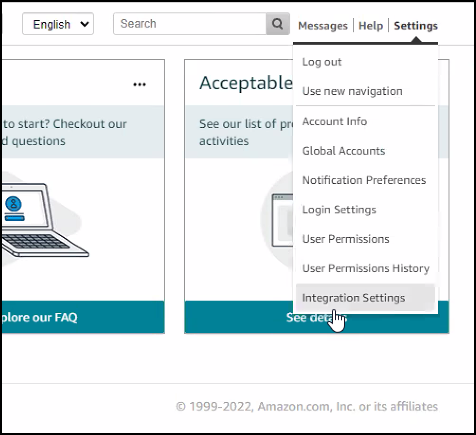
Now that we're in the production mode of Amazon Payments we need to configure the IPN notification URL one more time. In the upper right corner of Seller Central screen, click Settings -> Integration Settings as shown below.
On the Integration Settings page configure the Instant Notification Settings URL. This allows Amazon to proactively notify UltraCart about the flow of Amazon payments through the various stages. Click Edit next to the Integration Settings and then configure the Integrator URL as:
...
After saving the Integration Settings the screen should look like this:
| Note |
|---|
Failure to configure the Integrator URL for Instant Notifications will result in slower processing of Amazon orders on your UltraCart account. |
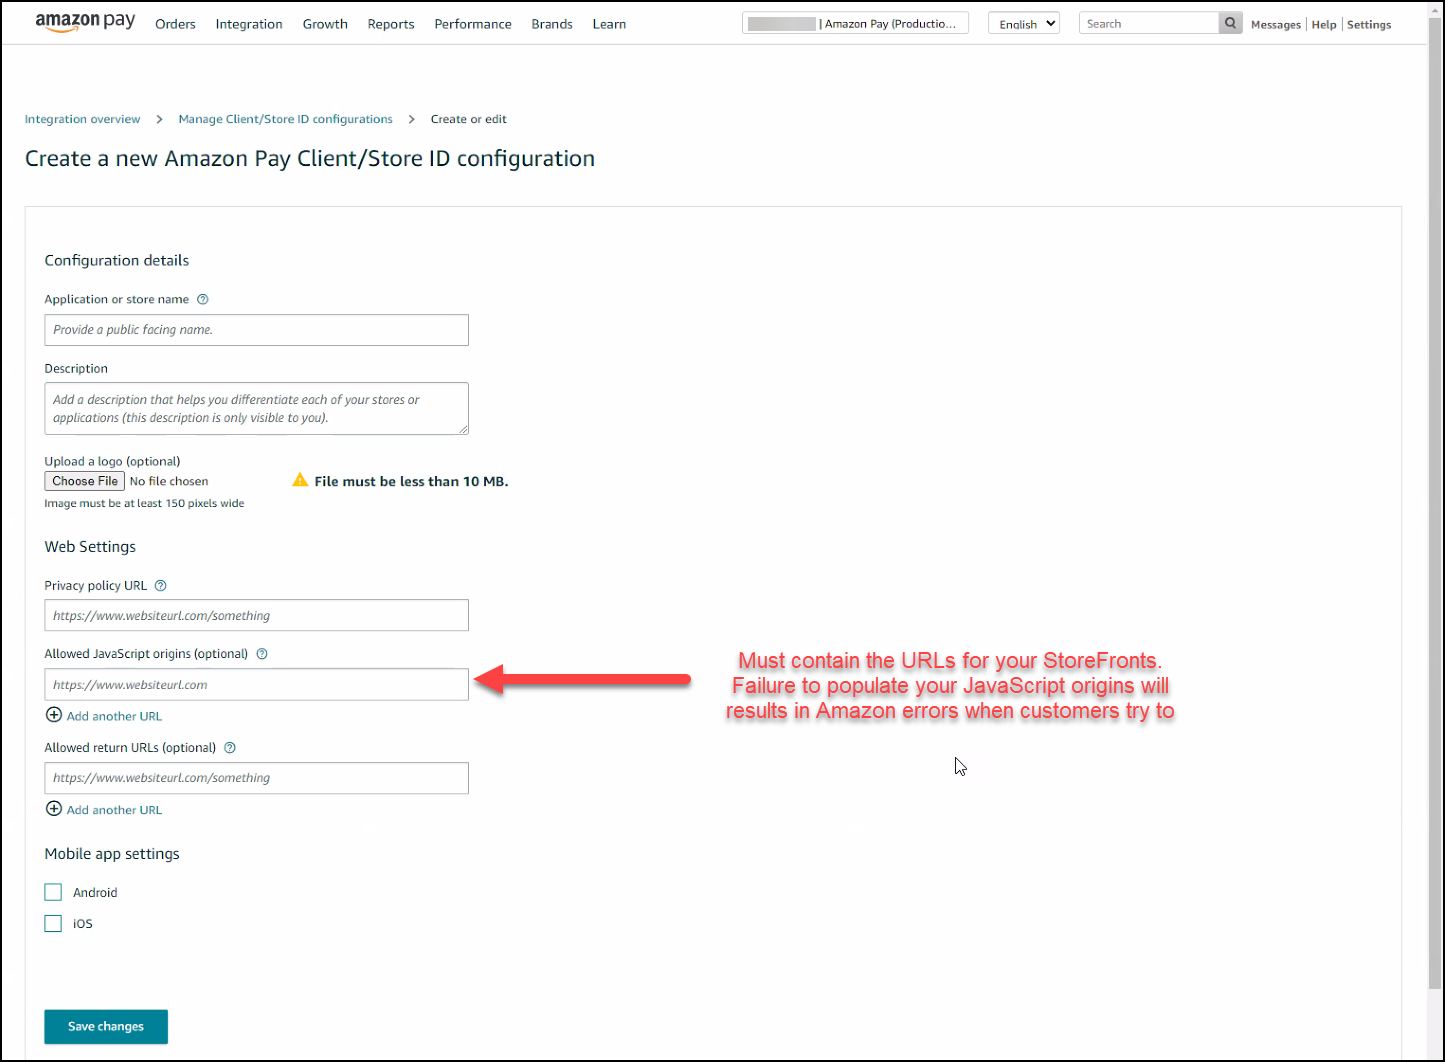
From the dashboard, click on Create Configuration for your Store Connection as shown below.
Complete the store configuration. Pay careful attention to the JavaScript origins field and populate that with the URL to your StoreFront.
Troubleshooting Going Live Errors
Error code: InvalidAccessRequest
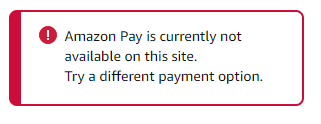
When testing your Amazon Pay integration with a live transaction you might come across a message that says:
In the details of that message you find the error code InvalidAccessRequest.
To resolve this issue, configure the JavaScript origins on your Store Connection configuration shown above.
Frequently Asked Questions: FAQ about Amazon Payments


