| Table of Contents |
|---|
Overview
...
- Install The plugin and Activate the plugin
- Connect your site to UltraCart via Settings → UltraCart
- Add eCommerce components to your site
NOTE: You can Install UltraCart eCommerce - Shopping Cart via the WordPress plugin directory, or by uploading the files manually to your server.
After becoming an UltraCart merchant, use the plugin to connect your accounts and authorize your site to use UltraCart via Settings → UltraCart in the WordPress admin menu.
Installing the plugin
The UltraCart WordPress plugin is located at the following URL:
...
Q: How do I add a product thumbnail to the "mini cart" (shopping cart snapshot that pops out of the right side of page after the item is added)?
A: The shopping cart snapshot is comprised of a set of hard coded in the PHP scripts and these scripts aren't presently customizable.
Q: How do I add a direct checkout link?
...
Inspecting and the Log
If you are having an issue with the plugin, there are two areas in which to inspect the plugin API logs.
- Authorized Applications Logs
- Webhooks Logs
In general, the webhook logs will have the logs for the communication initiating from UC to the server where Wordpress is hosted, while the application logs will contain the REST http requests and responses initiating from the Wordpress application to UC
Authorized Applications
To view the REST API logs for issue regarding the communication from Wordpress to UltraCart, log into UltraCart, then navigate
| Panel |
|---|
Main Menu → Advanced → Developer Tools → REST APIs → API Logs > Authorized Applications (tab) |
To view the log click the "Log" button:
...
The Wordpress logged events will appear like this:
Webhook Log
After you have successfully installed the wordpress plugin and are working with it, if you encounter and issue with either items syncing or item assignment, you can review the wordpress webhook logs for issue related to the activity of the plugin.

| Panel |
|---|
Main Menu → Advanced → Developer Tools → Webhooks → Webhook Logs > "Log" button |
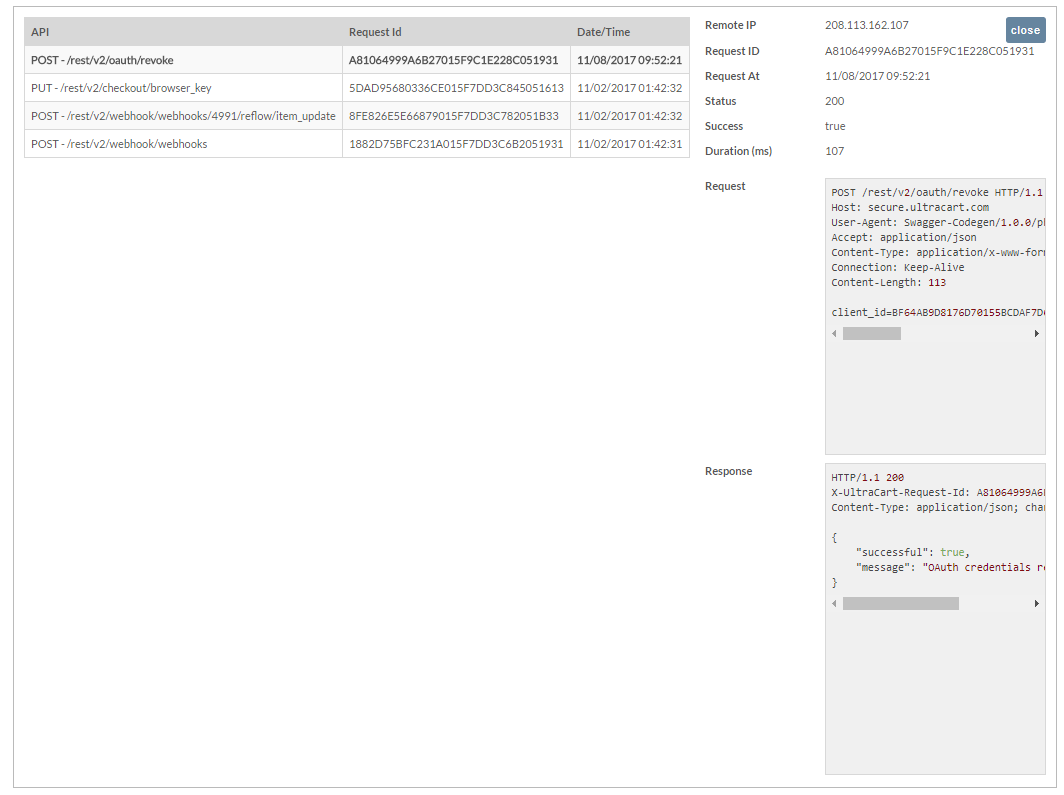
When reviewing the webhooks logs for errors, click the Request ID of the API call then inspect the Request & Response sections that are display along the right side of the page. The response will contain the error message:
...
- Within UltraCart, navigate to the REST API Logs.
NAVIGATION: Main Menu → Advanced → Developer Tools → REST API → API Logs - If you have more than one instance of the "UltraCart Wordpress" and "UltraCart Wordpress Checkout (Linked to UltraCart Wordpress)", click the revoke button for each instance of each.
- Next, navigate to the WebHook page
NAVIGATION: Main Menu → Advanced → Developer Tools → WebHooks → Webhook Logs - Click the "delete" button for each configured webhook with application name of "UltraCart Wordpress".
Inside of Wordpress
- Follow the installation instructions at the top of this document.
Troubleshooting FAQ
Q: I received an error on the back-end of my Wordpress site when trying to sync my items because new items weren't pulling in to Wordpress from UltraCart. I disconnected and reconnected Ultracart and now my items aren't syncing at all. I see a 403 error in the UltraCart Wordpress Webhook Logs. What could be the issue?
...
Q: What are the tracking scripts associated with the WordPress plugin integration?
A: There two potential tracking scripts, here's how to access them:
For example: