...
Configuring a mail server is a pain. There are hundreds of mail servers, each with their own nuances. The Autoresponder attempts to minimize the pain by providing a tool to test your mail server configuration from the start.
Before you create a campaign, you must have a mail server configured. It just makes sense. To configure a mail server, click on the Mail Servers link from the Autoresponder Home. This will display a list of all mail servers configured.
| Panel |
|---|
Operations → Marketing → AutoResponders |
| Tip |
|---|
Create more than one mail server. Configure and test your campaign with a mail server account you can afford to lose. Some companiescough Google cough are unforgiving when it comes to spam. If Google decides you're a spammer, the suspended account can never, ever be used again. So use a throwaway during development. Then, when everything is in place, switch to your main mail server and run through a final test. |
...
Click the Add Mail Server button (shown above). The Mail Server configuration screen will display the fields needed to set up both smtp and pop3 connections.
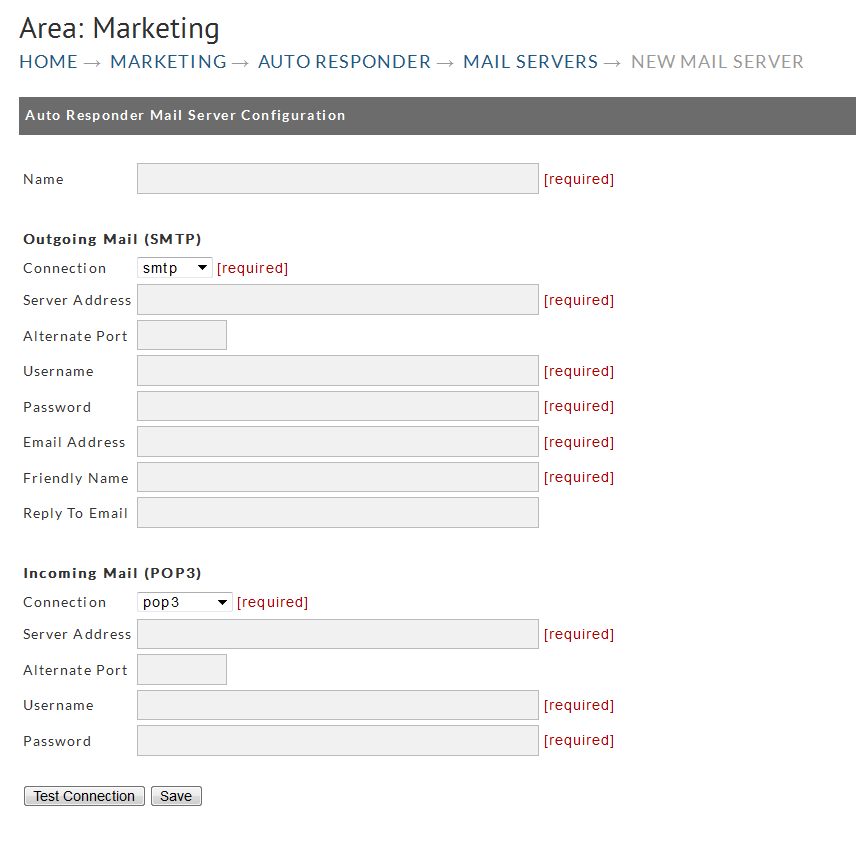
| Field Name | Description |
|---|---|
| Name | The name can be anything you desire. Spaces and strange characters are allowed. |
| SMTP Connection | Choose smtp or smtp-ssl. For google, choose smtp. For others, it will depend on your method of connecting |
| SMTP Server Address | Example: smtp.gmail.com. Your mail provider should have this address |
| SMTP Alternate Port | If your smtp server is running on a non-standard port, enter it here. This is an uncommon situation. |
| SMTP Username | Enter your username. Most often this is your email address. |
| SMTP Password | The password for making an smtp connection. This is usually the password used for checking your email. |
| SMTP Email Address | The 'from' address. All email will originate from this address. |
| SMTP Friendly Name | This will appear in the from field of the email. This should be descriptive. Using a friendly name of 'Joe' won't cut it. Represent your store with this name. |
| POP3 Connection | POP3 or pop-ssl. Regular POP3 is most common. |
| POP3 Server Address | Example: pop.gmail.com. Your mail provider should have this address. |
| POP3 Alternate Port | If your pop3 server is running on a non-standard port, enter it here. This is an uncommon situation. |
| POP3 Username | Enter your username. Most often this is your email address. |
| POP3 Password | The password for making a pop3 connection. This is usually the password used for checking your email. |
Validating mail server connections![]() Tip: Before saving, test your connection!
Tip: Before saving, test your connection!
Realize that any failure to send an email will mark a recipient as 'Failed' and suspend campaign execution. You must then reset the recipient and re-activate the campaign if you wish to try again. This is done for your protection. An incorrectly configured mail server will do two things: 1) cause your recipient to end up 'Failed' and probably disable your mail account due to repeated login failures. Test your connection!
...
The Mail Servers screen contains a list of mail servers that have been configured on the account. The display will shows the smtp and pop3 settings. It's a long list, so you will need to scroll to the far right to see the management button.

Button | Description |
edit | Click the edit button to change smtp or pop3 settings for your mail server. The edit page also contains a test button, so this is a good place to troubleshoot problems. |
delete | The delete button will delete a mail server. If a mail server is currently active for a campaign, the delete button is replaced by a message indicating that an active mail server cannot be deleted. Click the message to display a list of campaigns currently using that mail server (see figure below). |

