...
First we need to specify all the options within UltraCart that will control the details passed to Endicia. First navigate to:
| Panel | ||
|---|---|---|
|
Scroll down to the Endicia Dazzle section. Below is a screen shot of a typical configuration.
...
After you have configured the Dazzle options to meet your company's needs, scroll to the bottom of the page and click Save.
Building a Temporary Directory (One Time Configuration)
You will need to create a temporary folder at c:\endicia on your machine. We will assume that you have not worked on the command line and will create the folder using the Windows Explorer. First click on the Start button located in the lower left corner of your computer and then select Computer as shown below.
...
First navigate to your shipping department located at:
| Panel | ||
|---|---|---|
|
Scroll down to one or more of the orders that you want to ship and click the check box as shown below.
...
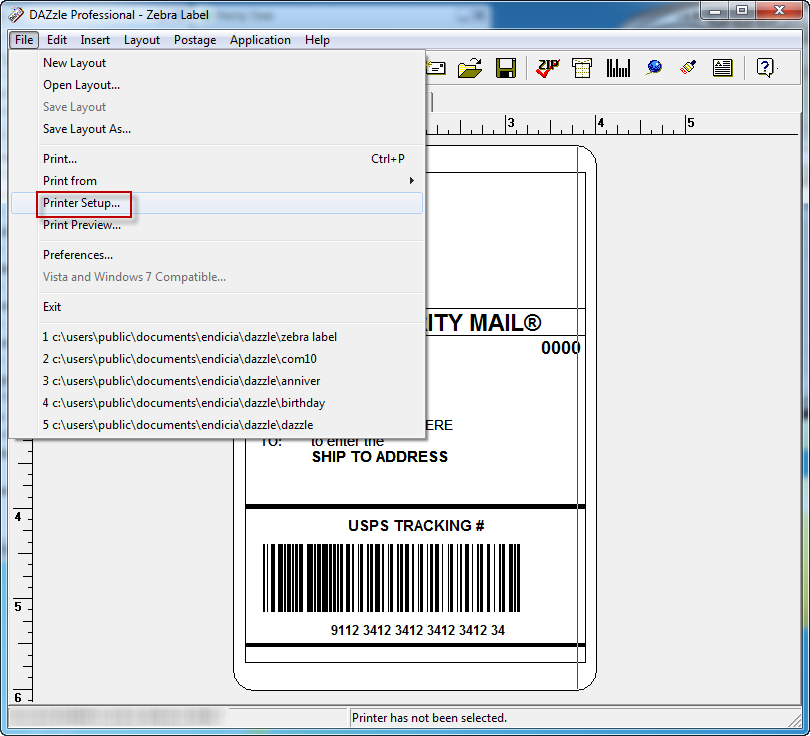
Finally click File -> Save Layout to record the printer setting changes that have been made. Endicia will now remember all the settings of how to print when this particular layout is used.
Printing the XML from Endicia
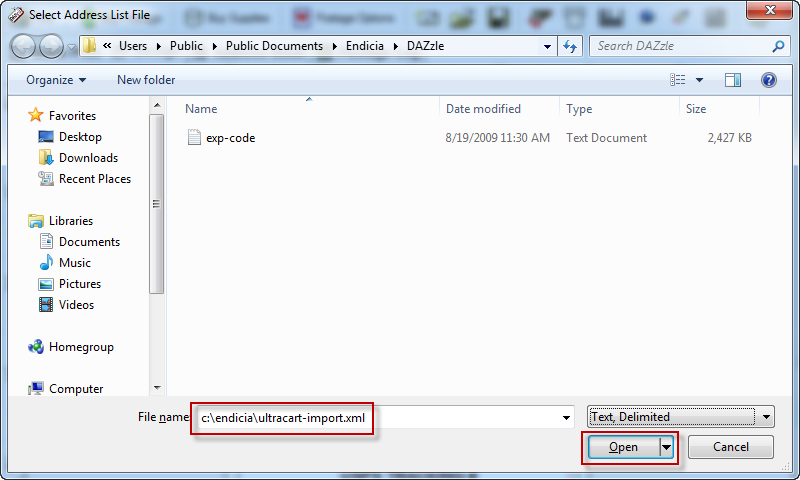
We are now ready to start printing the XML file that we have saved from UltraCart. From within Endicia click File -> Print From -> External File as shown in the screen shot below.
When the file open dialog appears just type "c:\endicia\ultracart-import.xml" into the file name field and click Open as shown below.
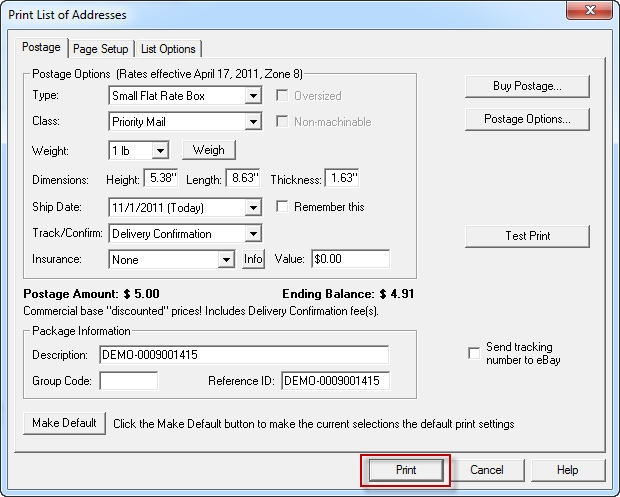
Now the Print Address List dialog will appear. You can review the settings and the click print as shown below.
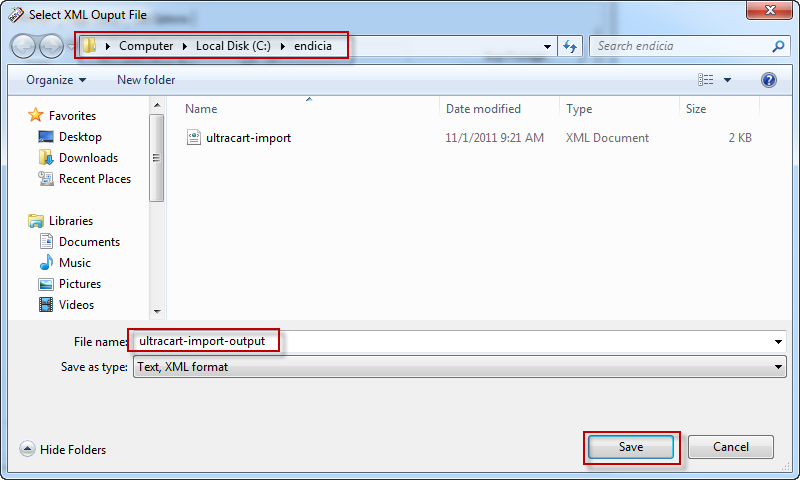
After Dazzle finishes printing the shipment information it will prompt you to save the export file. When the Select XML Output File dialog appears navigate to c:\endicia and then click the Save button. The screen should look like the shot below before you click Save.
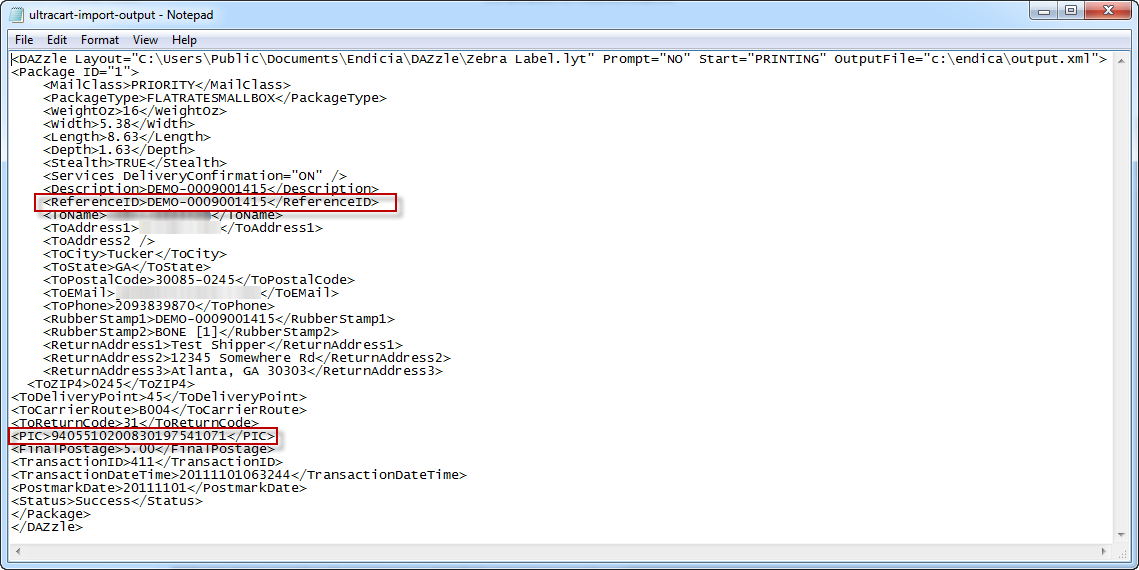
If we were to open the output XML file with notepad to inspect it we would see something like the screen shot below. The information pieces of information in the XML file are the reference ID and the PIC (tracking number). These are the two pieces of information that will be parsed out by UltraCart.
Importing Information from Endicia to UltraCart
We are now ready to import tracking information back into UltraCart from Endicia. Navigate to:
| Panel | ||
|---|---|---|
|
On the left hand tool bar click on the Import Endicia Dazzle button as shown below.

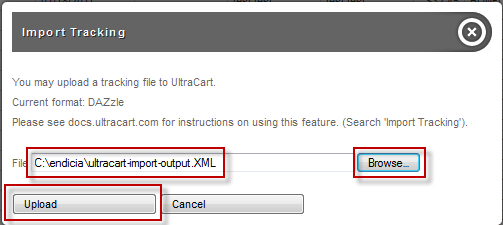
This will open up a lightbox on the screen. Click on the browse button and locate the c:\endicia\ultracart-import-output.XML file as shown below.
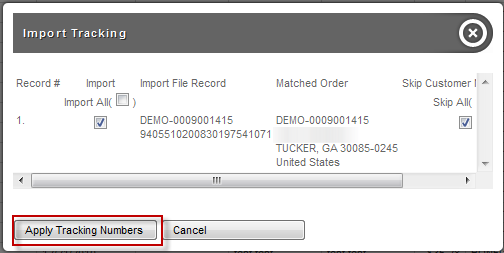
UltraCart will parse the XML file and display the details of all orders and tracking numbers that it extracted. Typically all you need to do is click the Apply Tracking Numbers button as shown below.
UltraCart will apply the tracking numbers, mark the orders as shipped and then remove from the shipping department.
Importing Tracking Information from the Endicia Postage Log
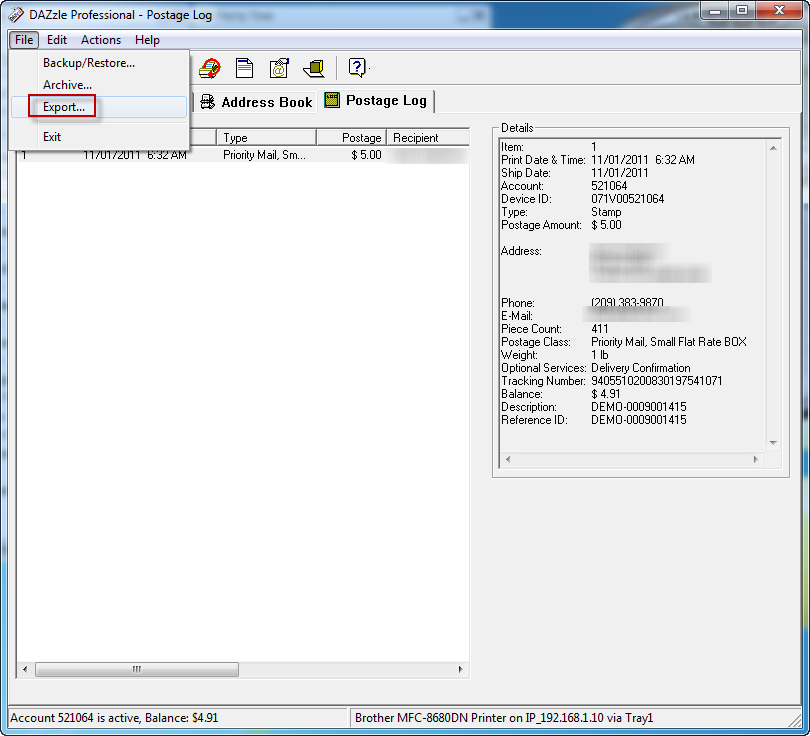
If you forgot to export information from Endicia using the proper configuration as described in this tutorial you can also export the postage log and upload that to UltraCart. Click on the Postage Log tab within Dazzle and then click File -> Export as shown below.
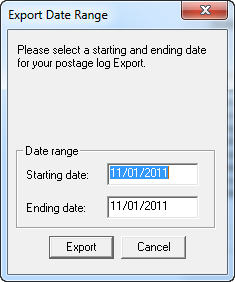
Enter the date range and then click the Export button as shown below.
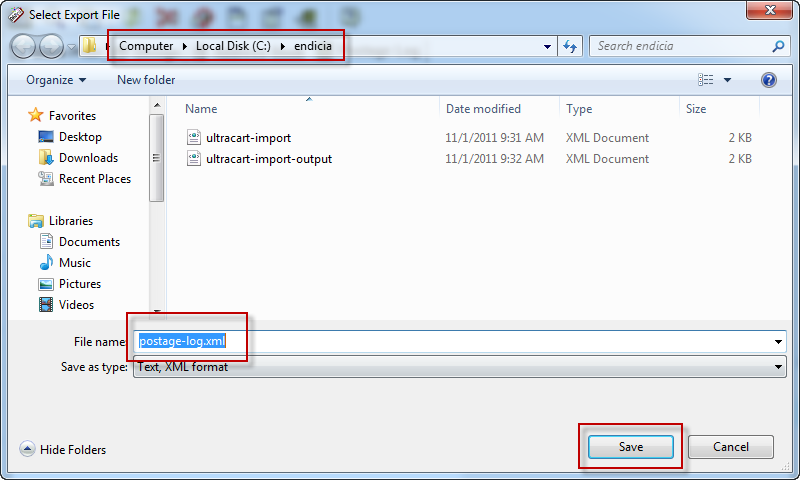
When the Select Export File dialog appears change the directory to c:\endicia and then name the file postage-log.xml and click save as shown below.
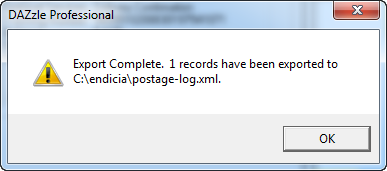
Dazzle should display a confirmation dialog telling the number of exported records as shown below.
You can follow the steps in the previous section and select c:\endicia\postage-log.xml for the tracking number file to import. UltraCart can also parse this file for tracking information.
| Warning |
|---|
UltraCart can not match up tracking numbers with orders that were hand entered into Dazzle. The order had to originate from an XML file produced by UltraCart so that the Reference ID field contains the order ID. |