...
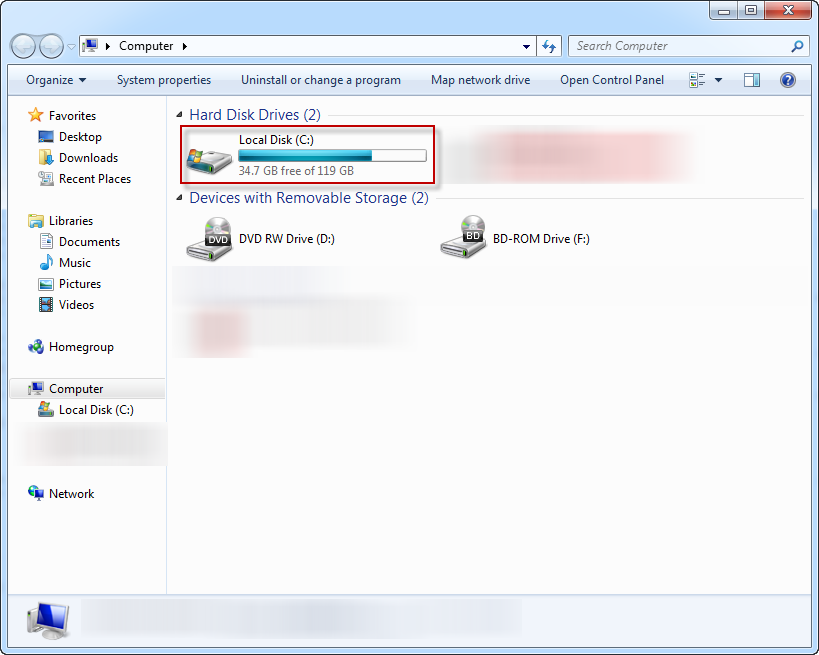
Now click on the C: as shown below.
Next click on the "New Folder" button at the top. When the text field appears type in "endicia" and hit Enter. Your screen should look like the screen shot below.
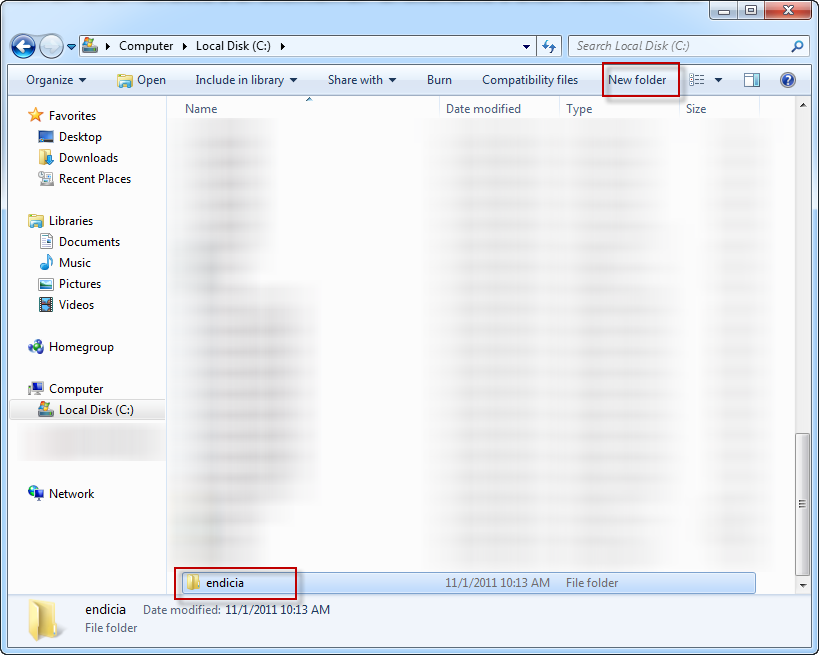
You have successfully created the directory where we will exchange XML files with Endicia.
Exporting information from UltraCart to Endicia
First navigate to your shipping department located at:
| Panel | ||
|---|---|---|
|
Scroll down to one or more of the orders that you want to ship and click the check box as shown below.

Now on the left hand side of the screen click the "Export to Endicia" button as shown below.

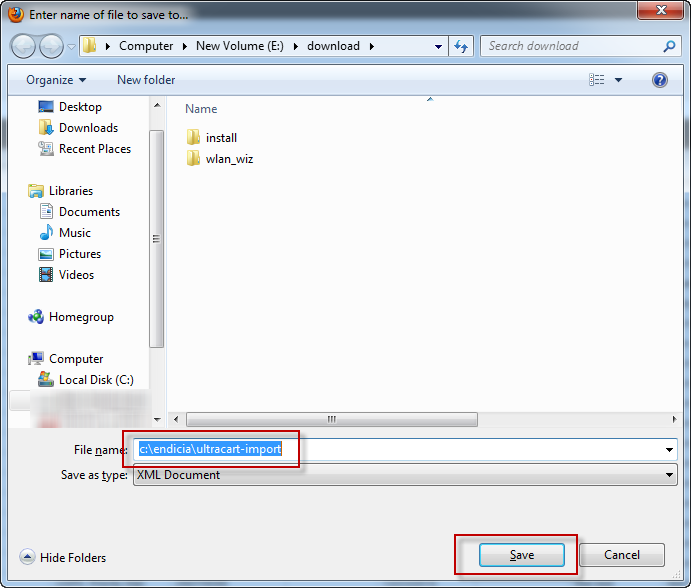
When you click the button a file save dialog will appear on your browser like the screen shot below. In the filename field change it from "ultracart-output.xml" to "c:\endicia\ultracart-output.xml". Now click the save button.
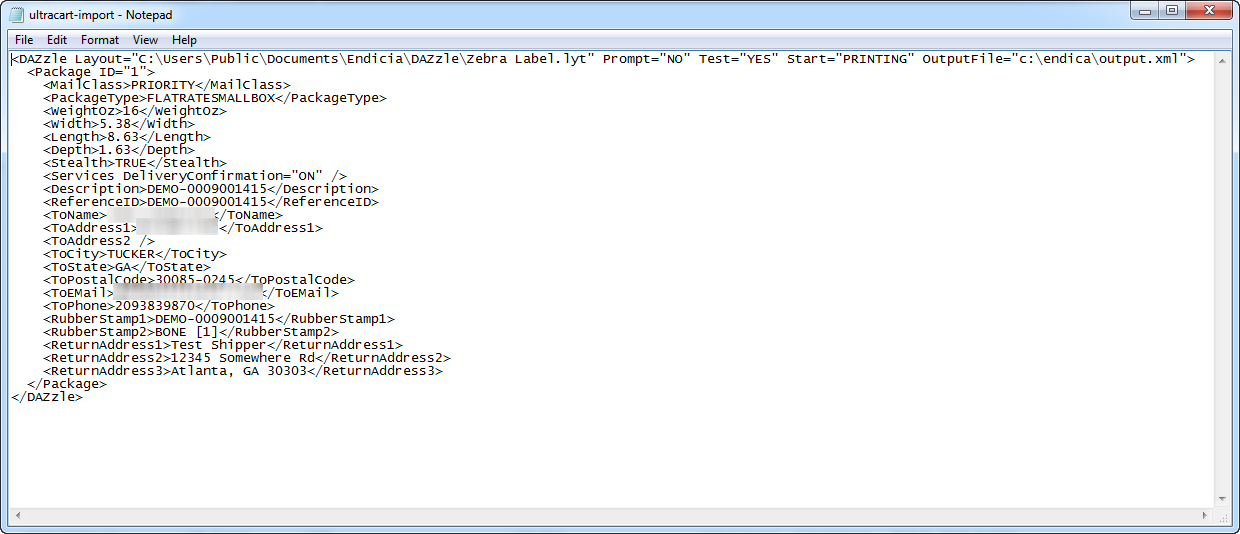
At this point we have successfully download the XML file with the shipment information. If you were to open this file in Notepad it would look like the screen shot below.
Setting the Layout Printer (One Time Configuration)
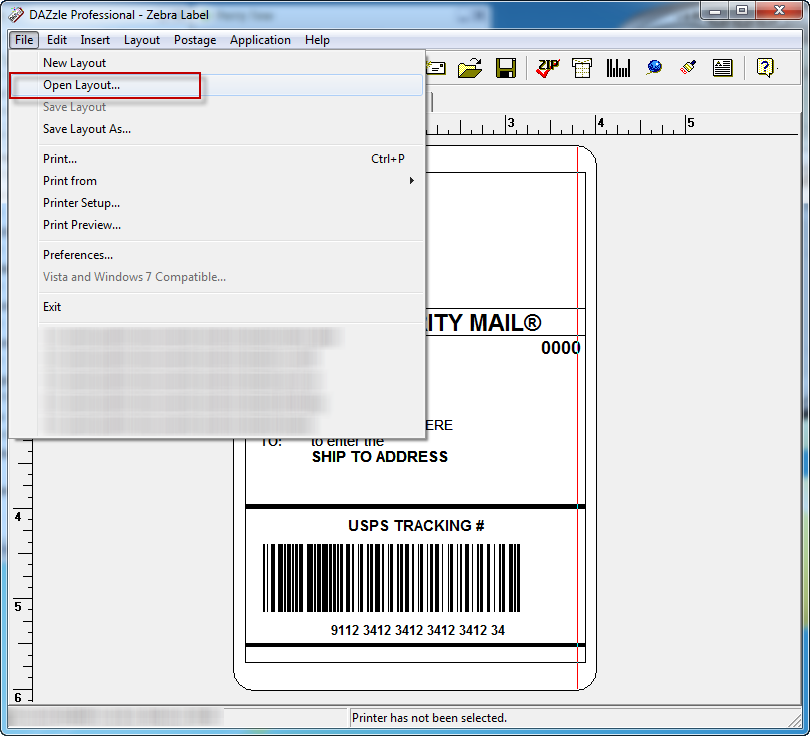
Endicia uses the concept of a layout file for printing. If you recall we configured it to use the Zebra Layout.lyt file earlier in the shipper specific options configuration. We need to quickly configure which printer we want this layout to use. Open up the Dazzle application, click on the Design tab, and then click File -> Open Layout as shown in the screen shot below.
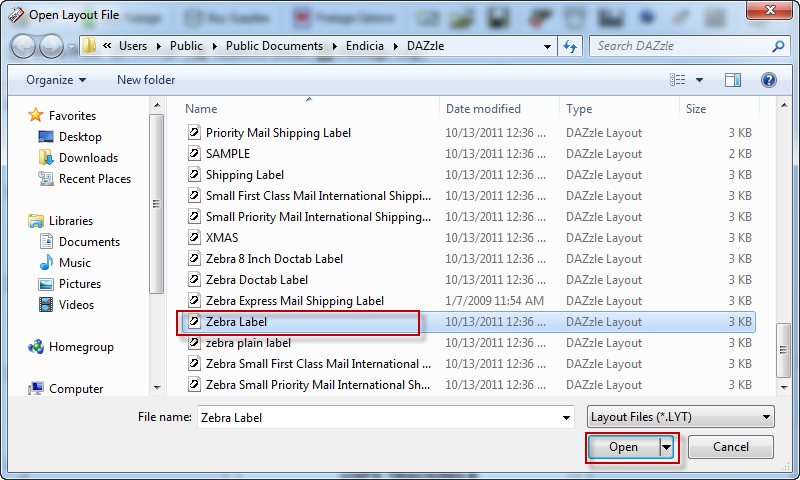
Endicia is smart enough to automatically open the folder that contains the layout files. Scroll down to the appropriate layout for your printing. In this tutorial we are working with Zebra Layout.lyt since we are printing 4x6 thermal labels (the most common shipping label). The screen shot below shows us selecting Zebra Layout.lyt and opening it.
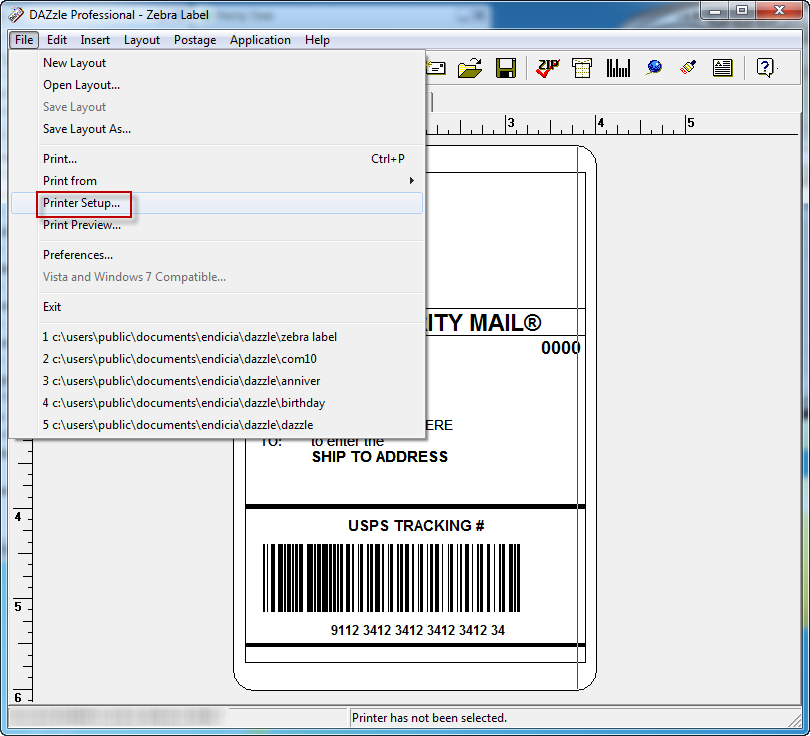
Next click File -> Printer Setup on the menu as shown below.
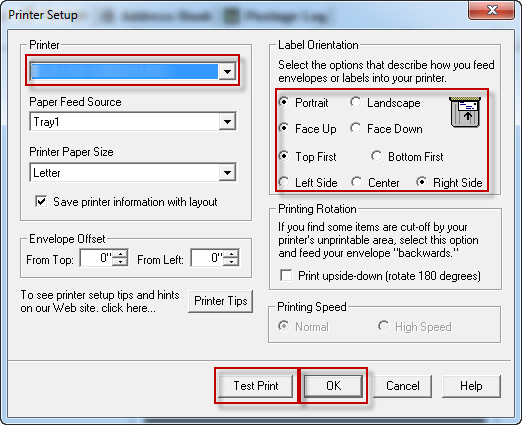
When the printer setup dialog appears you need to:
- Select the printer from the list
- Adjust label orientation settings
- Print test labels until the orientation is correct
- Click OK.
Below is a screen shot of the printer setup.
Finally click File -> Save Layout to record the printer setting changes that have been made. Endicia will now remember all the settings of how to print when this particular layout is used.