Enabling and Disabling Google Autocomplete in a Storefront Host
Overview
This document will detail the steps to enable or disable google's autocomplete functionality for an UltraCart storefront host.
Configuring the Google Places API in the Google Cloud Console
- Go to the Google Cloud Console at https://console.cloud.google.com/
- Create a project called "UltraCart Checkout"
- Enable the Places API on the checkout
- Create an API key under credentials.
- Enable the project for billing. If this is your first project then you'll have to create a billing profile and then link it to the project.
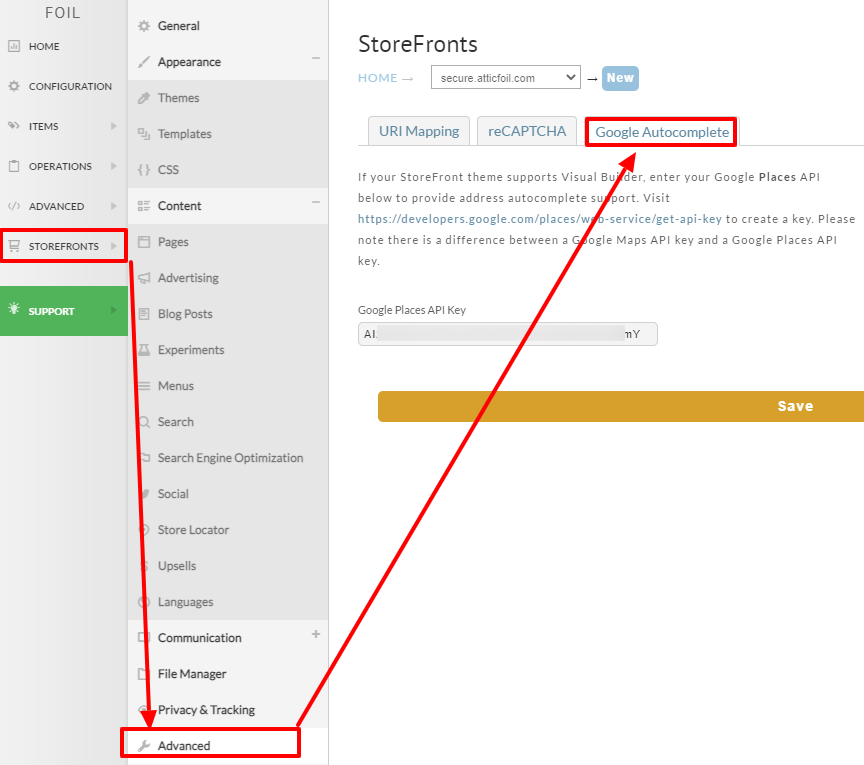
Configuring the Google Places API key in the storefront host
In order to configure the storefront host with Google Autocomplete, you'll need to configure the storefront host with your Google Places API Key.
- Navigate to the storefront menu within your UltraCart account.
- In the storefront menu, click the 'Advanced' tab, then click the 'Google Autocomplete' tab:
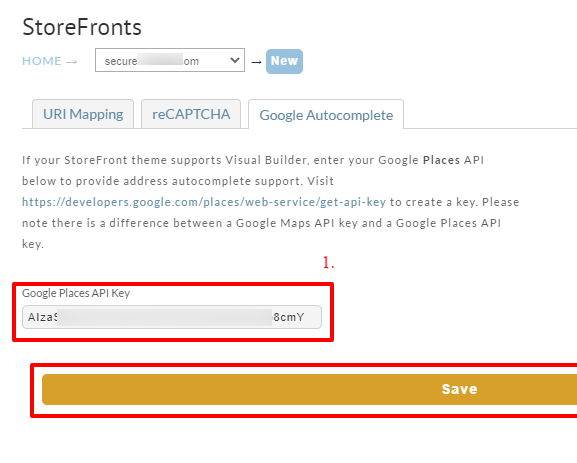
Paste your Google Place API key into the configuration field then click the save button:
Obtaining Your Google Places API Key
Visit https://developers.google.com/places/web-service/get-api-key to create a key. Please note there is a difference between a Google Maps API key and a Google Places API key.
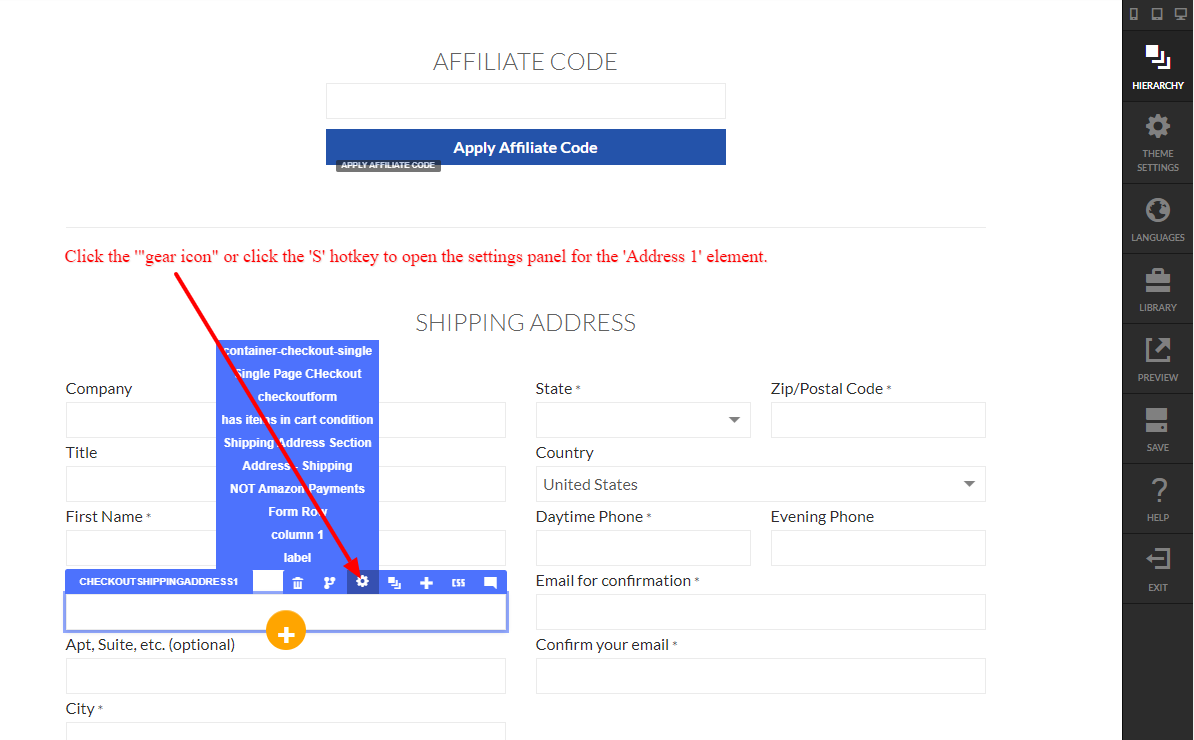
For Visual Builder Themes
The google auto complete setting is in the settings panel of the Address1 checkout field.
- Navigate to the checkout, then edit the page.
- Mouseover the Address1 field, then click the "gear icon" (of use the 'S' hotkey to open the element settings panel:
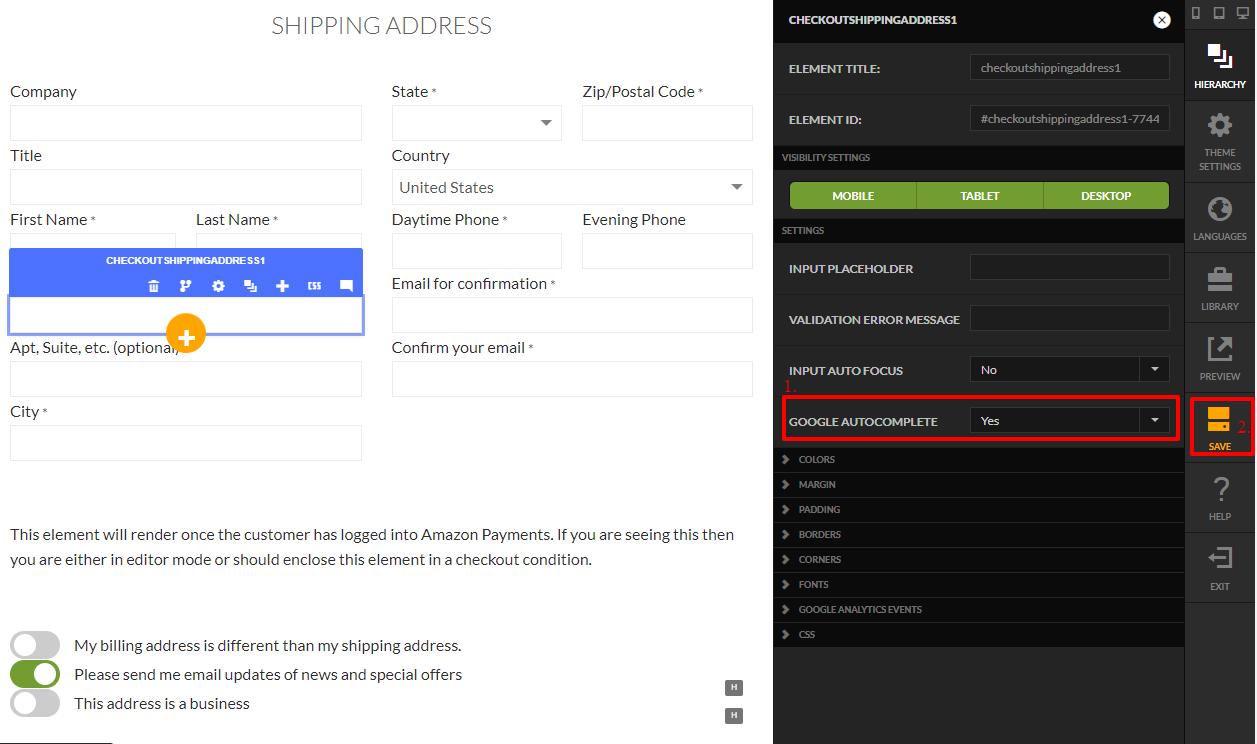
- Select either 'Yes' or 'No' then click the Save button:
For Non-Visual Builder Themes
Step 1
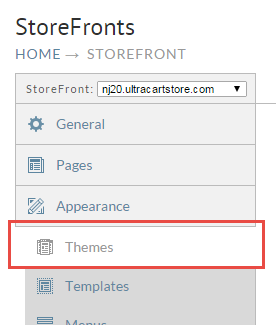
From the Storefront menu, click the "Themes" tab:
Step 2
The field will appear in the lower portion of the Theme page (exactly where depends on the installed theme and the version number of the installed theme.)
