Each StoreFront theme includes the ability to customize the contents of each page defined in the system. The theme designer can specify what content fields are available, and even what type of data it should allow.
To begin, navigate to General (1), then click on the Edit Icon for the page you wish to edit (2), and then click on the content tab (3).
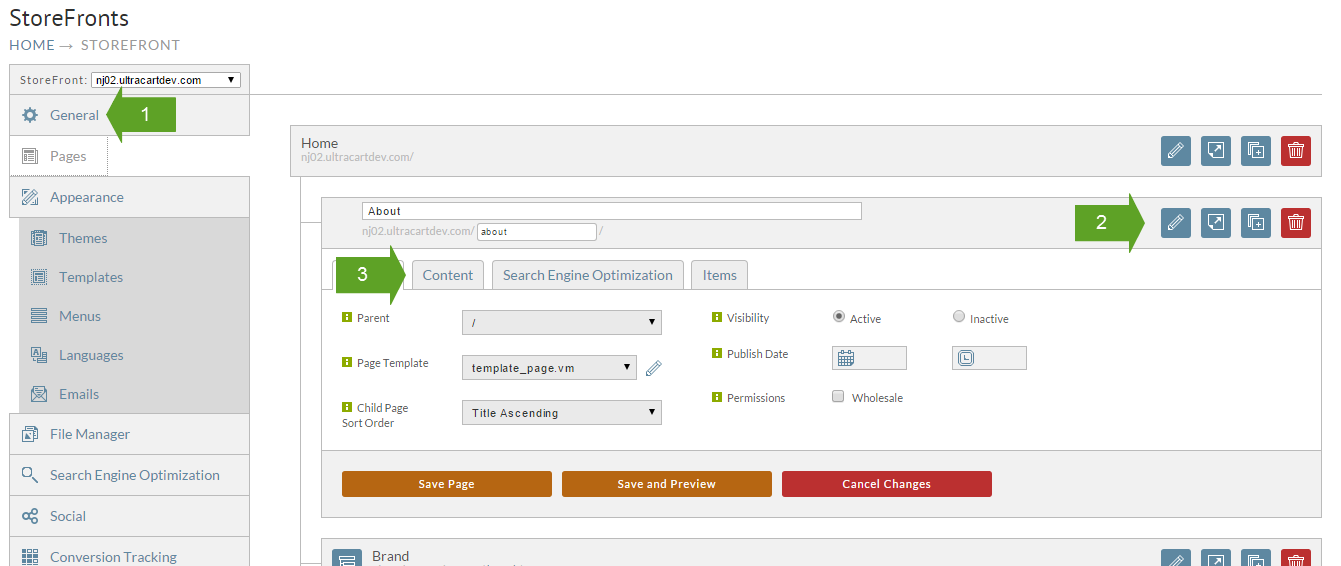
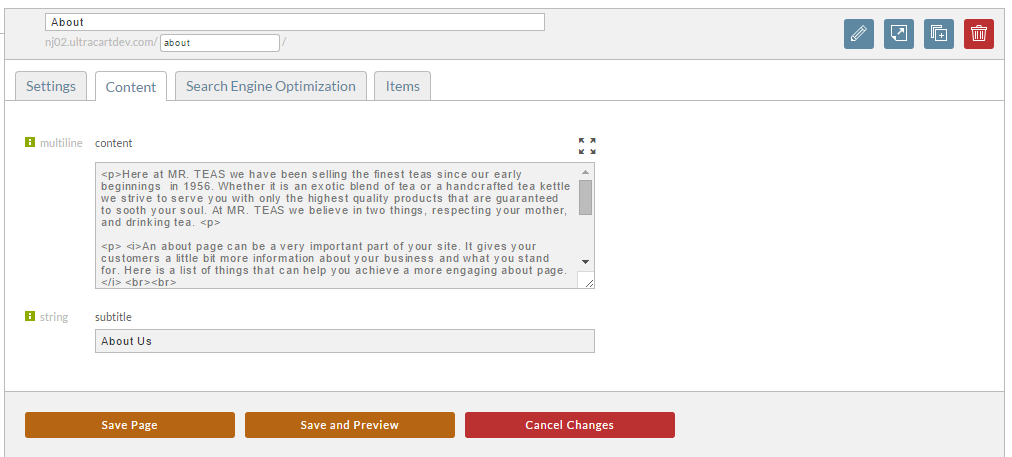
The content tab will now be displayed. Any editable fields that are defined by the theme for this page type are displayed. There are several different types of input fields. In this example, you can see that there is a large text area for the page's main content, as well as a single line field for the page's title. Typically, you can use HTML in any multi-line field, but should not use it in single line fields.
Press either Save Page or Save and Preview to save your changes, or Cancel Changes to undo them.
If the Save and Preview does not appear to work, make sure that your browser is not blocking popups on the secure.ultracart.com domain. Usually if something is blocked there is a warning up in the URL bar of the browser.
If the single custom content field provided for a your catalog page template isn't sufficient, follow these steps to add more. This may be the case if you a custom content block to a page listing of products. By default (for most themes), the template_catalog.vm does not have a Custom Content block like template_page.vm does.
Steps
- Add a page directive at the top of your template for your page attribute.
- Use your page attribute somewhere on your page.
- Using the StoreFronts console, edit your pages and supply your custom content.
Add Page Directive
The page directives notify the back end to display text fields or areas for values used within the page. There is a comprehensive list of all page directives found in the developer section. For this situation, you want page-attribute-html.
The syntax for the directive is this:
uc:page-attribute-html="content||.page-content"
The red text is the page directive name. We're using an html attribute so we may add lots of content to it.
The blue text is the name of the attribute. This is what will show on the back end editor.
The green text is the container class. This additional information aids the client side admin panel manage this content.
For this example, we're adding a new attribute named "sale info". We will enclose it in a div with a class "sale-info-container".
Edit the template_catalog.vm file.
At the top, add the directive. Begin the line with two pound signs (##) so the velocity scripting engine ignores these lines. See line 21.
##
## UltraCart - Mr Teas Template
## http://www.ultracart.com/
##
## Copyright (c) 2015 BPS Info Solutions Inc.
## License located here:
## http://www.ultracart.com/storefront/license/
##
## Designed by Level 2 Design, LLC http://www.level2d.com/
##

## uc:contains-velocity="true"
## uc:page-type="group"
## uc:display-items="true"
## uc:pagination="true"
## uc:display-subgroups="true"
## uc:child-page-multimedia-default-used="true"
## uc:page-attribute-string="subtitle||.catalog-title"

## HERE IS THE NEW DIRECTIVE!
## uc:page-attribute-html="sale info||.sale-info-container"

#parse("/snippets/checkout_only_redirect.vm")
#parse("/snippets/google_base_offer_id.vm")
Use Page Attribute
Wherever you desire, add your container and attribute. See line 26.
## uc:page-attribute-string="subtitle||.catalog-title"

## HERE IS THE NEW DIRECTIVE!
## uc:page-attribute-html="sale info||.sale-info-container"

#parse("/snippets/checkout_only_redirect.vm")
#parse("/snippets/google_base_offer_id.vm")
#parse("/snippets/top.vm")
	<div class="row no-margin">
    <div class="columns small-16">
      #parse("/snippets/breadcrumbs.vm")
    </div>
  </div>
  <div class="row">
    <div class="columns small-16">
      <h1 class="catalog-title">
        #if($group.getAttribute("subtitle") && $group.getAttribute("subtitle") != '')
          $group.getAttribute("subtitle")
        #else
          $group.Title
        #end
      </h1>
    </div>
  </div>

## =====================================================
## HERE IS THE ATTRIBUTE BEING USED!
  <div class="row sale-info-container">
    #if($group.getAttribute("sale info") && $group.getAttribute("sale info") != '')
      $group.getAttribute("sale info")
    #end
  </div>
## =====================================================


  <div class="row">
    <section class="columns small-16 catalog-container">
      #if($group.getChildren().size() > 0)
        #parse("/snippets/subgroup_list.vm")
Provide Custom Content
- Login to the backend (secure.ultracart.com) and browse to your StoreFront.
- Find or create a page that uses your newly edited template.
- Click on the Content tab. You should see your new attribute ready for editing.

After saving your changes, preview your page.
