| Table of Contents |
|---|
Overview
This document will detail the steps to editing a storefront template.
| Warning |
|---|
The StoreFront theme is wide open for you to edit. Before you do, please consider the following warning: By modifying theme files, you risk conflicts when upgrading your theme to subsequent versions. This warning doesn't mean you should never modify your templates! It just means you should be sure you have a good reason to do so. You may need some help handling merge conflicts when you perform your next theme upgrade. |
| Tip |
|---|
If you feel your edits might be beneficial to others, contact the theme developers and ask them to make the change in the official theme. Not only will it help others, it will give you the feature you need without the hassle of upgrade conflicts in the future. At the very least, talking through the change with the theme developers might provide advice on the best way to go about your change if it's a substantial one. |
...
Steps
TODO:
- Where are the templates located.
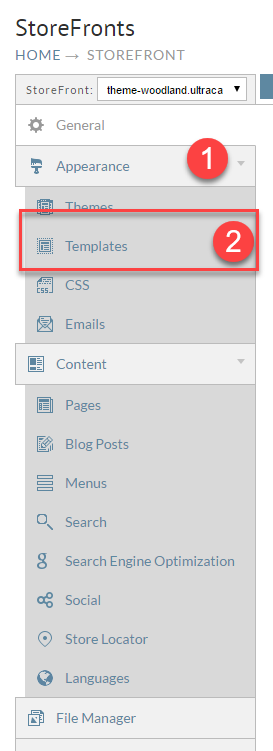
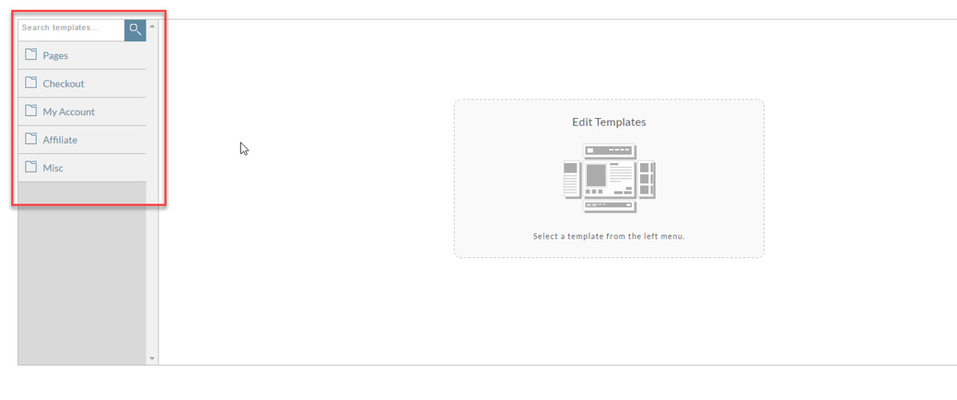
- Select a template to edit. Edit a template.You can edit the templates by directly navigating to the templates:
You can also initiate the editing of a template via the "Developers" tool bar while viewing a storefront page (while being actively
logged into the UltraCart back-end, which sets a cookie on your browser that's let's UltraCart know you are a merchant and not
a regular customer. This method is a good way to get familiar with which template(s) affect a given page view in your storefront.)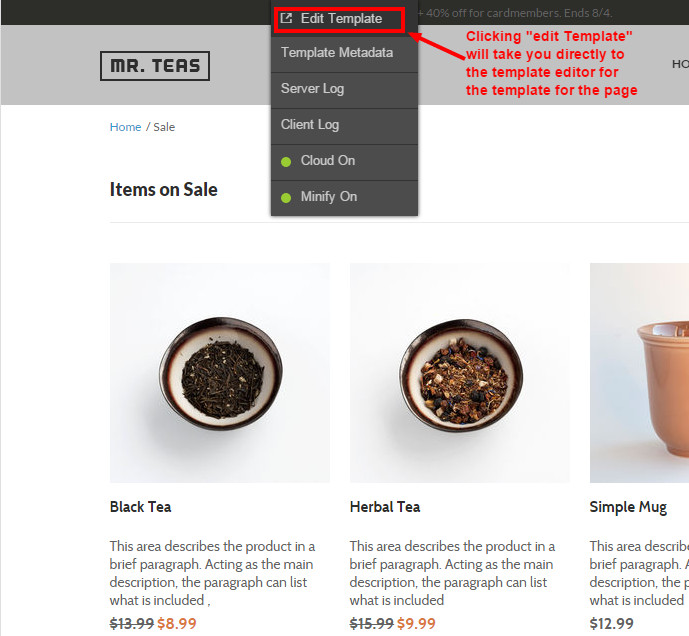
- View of the template opened in the template editor:
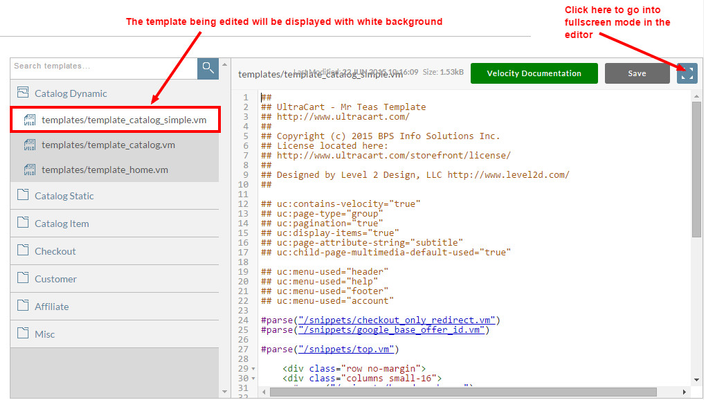
- Editing a template:
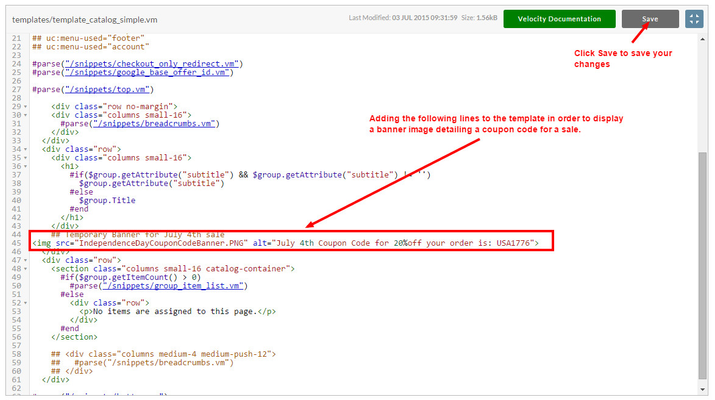
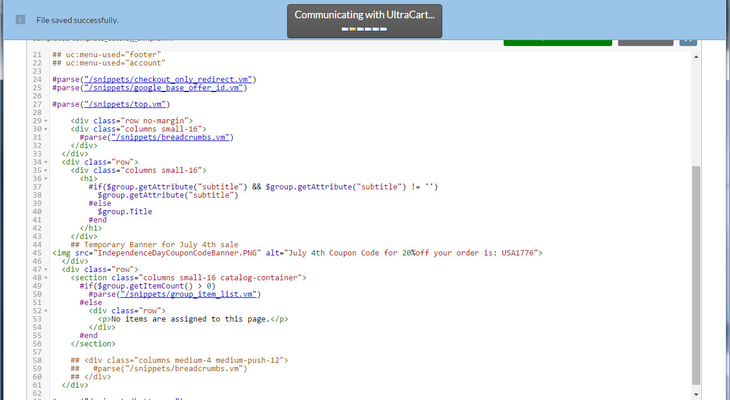
- Save the template.
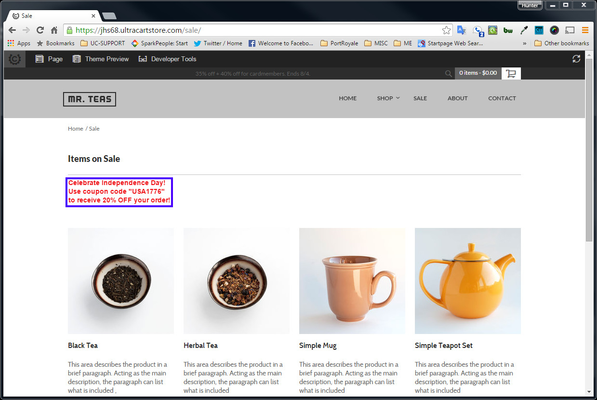
- View the change.
- Show the developer a screenshot of errors when they occur. (You'll need to explicitly code an error so you can generate one.)
- Point out the line numbers, etc.:
Troubleshooting Velocity Coding Errors
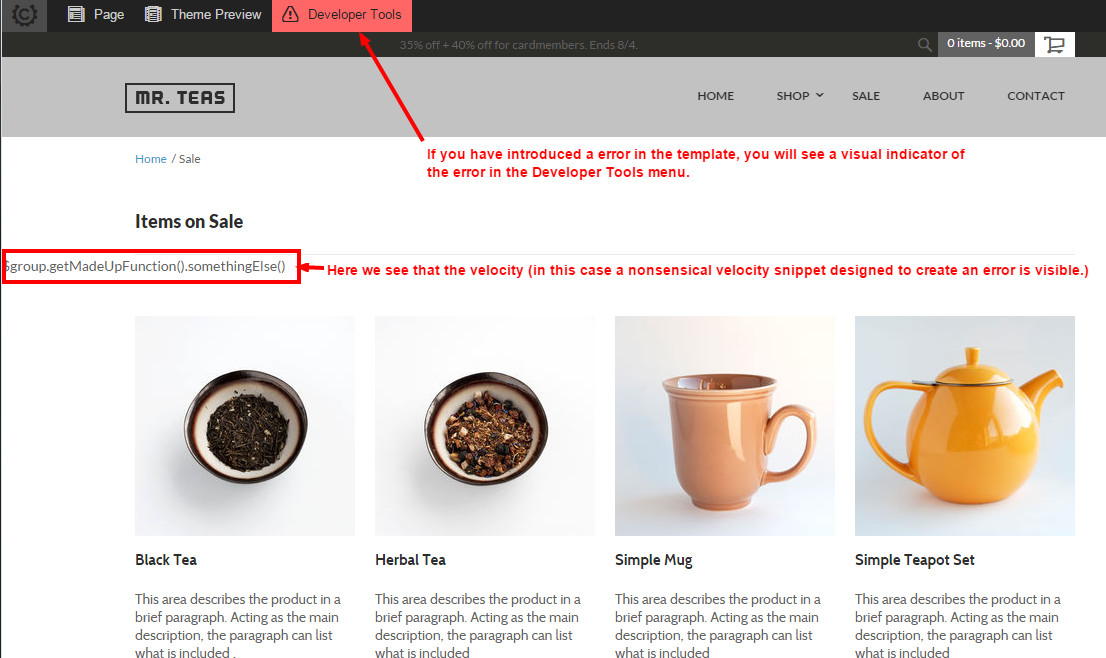
When editing the velocity snippets within the templates, you may inadvertently create a error.
If a error occurs in the rendering of the velocity of your template, you'll see a visual indicator of this in
the "Developer Tools" tab when viewing the page.
- Example of Developer Alert when viewing a storefront page:
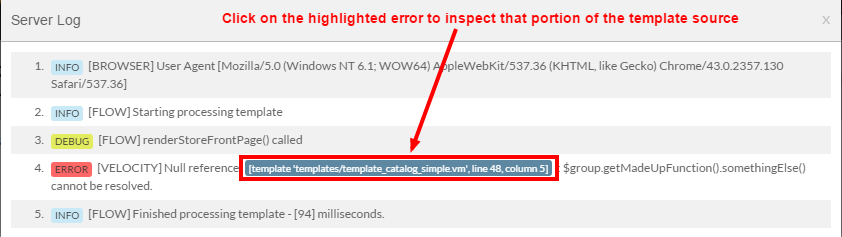
- To investigate the velocity error, mouse-over "Developers Tools" in the admin toolbar,
then click on "Server Logs" which is also highlighted in red to indicate an error requiring
your attention/correction:
- Clicking on the Server Log button will display a dialog window that explicitly references the lines in the template that contain the error:
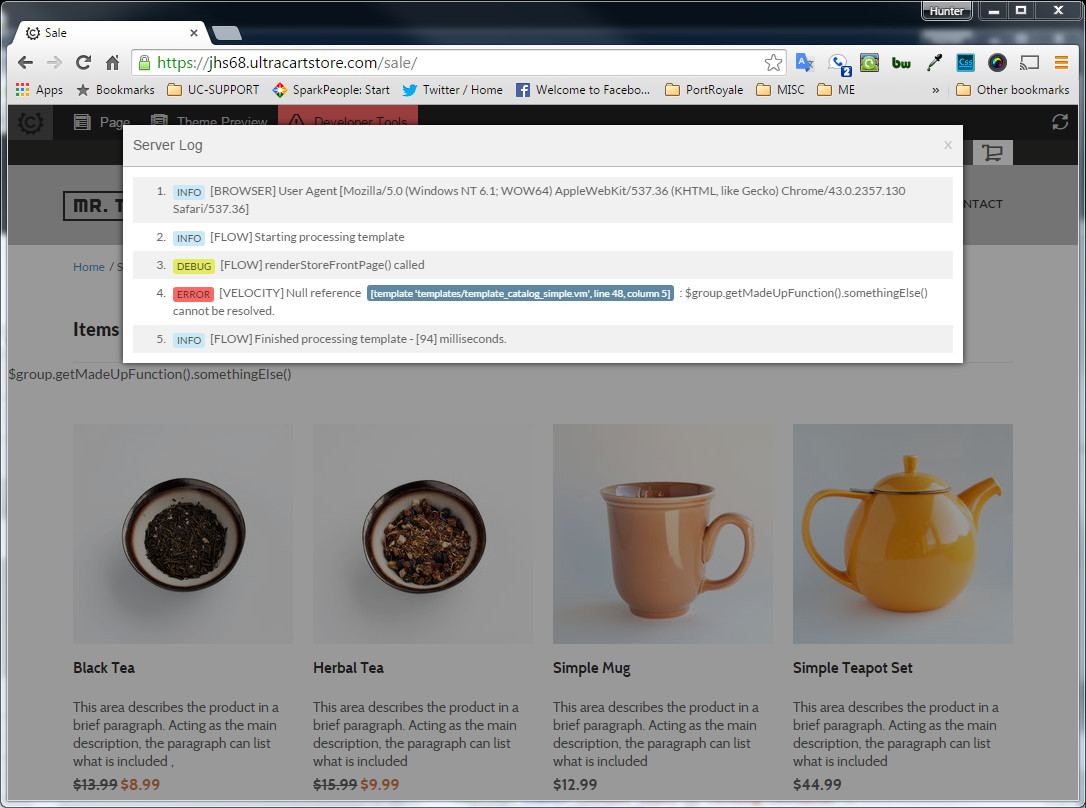
Here we see that the server logs displays which template and also the specific portion of the source (providing both line and column numbers where the error exists.
- Click directly on the portion of the highlighted error that is highlighted with blue background, which will take us to line 48, column 5 of source code:
- Here we are taken to the template editor and the line containing the error is highlighted in pink:
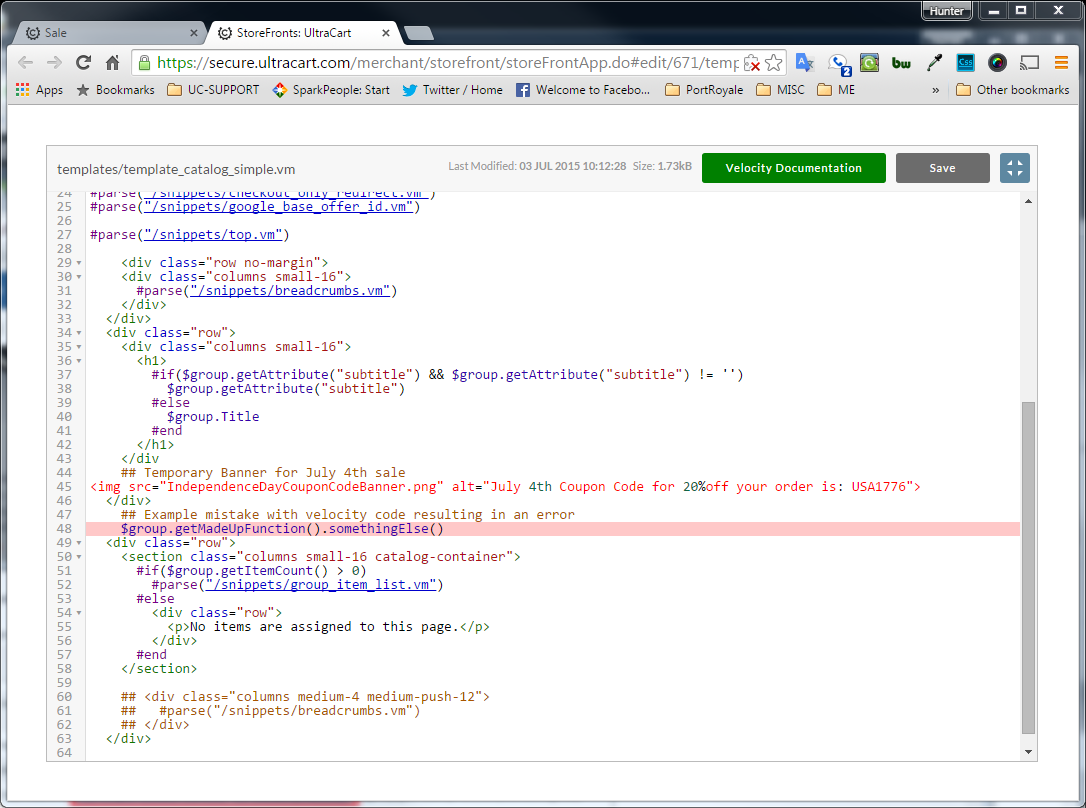
- Removing the problematic velocity code and saving the changes eliminates the issue.