| Table of Contents | ||
|---|---|---|
|
...
The Accounts Receivable section allows you to review and manage orders that have not completed the payment process.
Basically, it It allows you to quickly process all outstanding orders. You can select orders individually or in batches. For individual order, simply click on the hyperlinked orderID "Order ID" to view the full invoice details for that order. To processing the payment scroll down to the payment section that appears below the invoice. If you have multiple orders that need processing, you can use the check boxes along the left side of the A/R order list to select multiple credit card payment type orders and then process them for payment. Other payment types that are not processed against your configured credit card payment gateway should be processed individually.
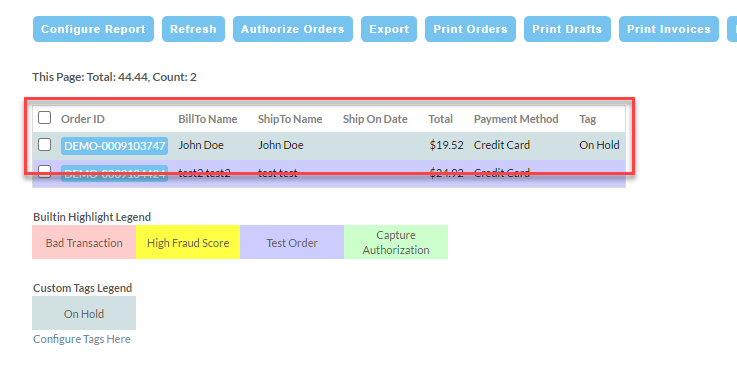
You should notice right away that there are payment methods on the right hand side. Currently they are rendered in Alphabetical Order by Payment Method. These will be different depending on what payment methods you have configured in your account and on what payment methods your customers used when placing the order.
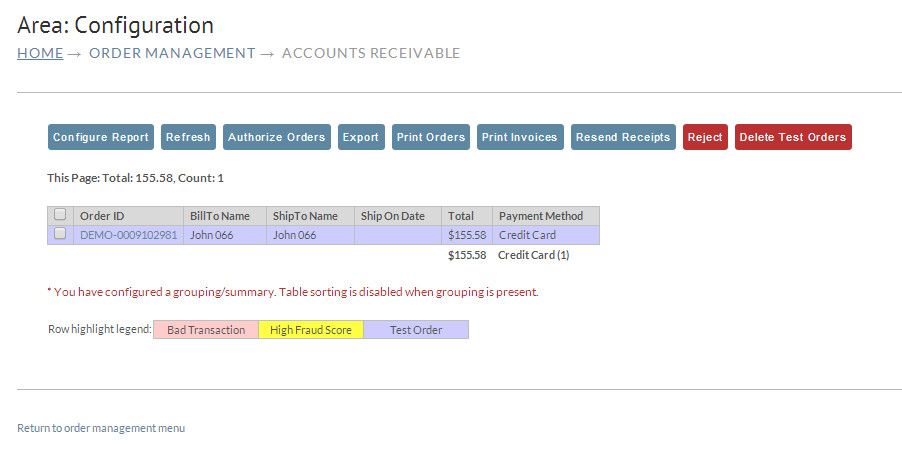
Also notice at the bottom of your page are three Four boxes in different colors. Orders are cross-checked as they come into Accounts Receivable and then highlighted accordingly. You can then easily move large numbers of orders instead of having to research each one. For instance, you can quickly select and "reject" all the orders that are highlighted as Test Order to clean up the spreadsheet.
...
| Info | ||
|---|---|---|
| ||
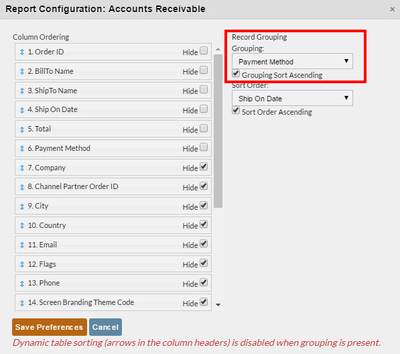
In the "configure report" page (accessible by clicking the "configure report" button) you are able to configure the report with "order grouping".
IF configured with order grouping, you'll see a red message stating: To revert back to the normal ordering by orderID, click the "Configure report" button then choose none in the "record Grouping" drop-down list. Then save changes. |

Section Name | Description |
|---|---|
This allows you to configure the display of information within the Accounts Receivable page. | |
Refresh | At any given time you can "refresh" the Accounts Receivable screen by clicking on the "Refresh" button. |
Authorize Orders | This attempts to process any orders that have been selected |
Export | This will download an XML file that contains the information for the orders selected. |
Print Orders | This will dynamically generate a PDF document containing one order per page. |
Print Invoices | This will dynamically generate a PDF invoice document containing one order per page that can be mailed to the customer. |
Resend Receipt | This will simply resend a copy of the receipt to the customers email. |
Reject | This will make the order as rejected and remove it from Account Receivable. |
Delete Test Orders | This will delete any and all test order currently in Account Receivable. These orders will be highlighted in blue. |
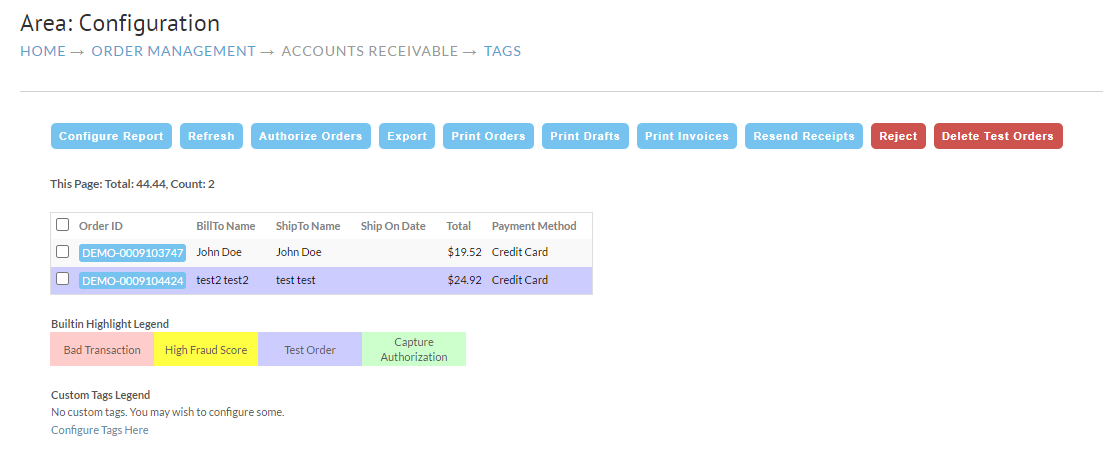
*Print Draft Checks | UltraCart allows merchants who do not have an e-check gateway to accept e-check orders through the use of draft check printing. |
...
Select the credit card orders using the checkbox in the left-hand column, then click the "Authorize orders" button to process the payment authorizations for the selected orders.
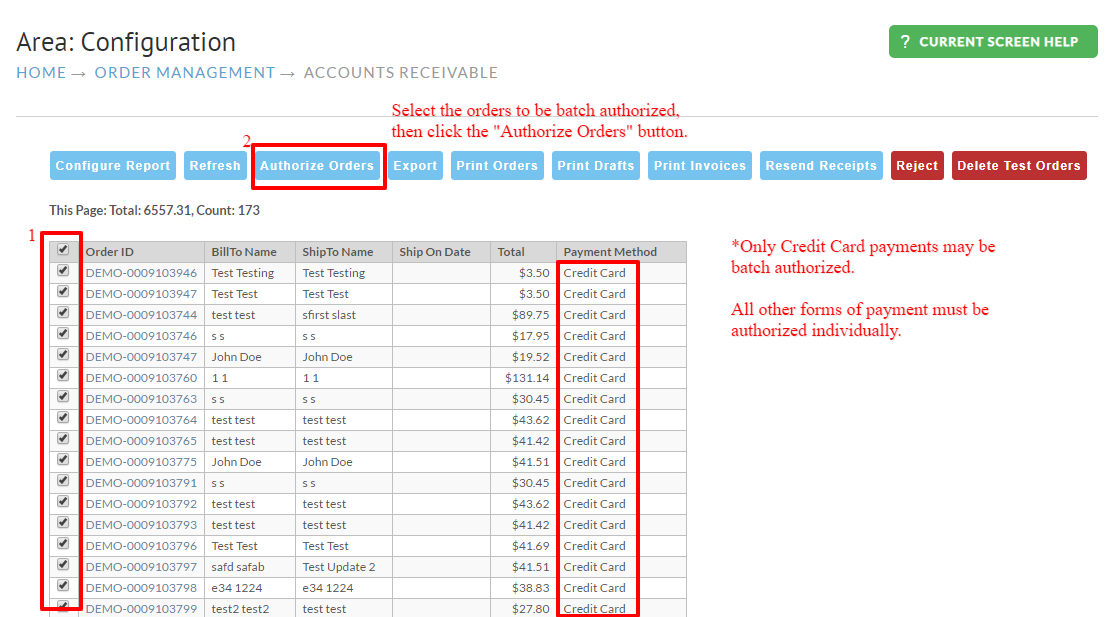
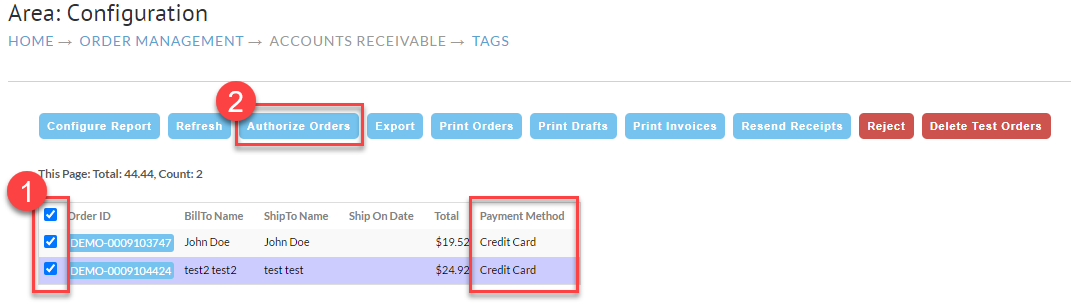
| Warning |
|---|
Only Credit Card transactions can be batch authorized. Any other payment method will need to be authorized within the individual order itself. |

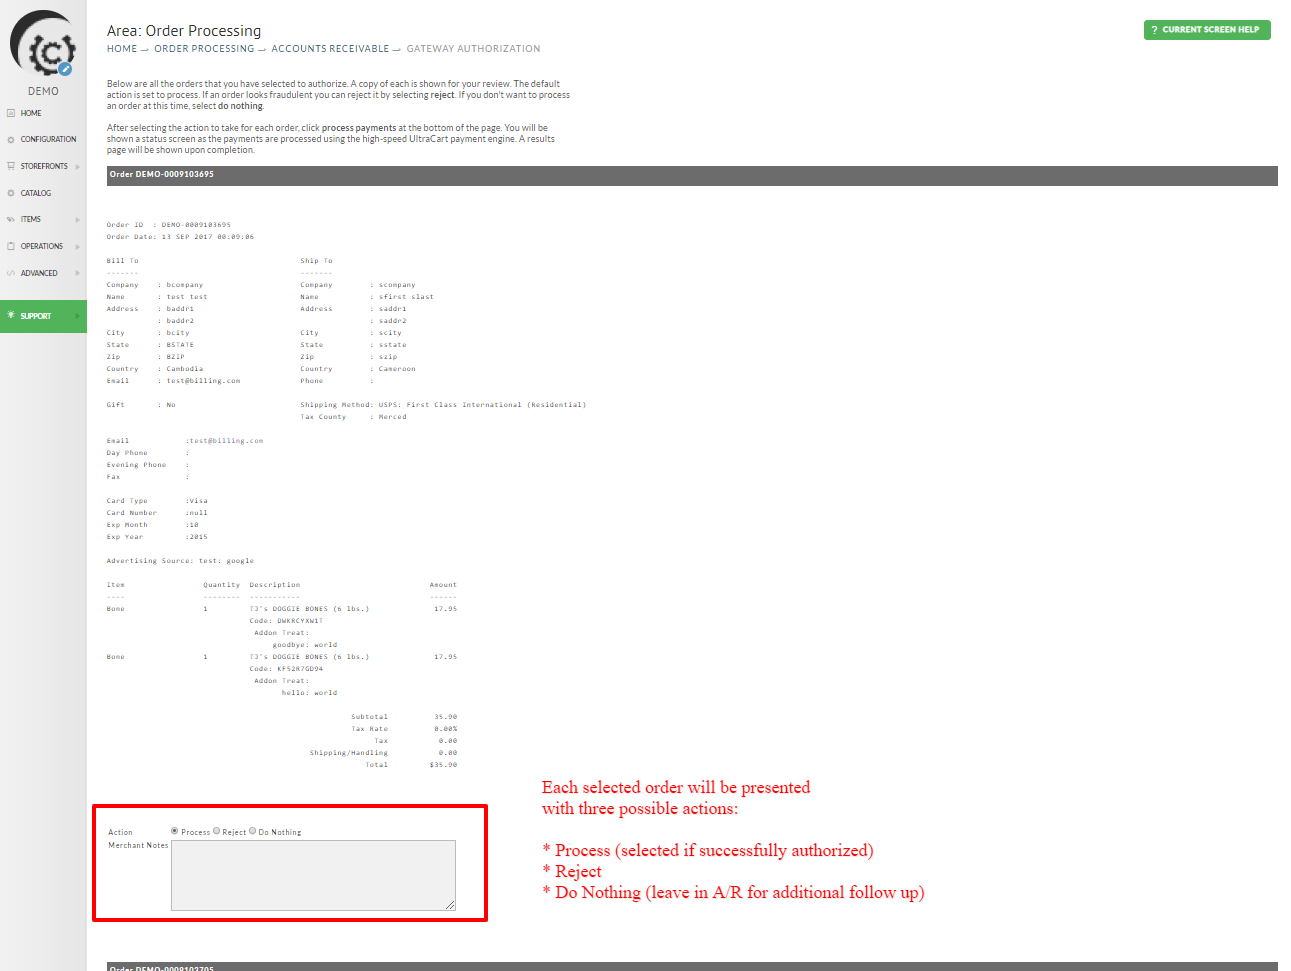
You'll be presented three actions regarding the payment authorization for each of the selected orders, along with a a merchant notes field:
...
To authorize individual orders, click on the hyperlinked orderIDOrder ID, then scroll down below the orders to the "Payment" section, and depending on the payment type click the Process Payment" or "Authorized" button.
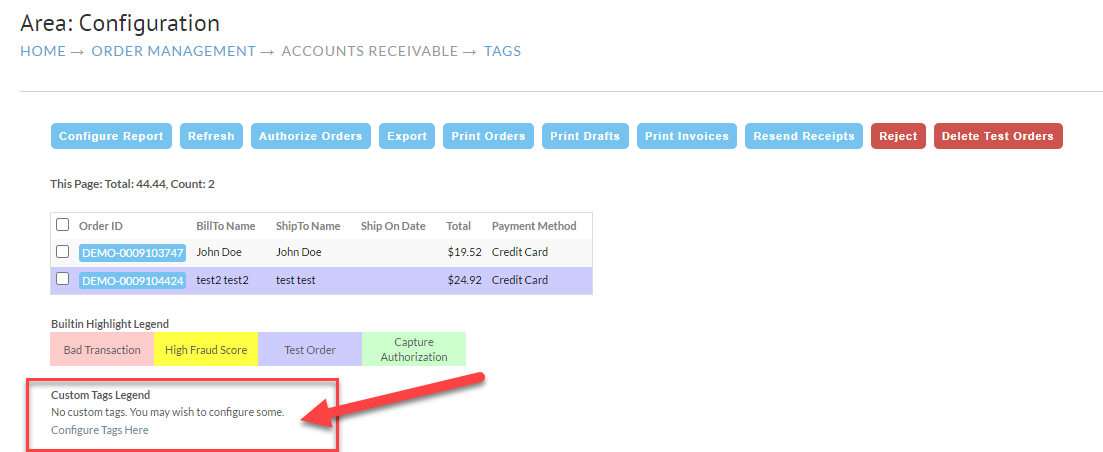
Custom Tags
The new Custom tag system allow you to create your own custom legend for the different stages an order could go thought depending on the process you or your customer service representatives go though. This can be anything from tags for different users so that a user can take ownership of an order while it is waiting to be processed. Or different stages if a customer needs to be called back or emailed.
To configure a custom tag simply click on the text for "Configure Tags Here".
This will open the Configuration screen to create your custom tags.
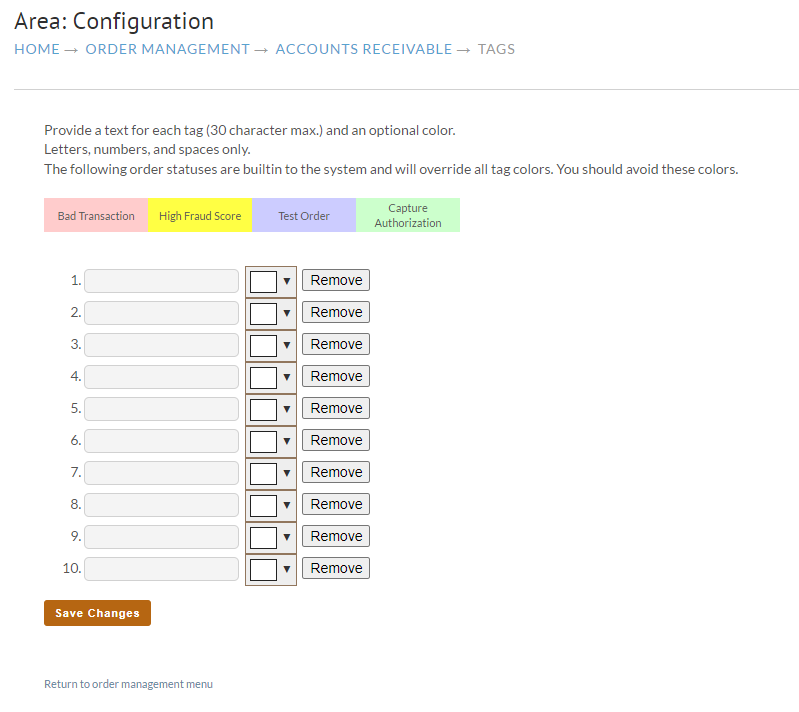
Simply fill in the field with the desired tag name and select the color drop down to assign a color. This can be any of the default colors provided, with the color picker or with a hex color code as shown below.
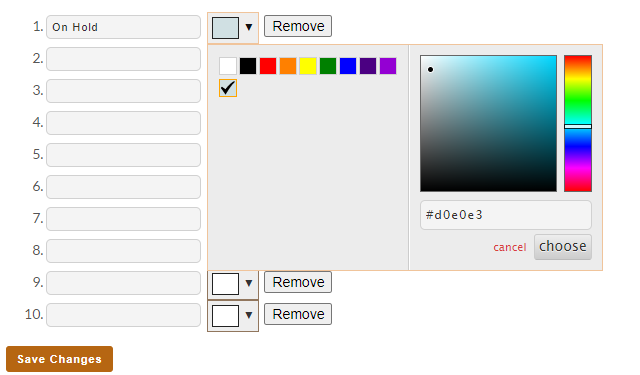
Once you have your different tags and colors configured simply Save Changes to be taken back to Account Receivable.
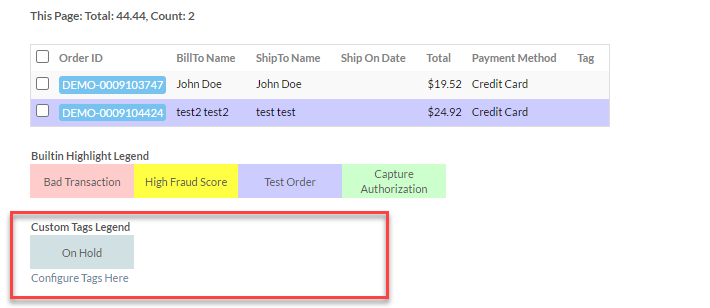
Now that you have a tag configured it will be displayed at the bottom of the page with the color selected and the tag name.
Assigning a Tag to an order
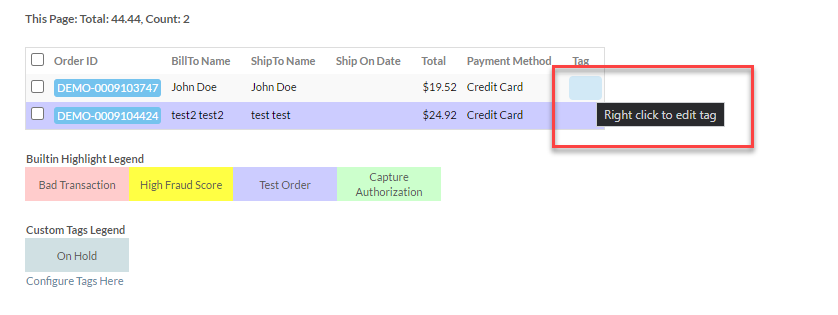
You should now have a column within the headline of Tag, to add a tag to an order simply right click on the column for the order. It will be slightly highlighted as shown below.
After right clicking on the column for the order in question a select popup will be displayed. This will allow you to assign a new tag to an order, change the tag on an order or remove the tag altogether.
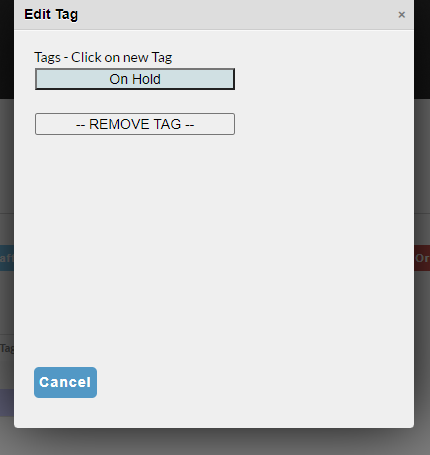
If we click on the tag name we will be taken back to the Accounts Receivable screen where it has been assigned to the order and the display has been updated.
| Info |
|---|
There is currently no limit to the number of tags you can create, however you can only create 10 tags at a time. You will need to save your changes and come back to add more tags. |
Related Documentation
Reviewing the Fraud Score of an Order
...