...
A Storefront may be configured in a "checkout only" configuration, where only the checkout portion of functional. This configuration would be used when you already have a front-end storefront in place and only need to add the checkout to this fronte-end site.
Hero Theme
With the Hero theme, you'll configure the "Checkout only" settings within the Visual Builder.
Navigate to the Storefront:
Main Menu → Storefronts → (Choose SF Host) → Click the "Browse your Store" button → Click the "Edit" button in top left portion of the page
Steps
Next:
All Other Storefront Themes
Steps
Here are the steps for using a StoreFront as a Checkout Only theme. Placing a theme into Checkout Only mode causes the theme to generate a slimmed down version of header/footer navigation and redirect any other traffic to the StoreFront to your main website. Using a StoreFront in a Checkout Only mode is the fastest way to add a responsive checkout experience to an existing website.
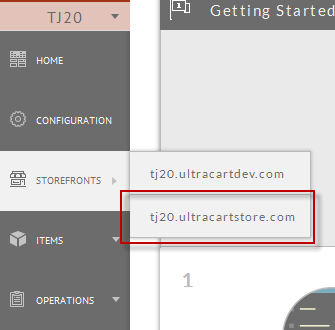
- On the left hand menu hover over StoreFronts and select one as shown below.
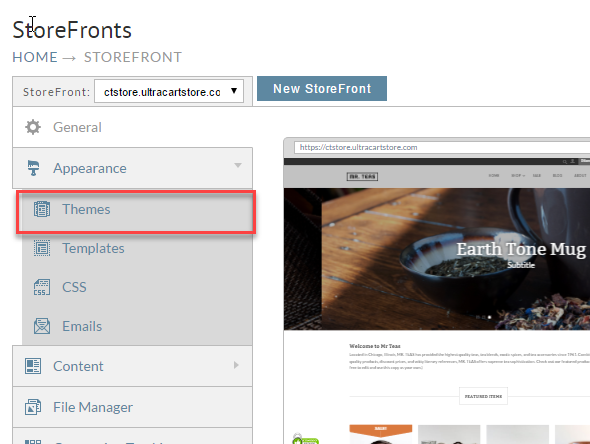
- Click on the Themes tab as shown below.
- Check the "Checkout Only Theme" attribute. Fill out the "Checkout Only Theme Logo URL" with the URL to home page of your website. Finally click save.
At this point the StoreFront is in Checkout Only mode.
| Info | ||
|---|---|---|
| ||
In the screenshot above, the "Checkout Only Theme Logo URL" should be configured as an absolute URL uincluding including the "http://" prefix. So it should be configured aslike this: http://www.ultracart.com |
...


