...
Clicking the "add upsell path" button will add the Path.
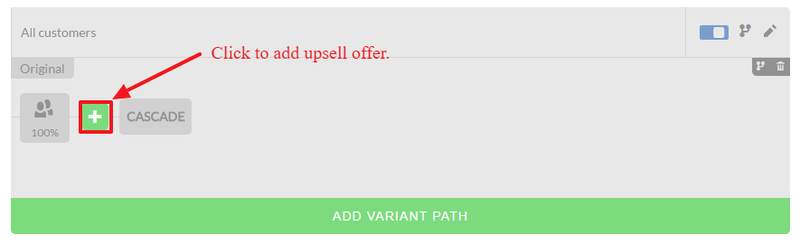
Creating an Upsell Offer
Click on the + button to create your first step.
...
- Give the offer a meaningful name (not visible by the customer)
- When ready, set the offer to active.
- Choose the item(s) that are being upsold to the customer.
- Pick one of the pre-defined layouts that you want to start with. After selecting your layout click on the preview of the offer to launch the visual editor for the upsell. Make whatever content adjustments to the offer that you want. Note that the first two pre-defined layouts use a textblock of "lorem ipsum" as a placeholder. So make sure you change that to some meaningful marketing verbiage.
- Save
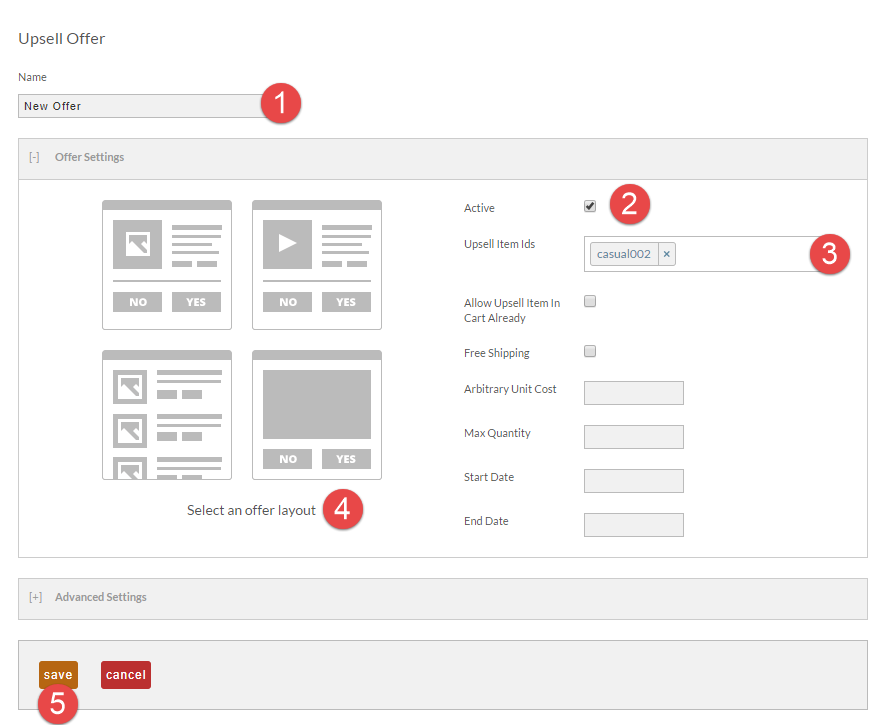
| Field | Description |
|---|---|
| Active | If Check, the offer is active. |
| Upsell Item Id's | The item(s) added to the order if the customer selects 'yes' for the offer. |
| Allow Upsell Item In Cart Already | Select this when the upsell Item ID is already in the cart prior to the display of this offer. |
| Free Shipping | Flags the upsell item as a free shipping item in the offer even if the item normally charges for shipping. |
| Arbitrary Unit Cost | If you are selling the item blow the cost configured on the item, then enter the new lower unit price here. |
| Max Quantity | Sets a max quantity for the upsell item. |
Start Date | Sets the Starting date for this offer (this is useful for setting time sensitive offers (like a Memorial Day special, for example.) |
| End Date | Sets the end date for this offer (this is useful for setting time sensitive offers (like a Memorial Day special, for example.) |
Now that we have our first offer created, let's look at how it shows in the path. When you hover over the offer you will see a grey popup set of tool icons along with a DOWNSELL option. There is also a quick toggle to make the offer active (blue) OR inactive (grey).
...