Getting started creating a blog for your site
Important Concepts
- You may have one or more blogs on your site. There is no limit to the blogs you have.
- A blog is a special page. To create a blog, you create a page. It resides within the existing page hierachy as just another page, much like your product groups and product item pages. This will allow you to place one or more blogs wherever you desire.
For example:/products/shirts/mens//products/shirts/womens//myblog//mysecondblog//products/shirts/deeplynestedthirdblog/ - The individual Blog posts (articles) are created on a separate screen. They are not created in the page editor. So after you set up a blog page, you'll need to move from the StoreFront → Pages screen to the StoreFront → Blog screen to enter individual blog posts.
- Blog posts are assigned to blog pages. There are two ways to do this: 1) manually assign each post, or 2) use automatic selectors, such as a) all posts, b) a particular author, or c) certain blog post tags.
- A blog post may belong to numerous blogs.
Steps for creating a blog
Navigate to your StoreFront Pages editor. Whenever you want your blog to appear, create a new page.
- Set your page title
- Set your page directory.
- Select template_blog.vm as the page template. Until you do, the Blog Posts tab will not appear.
- Look for the Blog Posts tab. If that tab is not visible, your theme does not support blogs. Please contact your theme developers and request support for blogs.
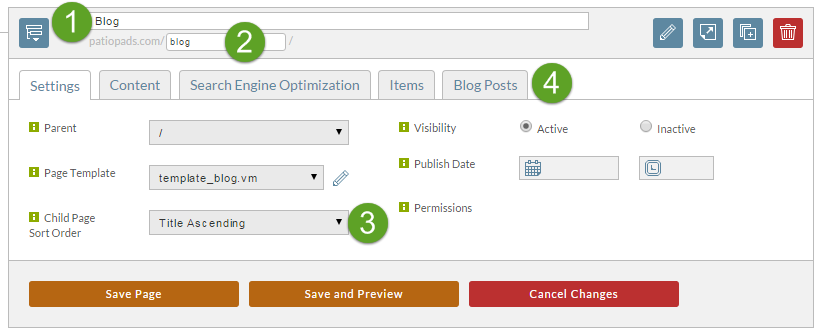
- Select template_blog_post.vm. This template will be used to render individual posts.
- Decide which posts will appear on this blog. If you only plan on having a single blog, select the All Posts radio button.
- Save Page

Next Steps
After you create your blog, you may add blog posts to your site.
If you wish to allow comments on your blog posts, you'll need a disqus account. See these instructions for setting up disqus on your blogs.
Finally, you'll probably wish to add your blog to your site's menu.
Blog Post Assignment
There are three options for the blog post assignment:
- Manually
- All Posts
- Automatically Based on Conditions
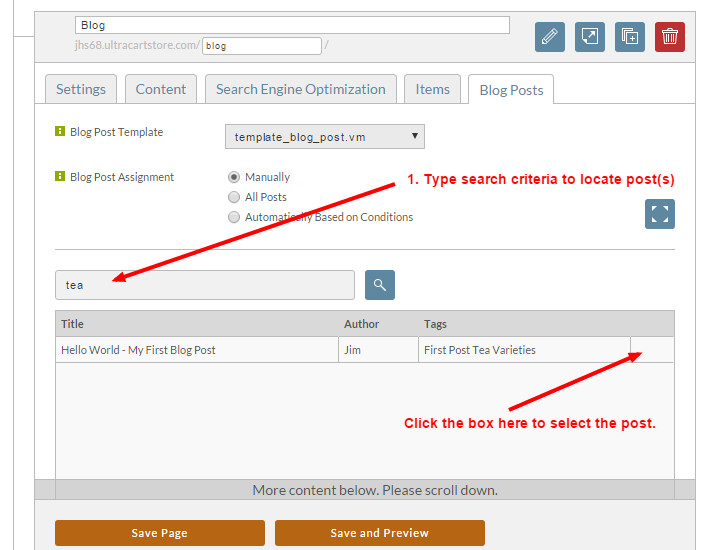
Manually Assigned Posts
To apply a blog post manually, search the posts then in the search results, select the post by clicking the box on the far-right of the post(s) you wish to assign to the blog.
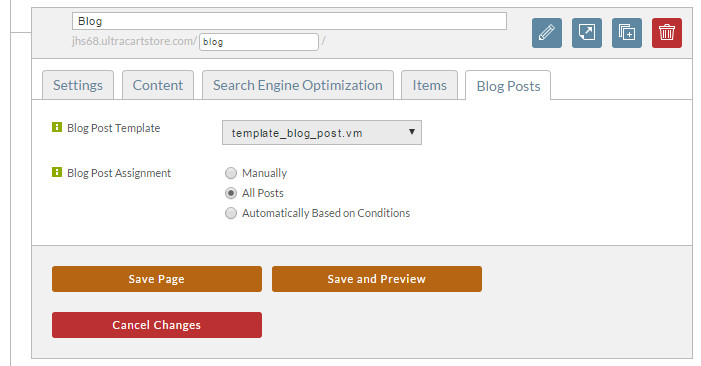
Assign All Posts
If you have only one blog you can simply assign all posts to appear in the blog by selecting the "All Posts" radio button:
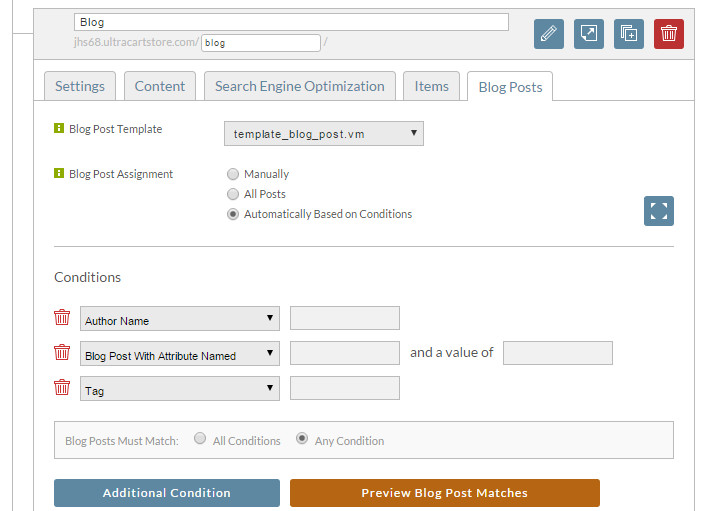
Assign Automatically Based on Conditions
An advanced assignment option is to assign the blog posts based on conditions.
There are three assignment conditions:
- Author Name
- Blog Post with Attribute named
- Tag
Author Name
The "Author Name" condition lets you assign blog posts by the author.
Blog Post with Attribute Named
If the blog post template specifies that it uses one or more blog post attributes, then those attributes will display on the post editor screen.
The "Blog post with attribute named" condition allows you to assign filter which posts appear on that page based on the presence of that attribute being supplied to the post. If the attribute was supplied, the post is included.
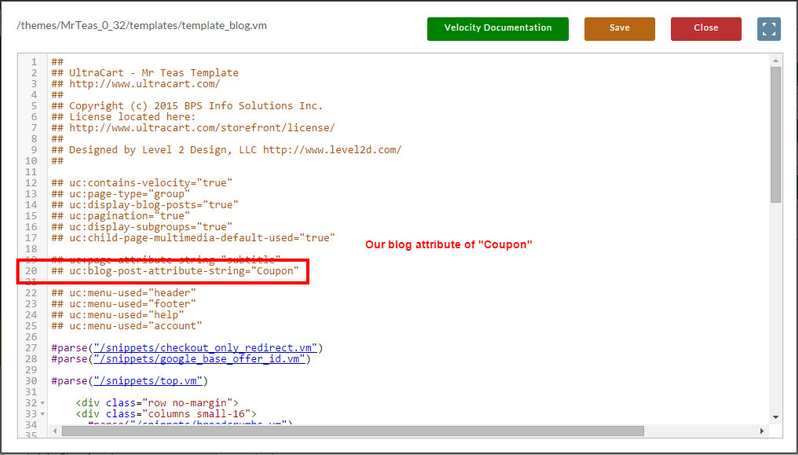
A simple example: Let's say you want to assign a attribute of "Coupon" for posts that references a discount coupon. You can then use that attribute as a condition for including the blog posts. (Remember that you can have multiple blogs so this may be a way of selectively including certain posts to be displayed on a specific blog page.)
First you would add the attribute to the blog template:
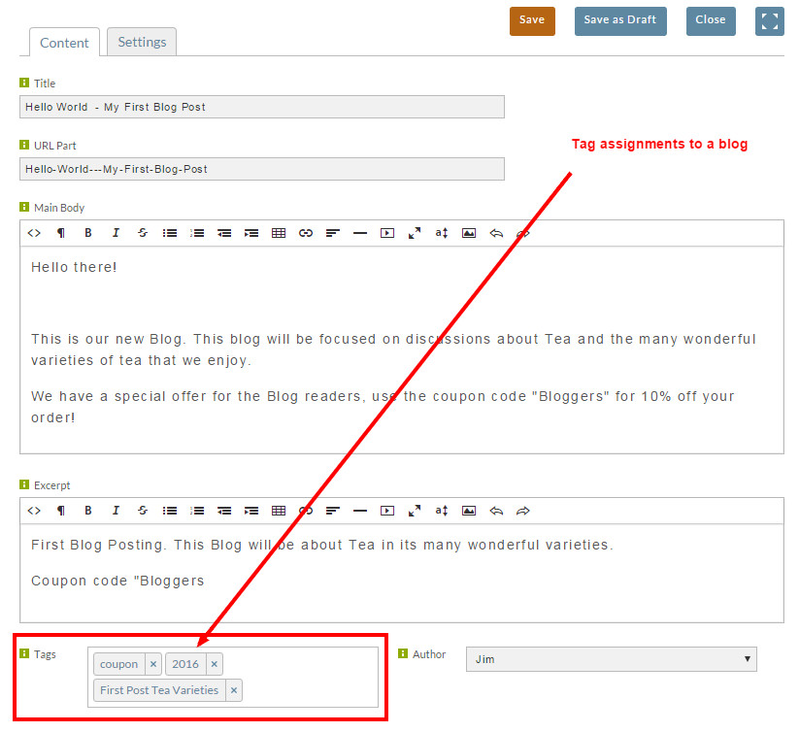
Tags
In the blog post editor is a section to assign tags (key words) to the post, and these tags are an easy method of blog post assignment by condition:
You can have one or more assigned conditions, as desired.
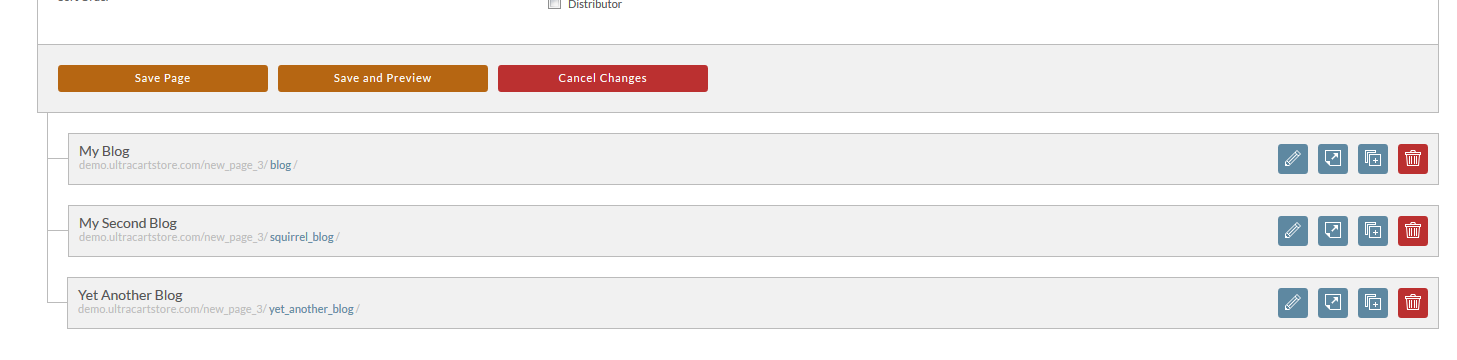
How to create multiple blogs on your web site
It's really quite simple. Just create multiple pages, make sure each have the Blog Posts tab filled out, and you're done!