Configuring a Payment Gateway Tutorial
Introduction
Welcome. This is a brief tour explaining how to configure payment methods and gateways.
During this tour, we’ll also show how to place a test order and process it through Accounts Receivable.
Payment Methods
To begin, navigate to:
Configuration → Checkout → Payments
Click on the Configuration menu link and navigate to the Payments screen.
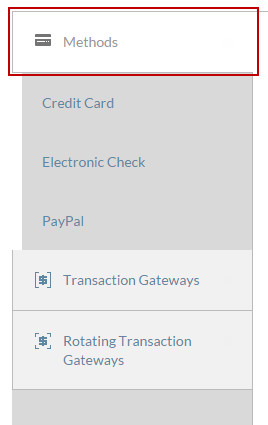
The first tab shown is payment Methods. Each payment method contains configuration fields that display when checked. Simply Click on Credit Card to view the configuration screen.
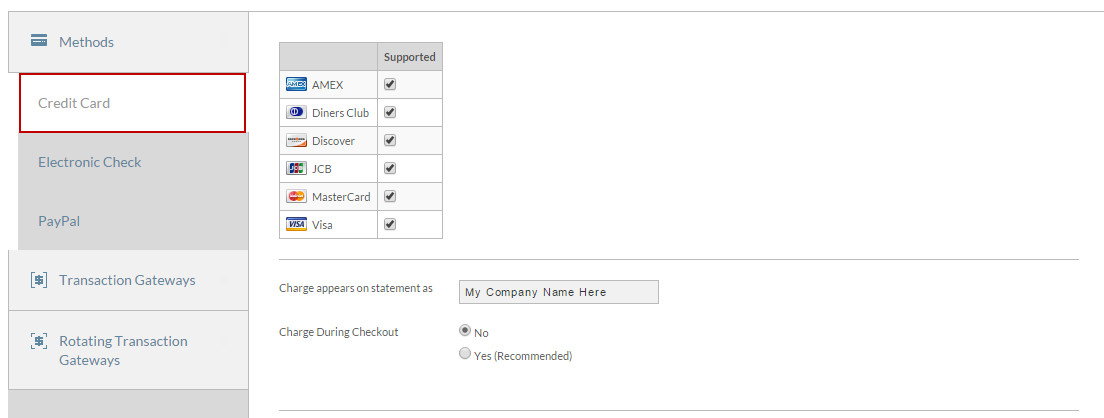
We’ll choose them all for now by clicking the adjacent check boxes. There’s additional information we can fill out for each card, but we’ll skip that for now.
Scroll down and save your changes.
Clicking another tab also saves your changes! It's quicker, but this tutorial takes the long route to ensure you don't get lost.
Configuring Payment Gateway within Transaction Gateways tab
Reenter the Payments screen and click on the Transaction Gateways tab.
![]()
Each transaction gateway also displays configuration fields when clicked as you will see below. We are going to use the UltraCart Test Gateway to simulate a transaction but you'll need to eventually integrate your actual payment gateway in place of the test gateway.
Understanding the UltraCart Test Gateway
What is the UltraCart Test Gateway
The UltraCart Test Gateway is to be used for the initial testing of various aspects of your configurations prior to configuring the actual gateway.
The UltraCart Test Gateway does not actually process any authorization against a credit card. It simply simulates that step, returning an approval for the placed order. So, make sure that you remove the UltraCart Test Gateway from your configuration when you configure your actual credit card gateway.
At times you may need to test various cart settings. You can still place test orders using the UltraCart test credit card numbers which will not involve your gateway.
Scroll down and click the UltraCart Test Gateway check box.![]()
Enter your Merchant ID and select the cards you wish to accept. We’ll select only 3 cards in this example. When finished, scroll to the bottom and save your changes.
Understanding the UltraCart Test Credit Card Numbers
Test Credit Card number DOES NOT test gateway
Please note that the test credit card is not meant to test the gateway configuration. The test credit card is useful for generating orders without incurring transaction fee's..
To test the configuration of your actual gateway it's best to create a real order using real credit card details. Some gateways show an option for a test gateway which allows you to temporarily place the gateway into the test mode and then use the specific card numbers your gateway provides for testing purposes.
To learn more about the Test Credit Cards, see: Test Credit Card or Electronic Check Payments
Creating a Test Order
Now lets create a test order by adding an item to our cart. In this example the gateway is set to send orders to Accounts Receivable for authorization.
Navigate to:
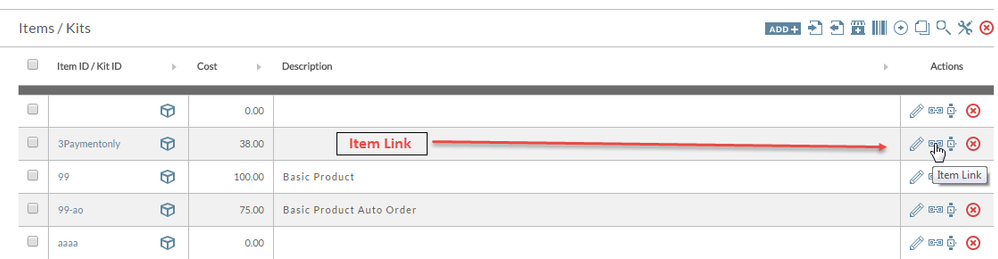
Store → Items
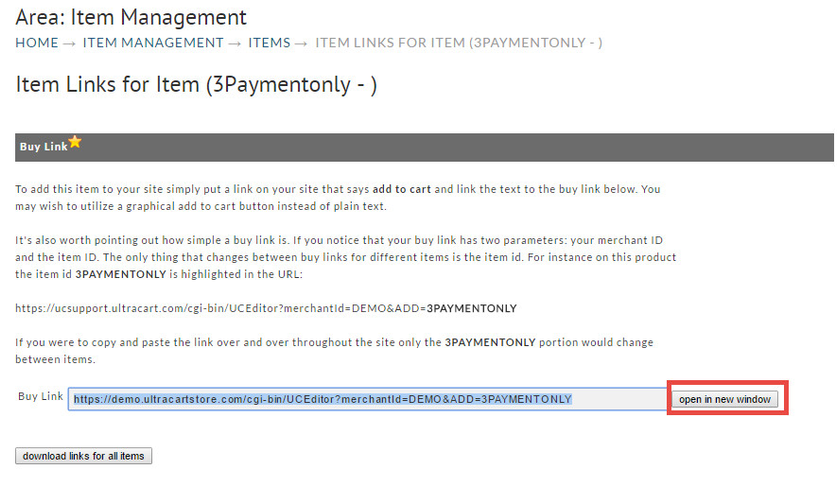
Scroll down to a random item, and click the Item Links hyperlink ![]()
From the Links screen, simply click on the "open in new window" button to send the item into the cart.
Once in the cart, fill out the shipping information. When I finish adding my address, the shipping preference will update with precise shipping prices. I’ll leave the shipping at FedEx: Smart Post.
At the bottom, I’ll enter my test credit card number. The expiration date can be anything in the future, and the card verification number can also be any 3 digit number.
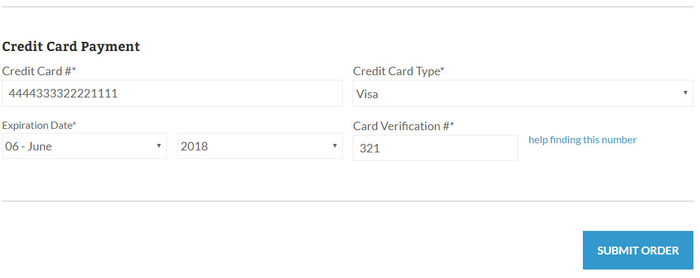
When my order is placed, I’ll remember my order id.
Authorizing the Test Order
Note: don't be confused by the fact that we used a different order to demonstrate the Authorize process.
Navigate to:
Operations → Order Management → Accounts Receivable
I see my order at the top of the Credit Card list. I can verify it’s my order by viewing it (clicking on it).
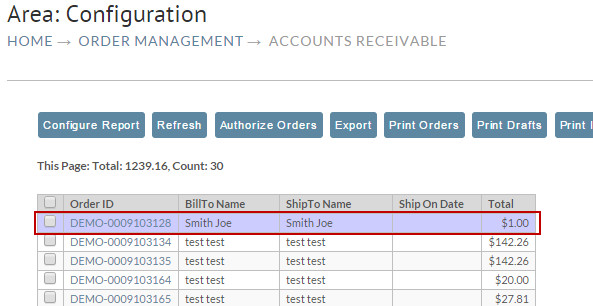
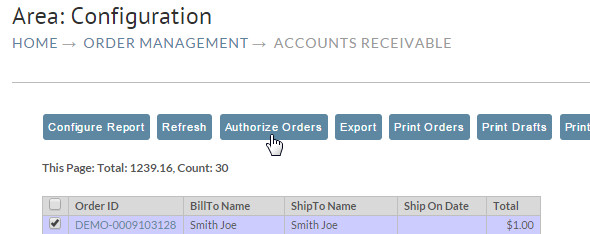
Check the Order ID check box and click the “Authorize Orders” button.
You are not quite finished yet. At the bottom of the batch authorize screen is a place for me to approve the order. Please notice the merchant note at the bottom of the order indicating that this was a test payment (because we used our test credit card).
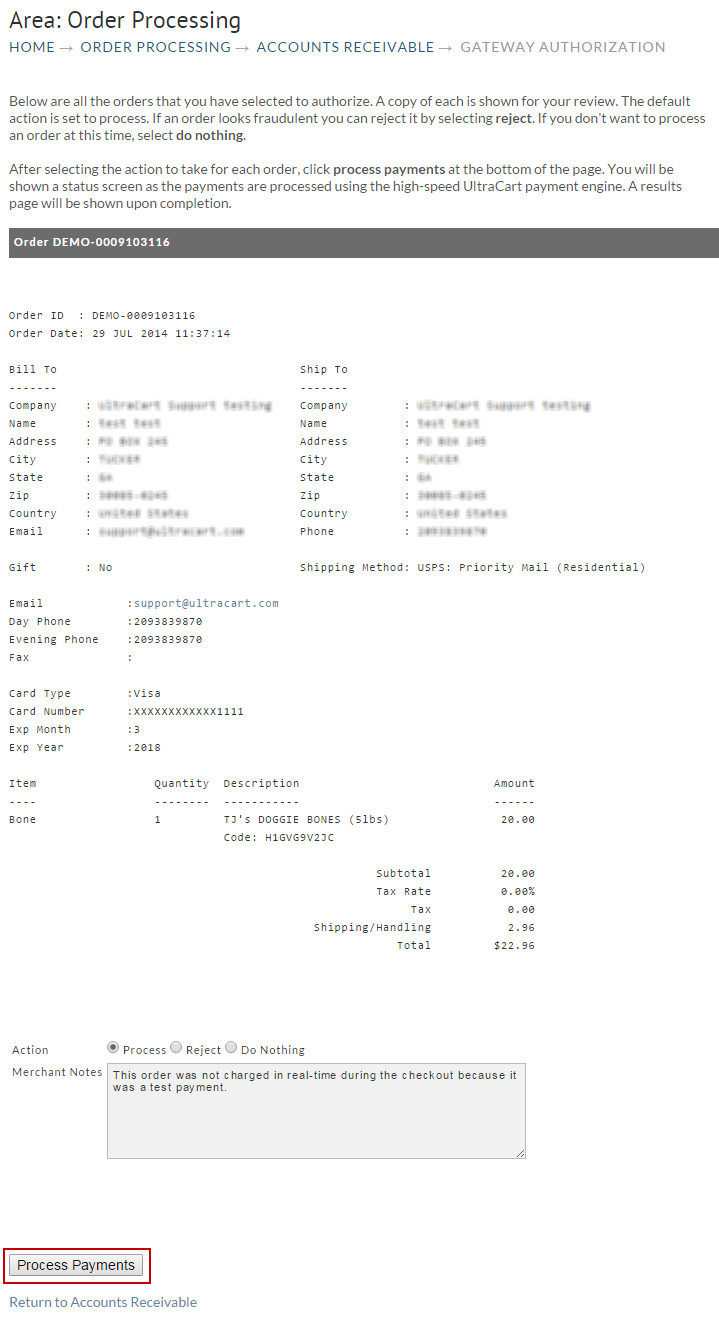
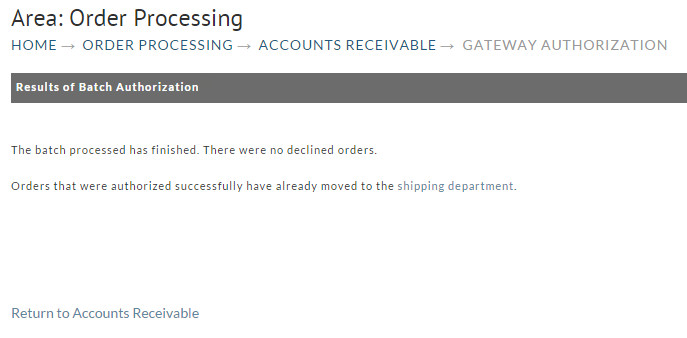
Clicking the Process Payments button will fire off the batch processing.
This can take some time if you have a lot of orders but for one order, it’s almost simultaneous.
My order was authorized and there were no errors.
I can then navigate to Order Management → Shipping and continue with the next steps in order management.
That’s it. We’ve created an order and authorized payment. Congratulation!
A video of this tutorial is embedded in Page 3 of the Getting Started Guide (look for the green section and expand it).